
Beretta V6-3100 3.1L MFI VIN M (1994)
Oil Pan: Service and Repair
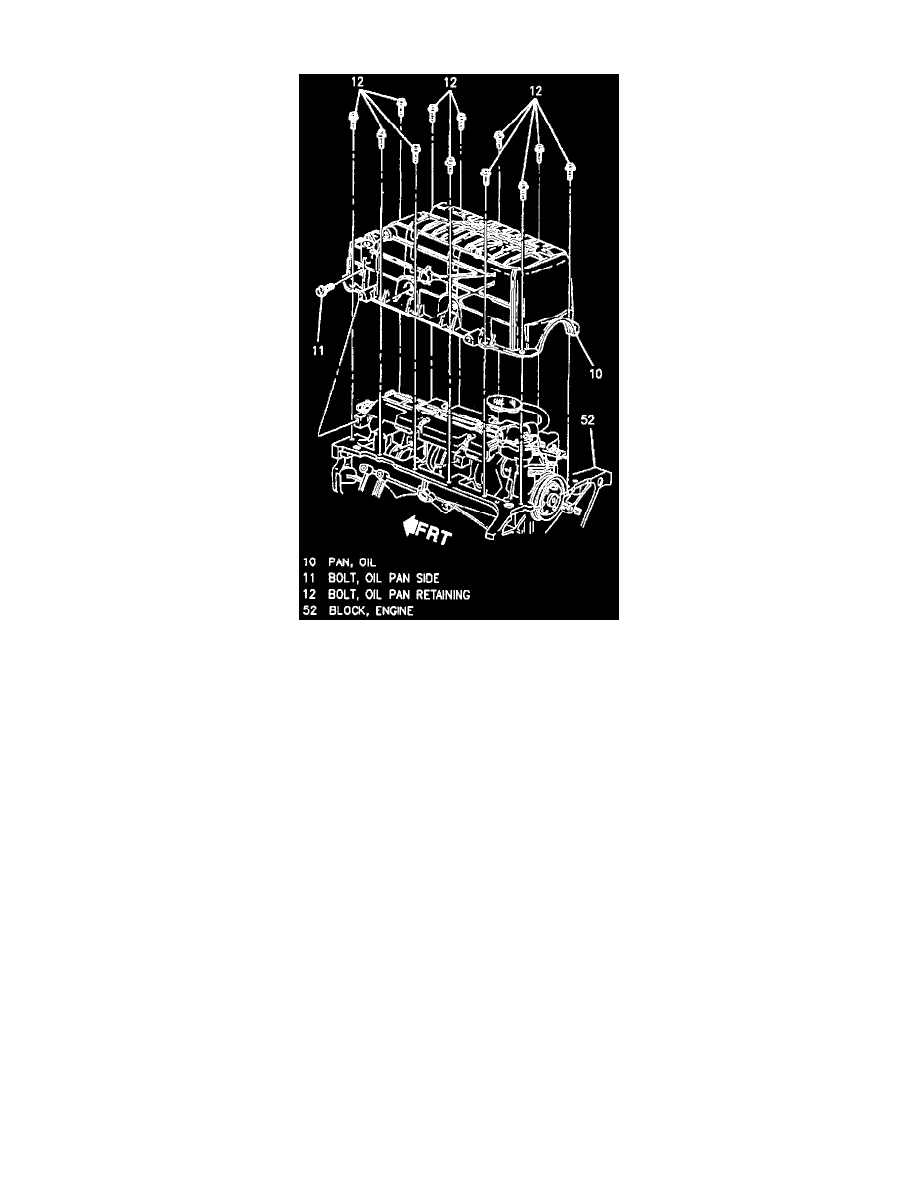
Oil Pan
REMOVE OR DISCONNECT
1. Negative battery cable.
2. Serpentine belt and loosen, but do not remove upper A/C compressor bolts (if equipped).
3. Raise vehicle and support.
4. Drain crankcase.
5. Right front wheel assembly and splash shields.
6. Engine mount strut from suspension support.
7. Right front ABS wheel speed sensor harness from the right suspension support.
8. Right front ball joint and stabilizer link.
9. Right side suspension support.
10. Remove lower A/C compressor bolts, position compressor aside and support.
11. Engine mount strut bracket and engine to transaxle brace.
12. Oil filter and starter.
13. Flywheel inspection cover.
14. Oil pan retaining bolts and oil pan.
Clean
^
Oil pan flanges.
^
Oil pan rail.
^
Front cover.
^
Rear main bearing cap.
^
Threaded holes.
INSTALL OR CONNECT
1. New gasket.
NOTE: If the rear main bearing cap is being installed, then GM sealant P/N 1052080 or equivalent, must be placed on the oil pan gasket tabs that
insert into the gasket groove of the outer surface on the rear main bearing cap.