
Blazer 2WD V6-4.3L VIN X (2004)
Cleaning and Inspection Procedure
1. Clean the IAC valve O-ring sealing surface, pintle valve seat, and air passage.
-
Remove excess carbon deposits with a small amount of carburetor cleaner on a parts cleaning brush. Follow any instructions on the cleaner
container regarding cleaner usage.
-
DO NOT use a cleaner containing an extremely powerful solvent such as methyl ethyl ketone.
-
Shiny spots on the pintle and seat do not represent a bent or misaligned pintle shaft.
-
If heavy deposits are present in the air passage, remove the throttle body for a complete cleaning.
IMPORTANT: DO NOT reuse the original O-ring.
2. Replace the IAC valve O-ring.
INSTALLATION PROCEDURE
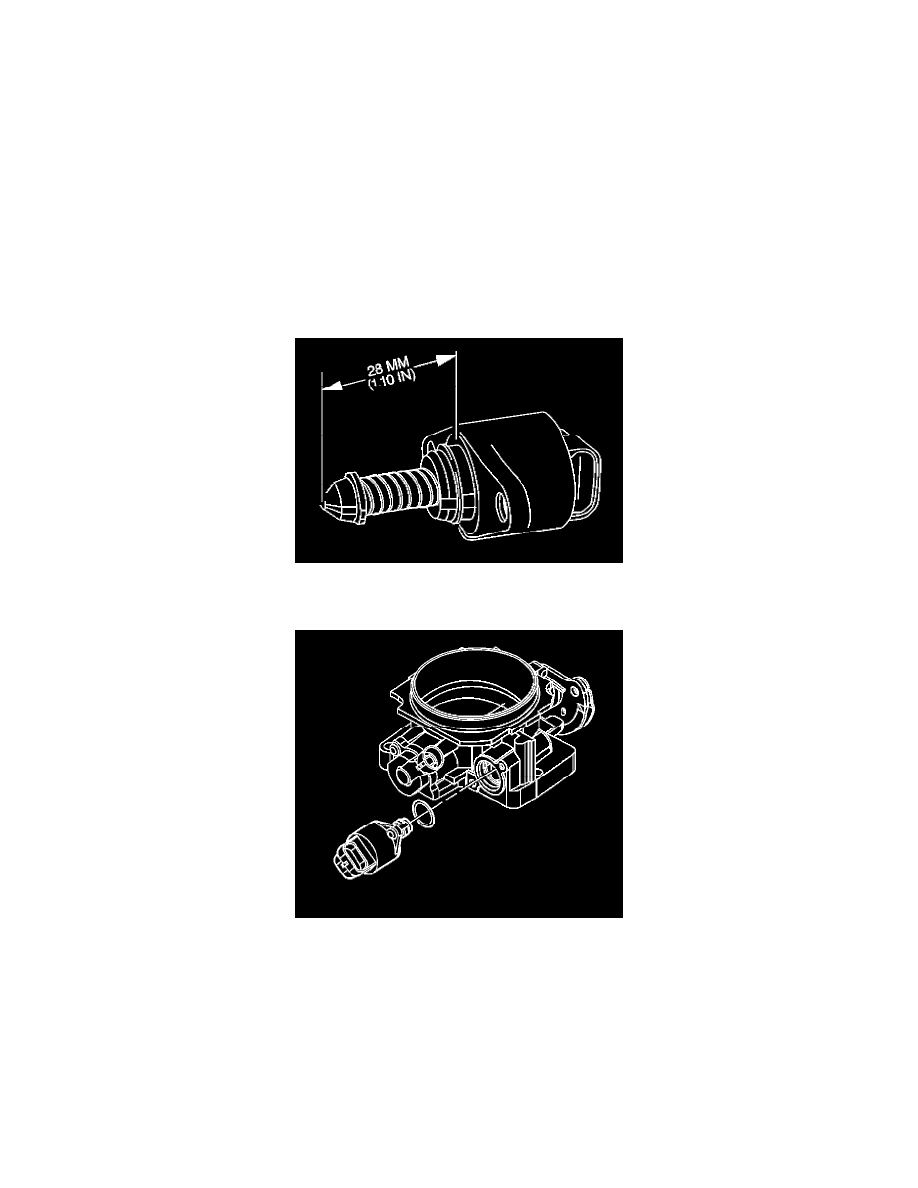
IMPORTANT: Use an identical part when installing a new idle air control (IAC) valve. The IAC valve pintle shape and dimensions are designed for
specific applications.
1. On a new IAC valve, measure the distance between the IAC valve pintle and mounting flange. Use finger pressure to slowly retract the pintle if the
distance is more than 28 mm (1-1/8 in).
2. Lubricate the IAC valve O-ring with clean engine oil.
3. Align the flange holes with the mounting holes on the throttle body assembly.
4. Insert the IAC valve through the O-ring into the throttle body assembly.
NOTE: Refer to Fastener Notice in Service Precautions.
IMPORTANT: The screws used to attach the IAC valve are coated with thread locking adhesive. Clean the attaching screw threads and apply thread
locking material GM P/N 1052624 or equivalent.