
Blazer 4WD V6-4.3L VIN X (2005)
Front Door Weatherstrip: Service and Repair
Weatherstrip Replacement - Front Door (Drip Channel)
Weatherstrip Replacement - Front Door (Drip Channel)
Removal Procedure
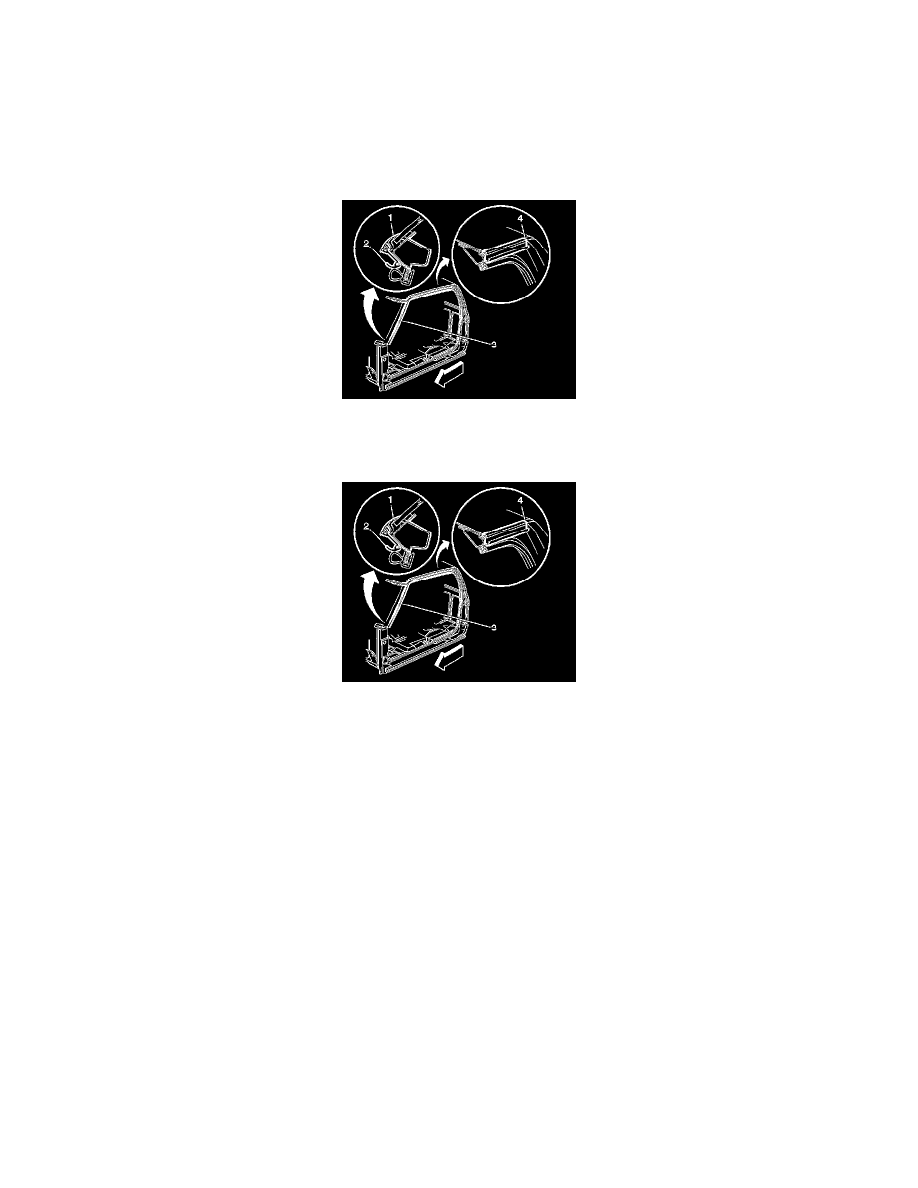
1. Open the door.
2. Remove the weatherstrip drip channel (3).
Installation Procedure
Important: Apply the drip channel in an environment free of dust or dirt that could come in contact with the sticky backing (2) and
prevent proper adhesion.
1. Clean the area where the drip channel is to be mounted. Use a general purpose adhesive remover.
2. Clean the affected body area with wax and grease remover, and wipe with isopropyl alcohol.
3. Dry the area thoroughly.
4. Ensure the body area is at a temperature range of 21-41°C (80-105°F).
5. Ensure that the drip channel is at a temperature range of 21-41°C (80-105°F).
6. Install end of drip channel begining at the upper rear corner (4) of front side door opening frame, towards the windshield reveal molding flange (1)
removing the tape backing as seal is applied.
7. When the drip channel is in position use a roller to firmly attach the tape to the entire contact surface.