
Blazer 4WD V6-4.3L VIN X (2005)
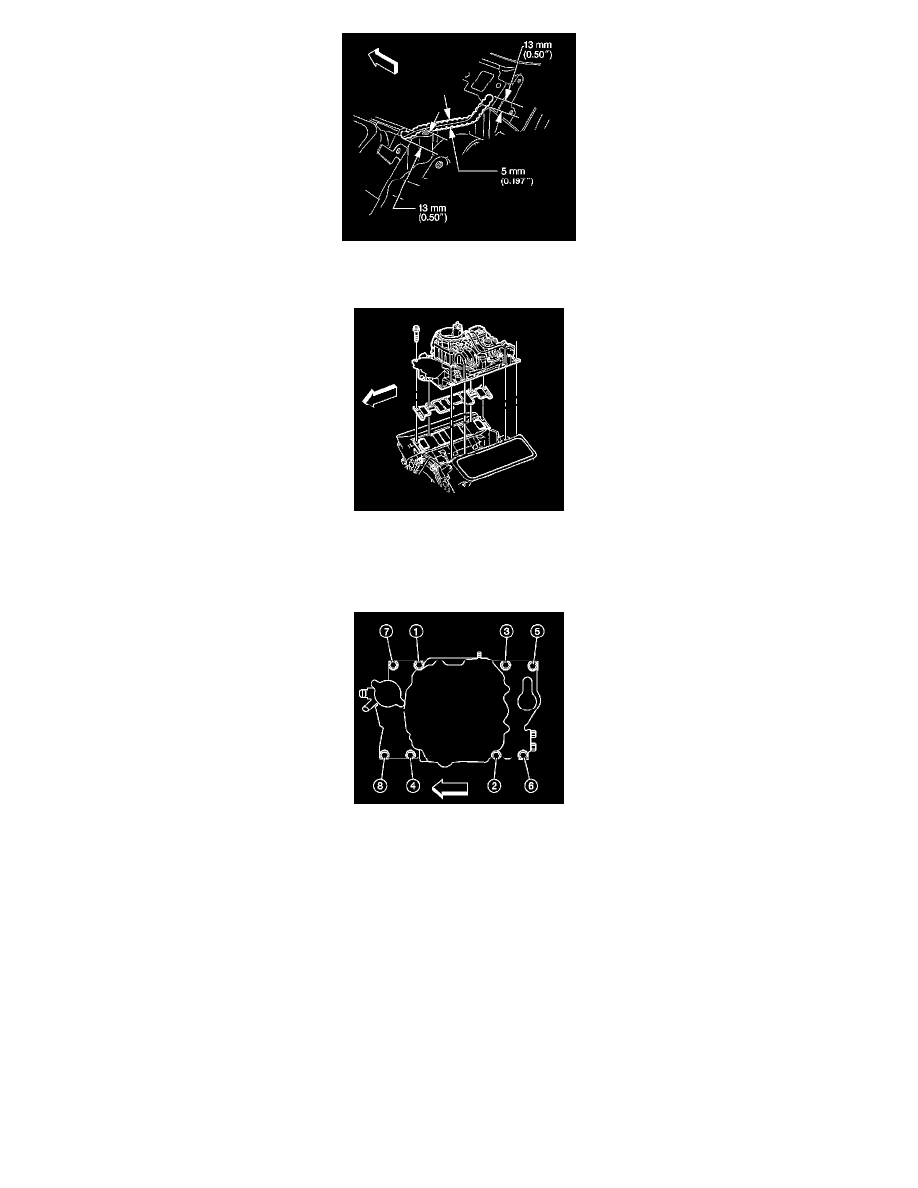
5. Apply a 5 mm (0.197 inch) bead of adhesive GM P/N 12346141 (Canadian P/N 10953433) or equivalent to the rear top of the engine block.
6. Extend the adhesive bead 13 mm (0.50 inch) onto each lower intake manifold gasket.
7. Install the lower intake manifold onto the engine block.
8. If reusing the fasteners, apply threadlock GM P/N 12345382 (Canadian P/N 10953433) or equivalent to the threads of the lower intake manifold
bolts.
9. Install the lower intake manifold bolts.
10. Notice: Proper lower intake manifold fastener tightening sequence and torque is critical. Always follow the tightening sequence, and torque the
intake manifold bolts using the 3 step method. Failing to do so may distort the crankshaft bearing bore alignment and cause damage to the
crankshaft bearings.
Notice: Refer to Fastener Notice in Service Precautions.
Tighten the lower intake manifold bolts.
1. Tighten the bolts on the first pass in sequence to 3 Nm (27 inch lbs.).
2. Tighten the bolts on the second pass in sequence to 12 Nm (106 inch lbs.).
3. Tighten the bolts on the final pass in sequence to 15 Nm (11 ft. lbs.).