
Blazer 4WD V6-4.3L VIN X (2005)
Fuel Level Sensor: Service and Repair
Fuel Level Sensor Replacement
FUEL LEVEL SENSOR REPLACEMENT
REMOVAL PROCEDURE
1. Disconnect the negative battery cable.
CAUTION: Refer to Battery Disconnect Caution in Service Precautions.
2. Relieve the fuel system pressure. Refer to Fuel Pressure Relief Procedure.
3. Drain the fuel tank. Refer to Fuel Tank Draining Procedure (2-Door Utility).
4. Remove the fuel tank.
5. Remove the fuel sender assembly.
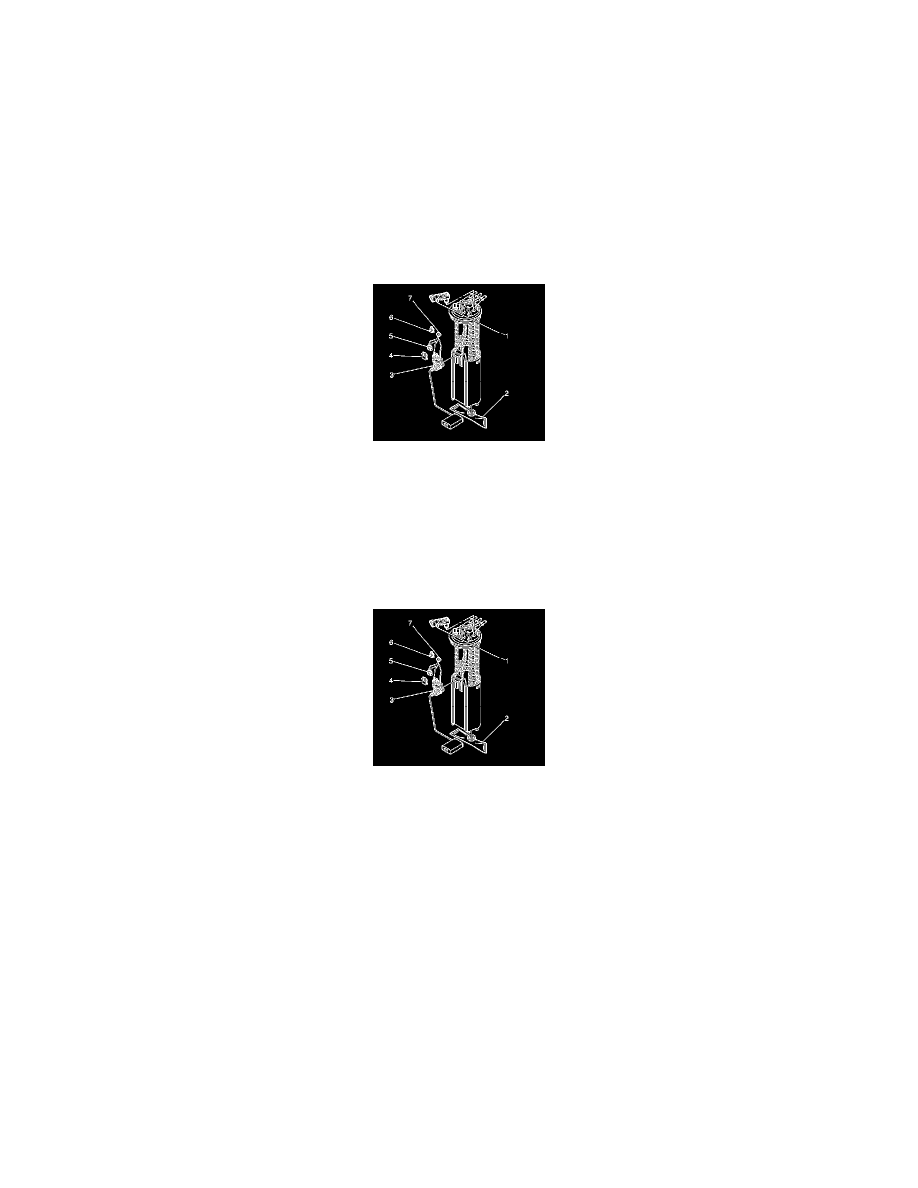
6. Disconnect the fuel pump electrical connector (5).
7. Remove the fuel level sensor electrical connector retaining clip (6).
8. Disconnect the fuel level sensor electrical connector (7) from under the fuel sender cover.
9. Remove the fuel level sensor retaining clip (4).
10. Squeeze the locking tangs and remove the fuel level sensor (3).
INSTALLATION PROCEDURE
1. Install the fuel level sensor (3).
2. Install the fuel level sensor retaining clip (4).
3. Connect the fuel level sensor electrical connector (7).
4. Connect the fuel level sensor electrical connector retaining clip (6).
5. Connect the fuel pump electrical connector (5).
6. Install the fuel sender assembly.
7. Install the fuel tank.
8. Refill the fuel tank.
9. Install the fuel filler cap.
10. Connect the negative battery cable.
11. Inspect for leaks.
1. Turn ON the ignition for 2 seconds.
2. Turn OFF the ignition for 10 seconds.
3. Turn ON the ignition.
4. Inspect for fuel leaks.