
Blazer 4WD V6-4.3L VIN X (2005)
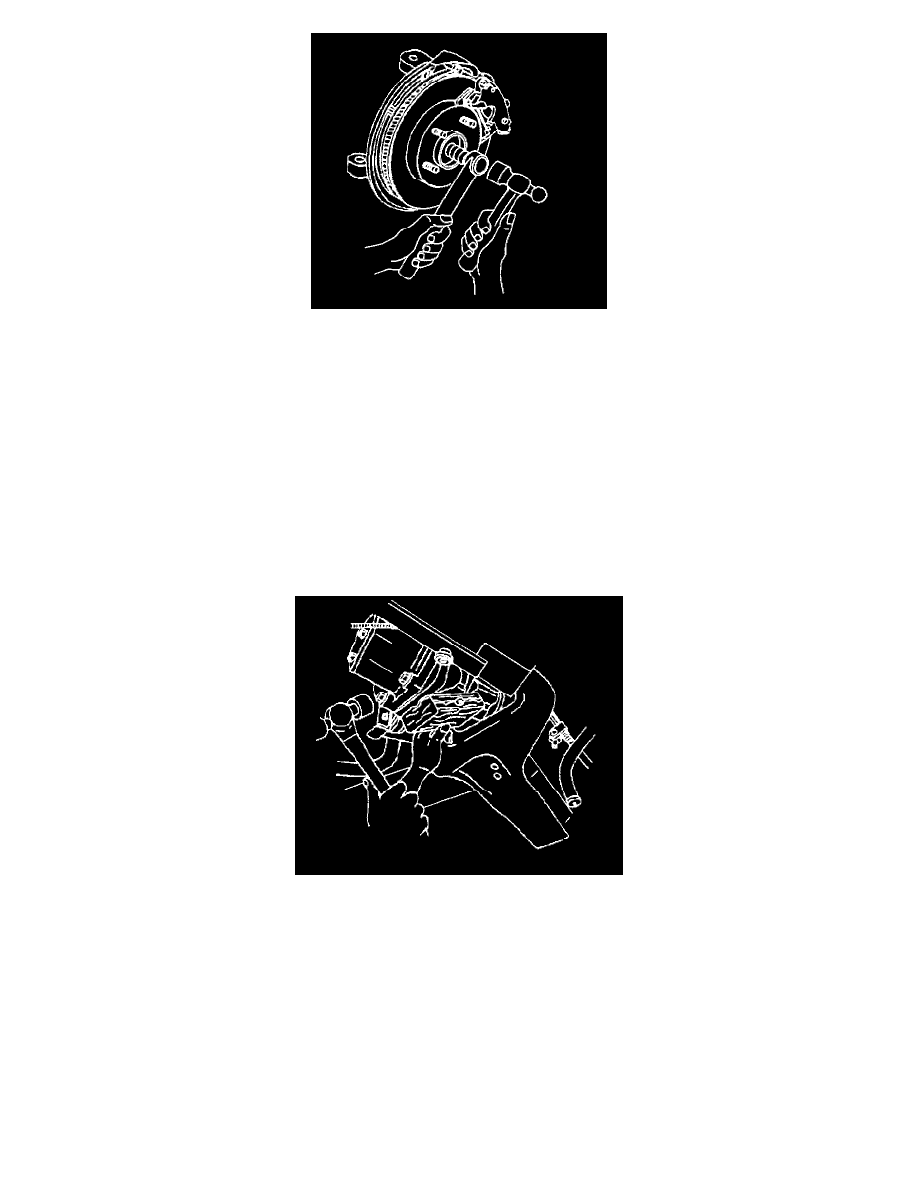
13. Disengage the wheel drive shaft from the hub by placing a brass drift against the outer end of the drive axle in order to protect the threads. Sharply
strike the brass drift with a hammer. Do not attempt to remove the axle at this time.
14. Support the steering knuckle and assembly with a piece of wire in order to prevent damage to the outer tie rod and ABS wire.
15. Disconnect the upper ball joint from the steering knuckle.
16. Remove the lower part of shock absorber.
17. Disconnect the lower ball joint from the steering knuckle.
18. After the lower ball joint is loose from the knuckle, simultaneously push the axle shaft in toward the differential carrier in order to allow room for
the knuckle and assembly to be removed.
19. Remove the axle from the steering knuckle assembly.
Important: Lower the safety stand from the lower control arm in order to relieve the pressure of the torsion bar and in order to allow for clearance. Do
not damage the axle seal during removal of the differential carrier shield.
20. Remove the front differential carrier shield.
21. Disconnect the left side wheel drive shaft from the differential carrier by placing a block of wood or a brass drift against the tripot housing. Firmly
strike the block of wood outward from the case with a hammer. Strike hard enough to overcome the snap ring pressure holding in the shaft.