
C 1500 Suburban 2WD V8-393 6.5L DSL Turbo VIN S (1996)
5. Lower ball joint (69) from the lower control arm.
INSPECT
^ The tapered hole in the steering knuckle and remove any dirt. If the hole is out of round, deformed or damaged, the knuckle must be replaced.
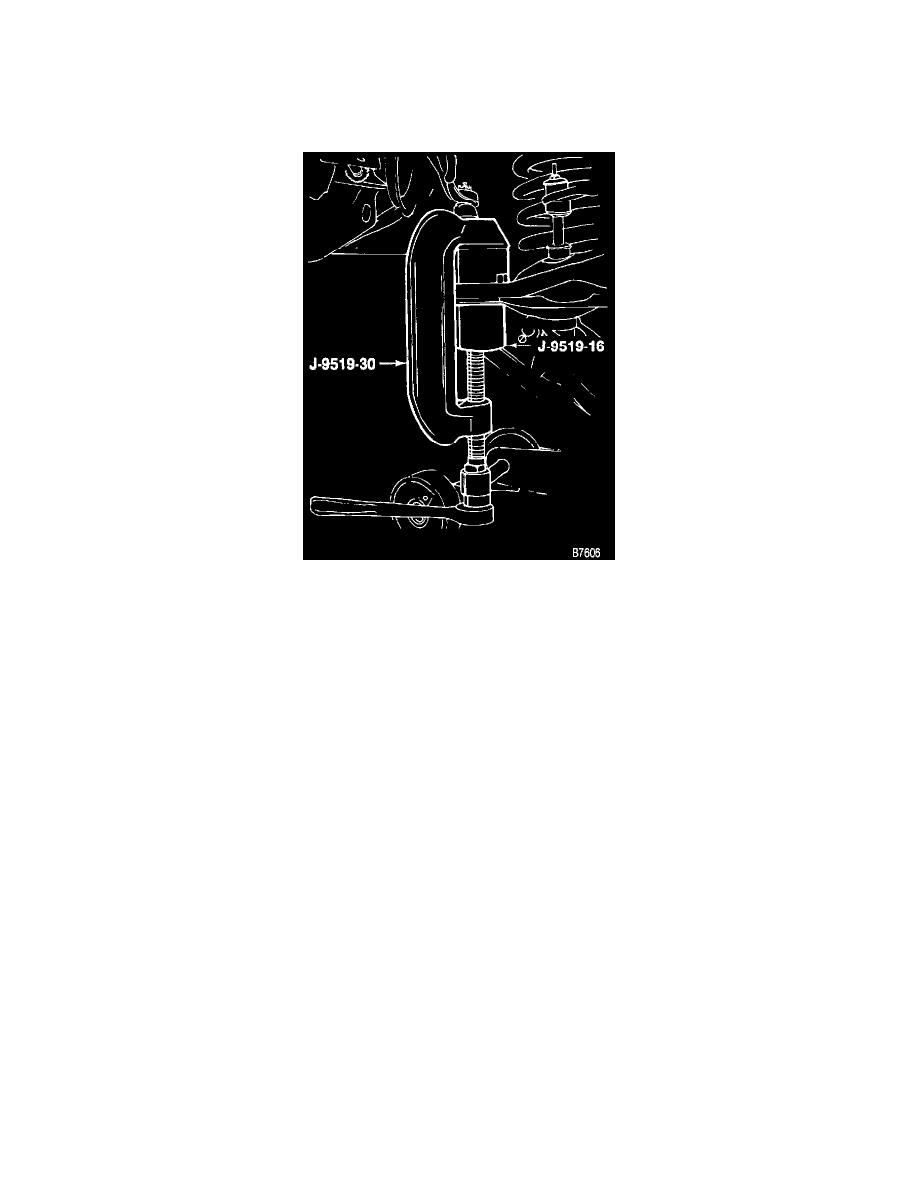
Installing The Lower Ball Joint
INSTALL OR CONNECT
1. New ball joint (69) into the lower, control arm (40).
^
Press in the ball joint. The ball joint will bottom on the control arm.
2. Ball joint stud into the steering knuckle.
3. Stud nut (67) onto the stud. Tighten nut (67) to 128 Nm (94 lb. ft.) and align the slot in the stud nut with the hole in the stud by tightening.
4. New cotter pin (68) to the stud.
5. Brake caliper.
8. Tire and wheel assembly.
^
Lower the vehicle.
IMPORTANT: Check the front wheel alignment.