
C 1500 Suburban 2WD V8-6.5L DSL Turbo VIN F (1997)
Intake Manifold: Service and Repair
Installation
-
Tools Required
-
J 39664 Manifold Cover Set, or equivalent
NOTE: Be sure to use the correct gasket. The gaskets do not have openings for the EGR.
1. Remove the J 39664 from the intake ports before installing the gaskets.
2. Install the intake manifold with new gaskets.
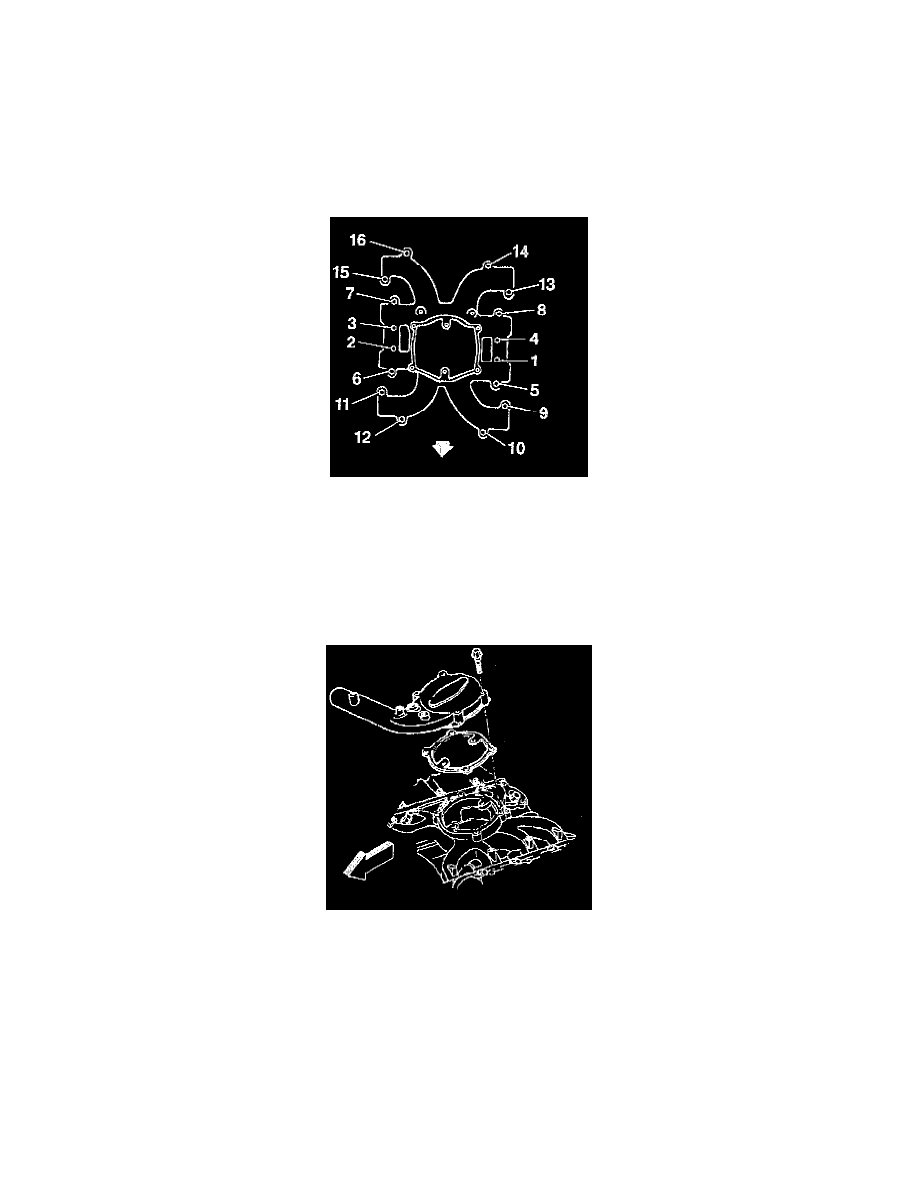
Intake Manifold Torque Sequence 6.5l
NOTE:
-
There are four bolt/studs, numbers 9, 11, 13 and 15 exposed to the crankcase, and should be sealed with teflon sealer.
-
Apply threadlocker GM P/N 12345493 to the threads of bolts and studs numbers 1 through 8, 10, 12, 14, and 16.
3. Install the intake manifold studs and the fuel line clips.
-
Tighten the intake manifold studs to 42 Nm (31 lb ft).
4. Install the upper intake manifold.
5. Slide the upper intake manifold into the turbocharger outlet hose.
6. Apply the silicone sealant GM P/N 9985943, or equivalent, to the turbocharger outlet before you Install the turbocharger outlet onto the upper
intake manifold.
7. Install the clamp for the turbocharger connector hose.
-
Tighten the connector hose clamps to 6 Nm (50 lb in).
8. Install the fuel line brackets and ground straps.
9. Install the upper radiator hose.
10. Install the long pencil brace to the turbo charger.