
C 1500 Truck 2WD V8-350 5.7L VIN K TBI (1995)
Important:
Thoroughly clean out all metal chips before installing the zerk and ball stud to prevent plugging the greaseable ball stud.
6.
Install greaseable ball stud P/N 23049797 using J 36510, clutch fork pivot remover/installer.
7.
Grease the fitting until a small amount of grease flows from the end of the ball stud.
8.
Install new clutch fork P/N 15588262. Place grease in the clutch fork pocket that contacts the clutch fork push rod.
9.
Reinstall the transmission following directions in the appropriate Service Manual, Section 7B, Manual Transmission.
10.
Grease the assembled ball stud lightly through the fining. Grease every 30,000 miles thereafter.
Important:
Grease should be added "sparingly" to the fitting. Excessive grease can contaminate the clutch disc friction surfaces resulting in slip or chatter
and the need to replace the disc.
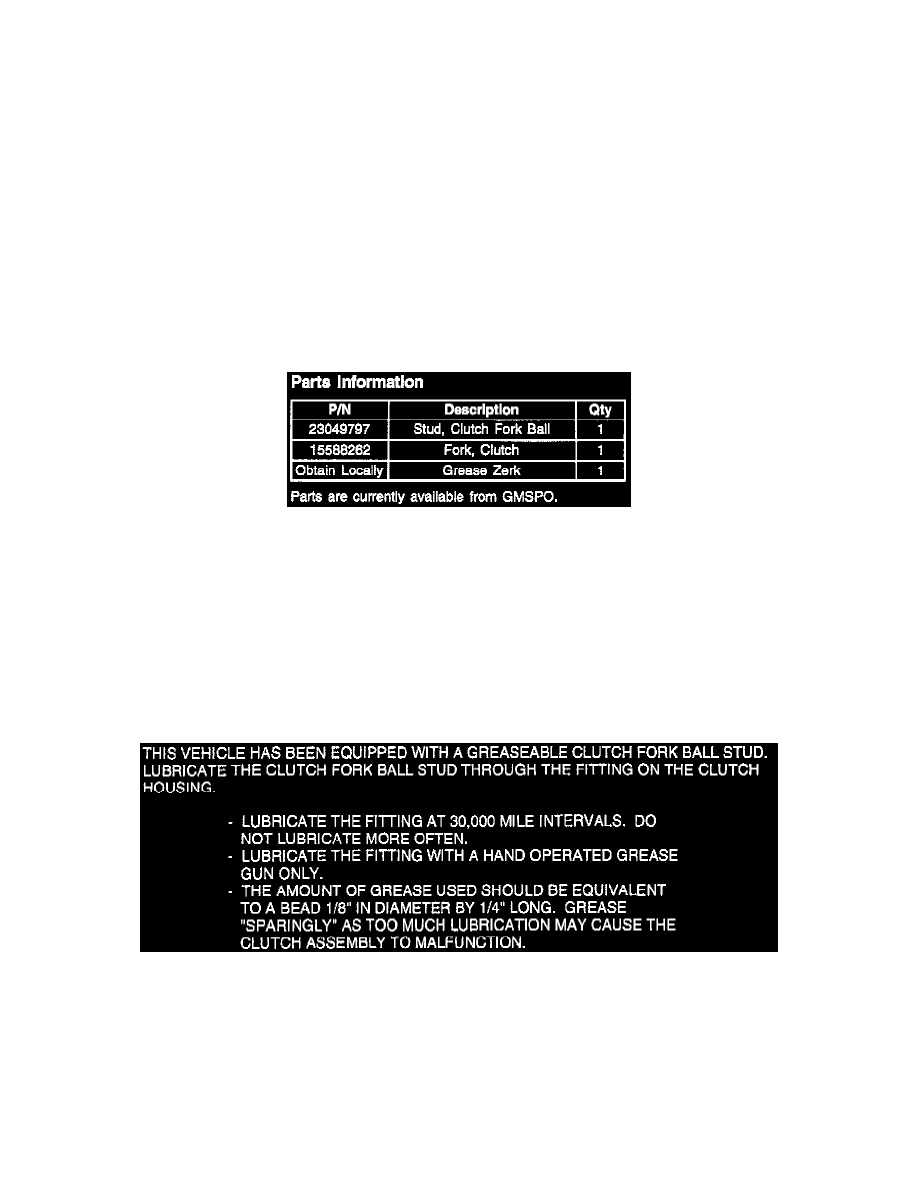
PARTS INFORMATION
Parts are currently available from GMPSO.
WARRANTY INFORMATION
For vehicles repaired under warranty, use:
Labor
Operation
Description
Labor Time
K0720
Fork and/or Ball
Use published labor
Stud, Clutch
operation time
Release - Replace
The document shown should be reproduced locally and provided to the owners of the vehicles modified by this procedure.