
C 1500 Truck 2WD V8-393 6.5L DSL Turbo (1994)
6. Switch actuator pivot pin (22) to switch (23) and cover (19).
7. Pivot & (pulse) switch wire harness through steering column.
^
Switch connector to vehicle wire harness.
^
Wire protector shield (36).
8. Dimmer switch rod actuator (21) to base plate (25).
^
Lubricate with lithium grease.
9. Base plate (25) to lock housing cover assembly (19).
^
Bottom edge of dimmer switch rod actuator (24) should rest on bend in dimmer switch rod (77).
10. Lock housing cover assembly (19).
11. Screws (15). Tighten screw in 12 o'clock position first, screw in 8 o'clock position second, and screw in 3 o'clock position third.
TIGHTEN
^
Tighten screws (15) in same order to 9.0 Nm (80 lb.in.).
12. Install multi-function lever.
13. Housing cover end cap (26).
14. Do all steps, "INSTALL OR CONNECT",for "UPPER COLUMN".
Tilt Steering Wheel Lever
TILT WHEEL LEVER REPLACEMENT
REMOVE OR DISCONNECT
1. Twist lever counterclockwise to remove lever.
INSTALL OR CONNECT
1. Twist lever clockwise to install.
Hazard Knob Assembly Replacement
HAZARD KNOB ASSEMBLY REPLACEMENT
Hazard Warning Knob Replacement
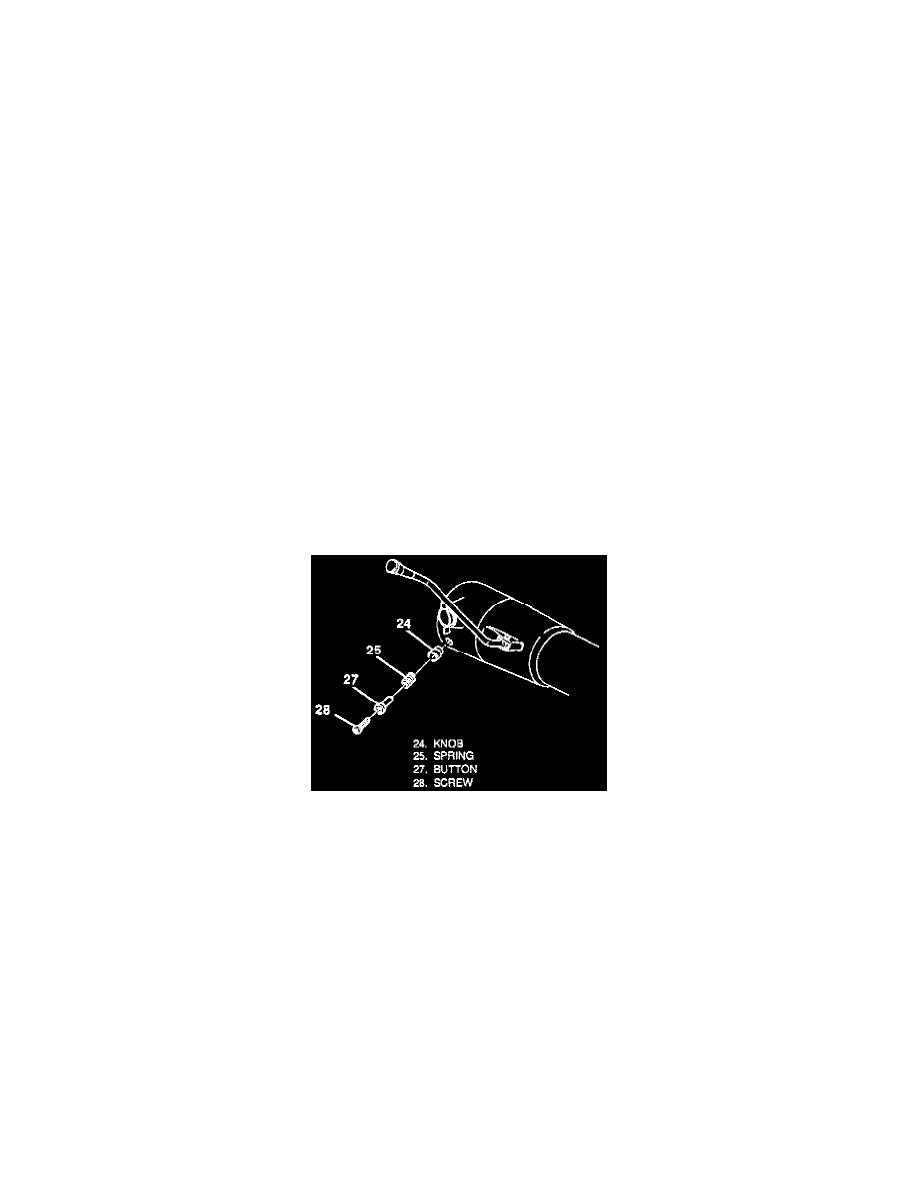
REMOVE OR DISCONNECT
1. Screw (28).
2. Button (27).
3. Spring (25).
4. Knob (24).
INSTALL OR CONNECT
1. Knob (24).
2. Spring (25).
3. Button (27).
4. Screw (28).
^
Fully seated, driven not stripped.
TIGHTEN
^
Screw (28) 7 Nm (6 lbs. in.).
Horn Switch