
C 1500 Truck 2WD V8-6.5L DSL Turbo VIN S (1997)
Oil Pan: Service and Repair
Replacement, Engine Overhaul
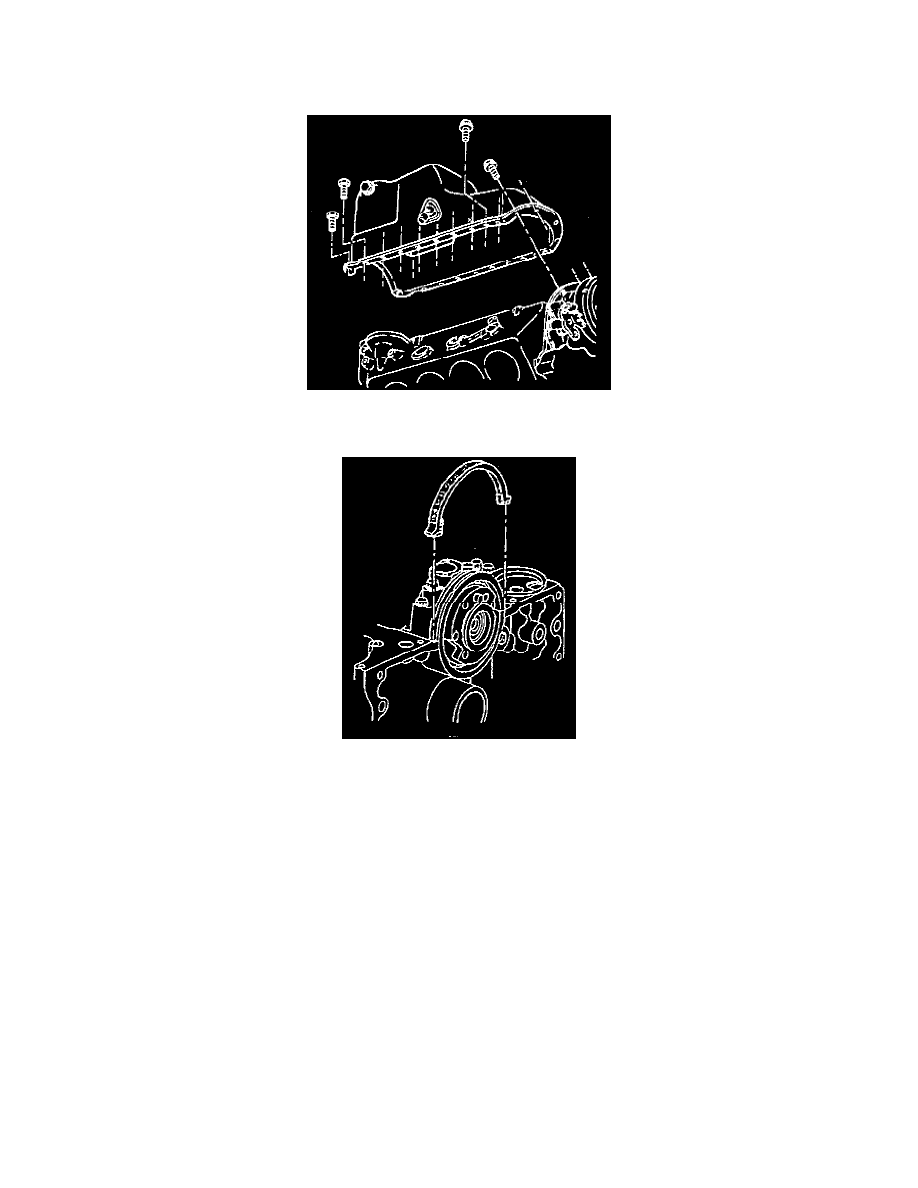
REMOVAL
1. Remove the oil pan bolts.
2. Remove the oil pan.
3. Remove the oil pan rear seal.
INSTALLATION
1. Apply a 2 mm (1/16 inch) bead of RTV sealant GM P/N 12345739 to the oil pan rear seal at the inside corners where the seal meets the rear main
bearing cap on the block.
2. Install the oil pan rear seal to the rear main bearing cap before the sealer starts to dry.
3. Apply a 5 mm (3/16 inch) bead of RTV sealant GM P/N 12345739 to the oil pan sealing surface, inboard of the bolt holes. Install the pan before
the sealer starts to dry.
4. Install the oil pan to the engine.
5. Install the oil pan bolts.
-
Tighten all except the rear two bolts to 10 Nm (89 inch lbs.).
-
Tighten the rear two bolts to 23 Nm (17 ft. lbs.).