
C 2500 Suburban 2WD V8-6.5L DSL Turbo VIN F (1995)
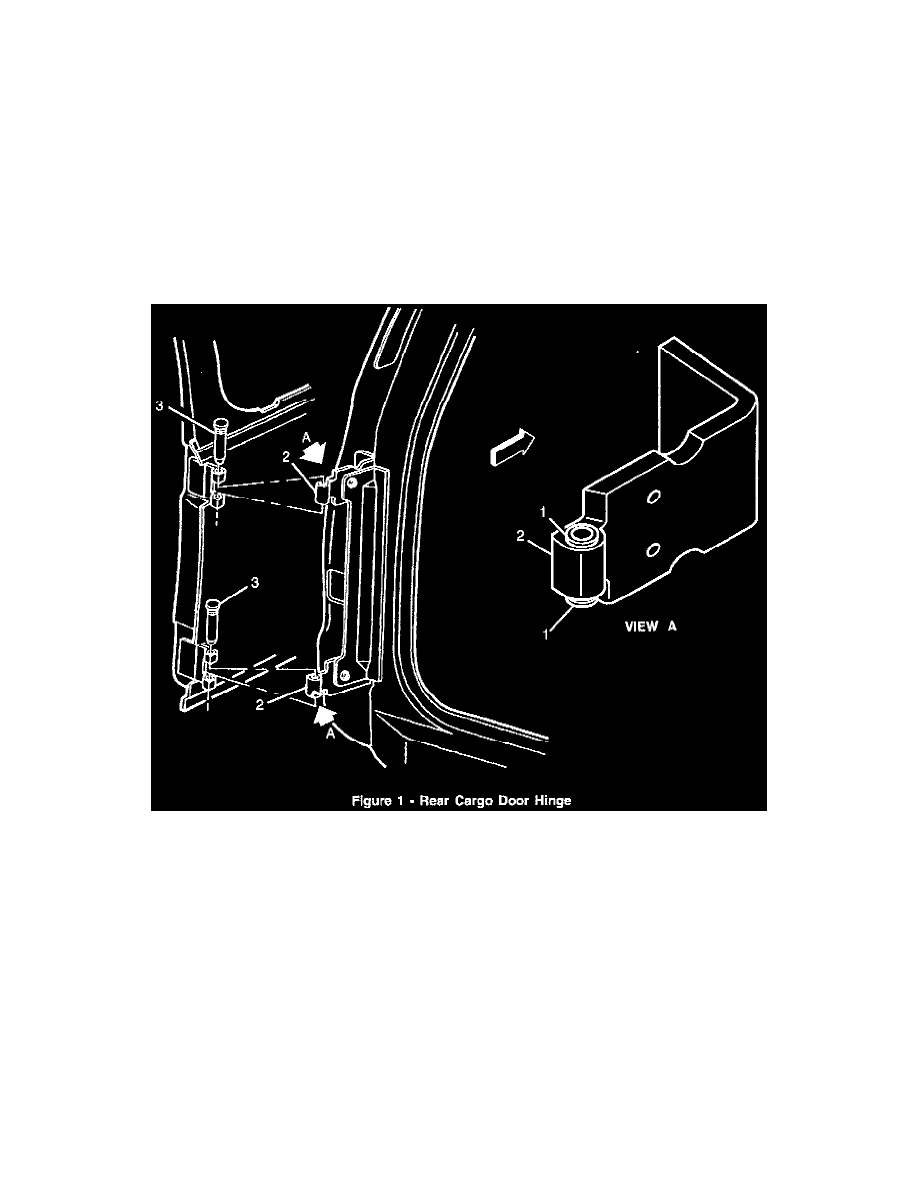
of the damaged hinge. Cut the hinge pin into three sections using a 1/32" cut off wheel on a die grinder. The two cuts should be made between the
hinge pin bushings in the center ear of the body side of the hinge and the top and bottom ears of the door side of the hinge.
Notice:
Care should be taken not to damage the center ear (body side) of the hinge because it is not serviceable.
2.
The remaining hinge pin on the undamaged hinge should be removed using the procedure outlined in GM Service Bulletin No. 36-10-14A.
Notice:
Failure to follow the procedure outlined in GM Service Bulletin 36-10-14A may result in damage to the hinge.
3.
Once the door is removed from the vehicle, the hinge pin must be removed from the center ear of the damaged hinge. Utilize the drills included
with Kent Moore tool # J 41226 to drill out the hinge pin and bushings. Center punch the center of the hinge pin and then use J 41226-11 (small
drill), J 41226-12 (medium drill), and J 41226-10 (large drill) to drill out the pin and bushings. Care should be taken not to damage the center ear
of the hinge.
4.
Install new hinge pin bushings as illustrated in view A of Figure 1.
5.
Remove the lower interior trim panel from the door.
6.
Locate the factory welds by using 400 grit sand paper and the service hinge backing plate as a sanding block. Lightly sand that attaching face of
the hinge until the puddles of the spot welds become visible. Use a center punch to mark these locations for future reference.