
C 2500 Suburban 2WD V8-6.5L DSL Turbo VIN F (1995)
Brake Caliper: Service and Repair
Bendix Single Piston Sliding Caliper
Removal/Installation
REMOVAL
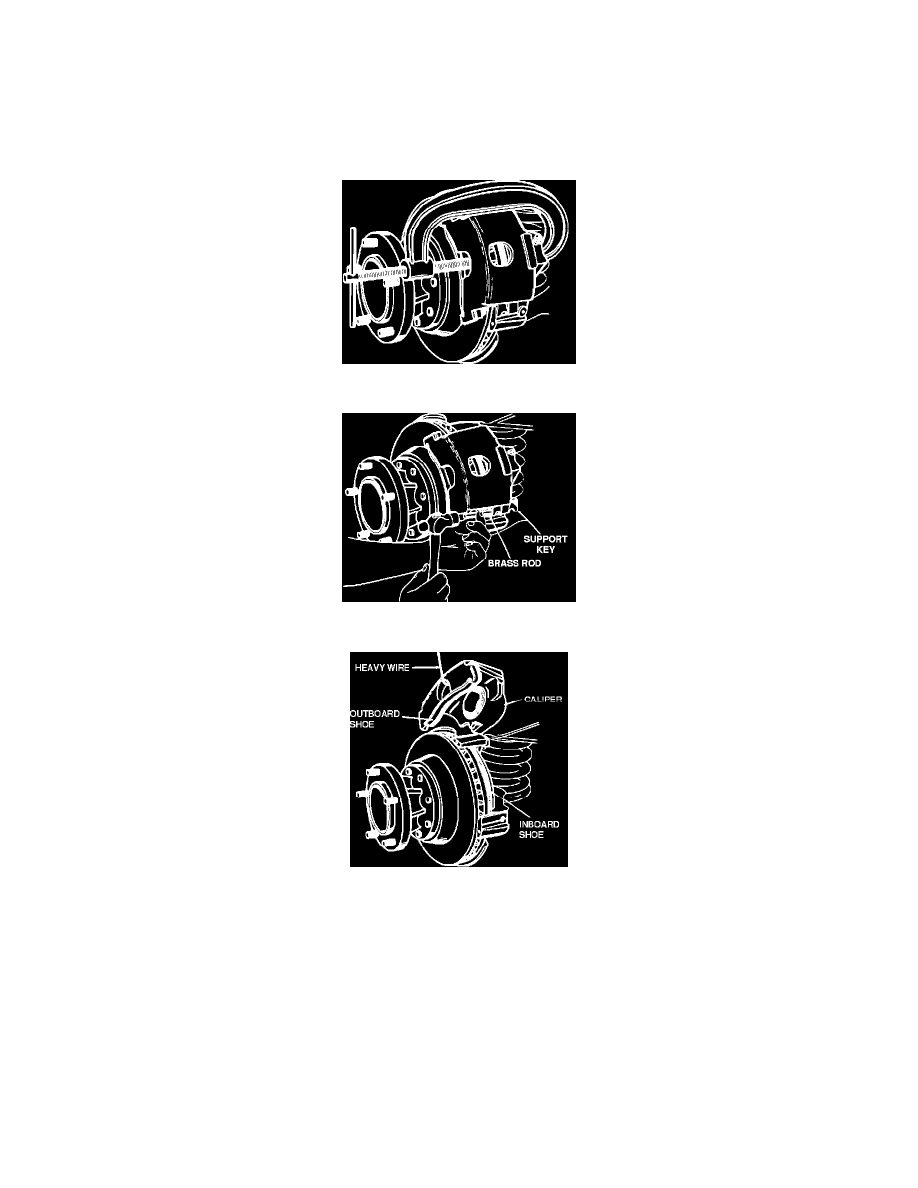
Fig. 2 Bottoming Position In Bore
Fig. 3 Removing Caliper Support Key
Fig. 4 Removing Or Installing Caliper
1.
Siphon two-thirds of brake fluid from master cylinder reservoir serving front disc brakes.
2.
Raise vehicle, support on jack stands and remove front wheels.
3.
Bottom the caliper piston in bore. Insert a screwdriver between inboard shoe and piston, then pry piston back into bore. The piston can also be
bottomed in the bore with a large C-clamp, Fig. 2.
4.
Remove support key retaining screw.
5.
Drive caliper support key and spring from steering knuckle with a suitable drift and hammer, Fig. 3.
6.
Lift caliper from anchor plate and off rotor, Fig. 4. Hang caliper from coil spring with wire. Do not allow caliper to hang from brake hose.
7.
Remove inboard pad from steering knuckle, then the anti-rattle spring from the pad.
8.
Remove outboard pad from caliper. It may be necessary to loosen the pad with a hammer to permit removal.
INSTALLATION
1.
Clean and lubricate sliding surfaces of caliper and the anchor plate with Delco Silicone Lube, P/N 5459912, or equivalent.
2.
Install anti-rattle spring on inboard pad, and ensure looped section of clip is facing away from rotor.