
C 2500 Suburban 2WD V8-6.5L DSL Turbo VIN F (1995)
Notice:
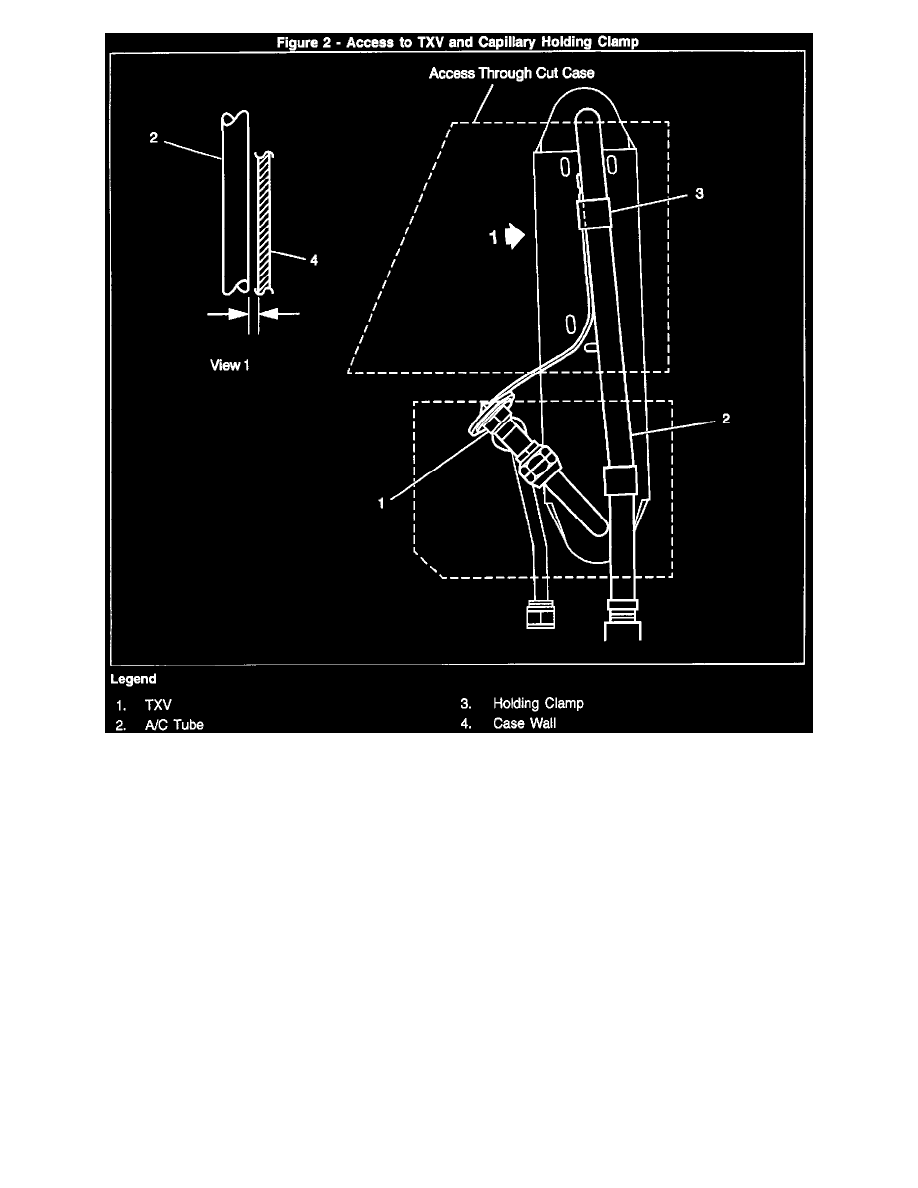
Cut through plastic case material only. Aluminum tubes are located approximately 1/8" behind the case wall (Figure 2, view 1). Do not use a
larger diameter cutting wheel.
15. Using a heat gun to soften the plastic case, pull back the access door on the upper evaporator case carefully to prevent breaking the case. Reach in
carefully and remove the holding clamp securing the capillary tube to the evaporator outlet tube. Be careful not to damage the capillary tube. Discard
clamp.
16. Using a heat gun to soften the plastic case, pull back the access door on the lower evaporator case carefully to prevent breaking the case (Figure 2).
Reach in carefully with two small adjustable wrenches and loosen the fitting attaching the TXV to the evaporator inlet tube. It will require a 7/8"
crows foot extension to loosen the TXV outlet joint fitting hidden behind the TXV itself. Remove and discard the TXV.
17. Remove original O-rings from the evaporator tubes and replace with new O-rings that have been oiled with 525 viscosity refrigerant mineral oil. DO
NOT USE PAG LUBRICANT.
18. Install the new TXV to the evaporator tubes being careful not to damage the O-rings. Finger tighten the joints and then torque the joints, using a
backup wrench to hold the TXV in position to:
INLET
20-35 Nm (14-25 lb.ft.)
OUTLET 15-22 Nm (11-16 lb.ft.)