
C 2500 Suburban 2WD V8-6.5L DSL Turbo VIN F (1995)
Case Checkballs And Filters
TOOL REQUIRED:
-
J 25025-5 Guide Pins
NOTICE: The use of a honing stone, fine sandpaper or crocus cloth is not recommended for servicing stuck valves. All valve lands have sharply
machined corners that are necessary for "cleaning" the bore. If these corners are rounded, foreign material could wedge between the valve and bore
causing the valve to stick. If it is found necessary to clean a valve, "micro fine" lapping compound 900 grit or finer should be used. Too much
"lapping" of a valve will cause excessive clearances and increase the chance of a valve not operating.
INSTALL OR CONNECT
1. The wiring harness pass-thru connector into the case.
2. The 3-4 accumulator pin (43) into the case.
3. The 3-4 accumulator piston seal (45) onto the 3-4 accumulator piston.
4. The 3-4 accumulator piston (44) onto the pin.
-
The end with three legs must face the valve body.
5. The 3-4 accumulator piston spring (46).
INSTALL OR CONNECT
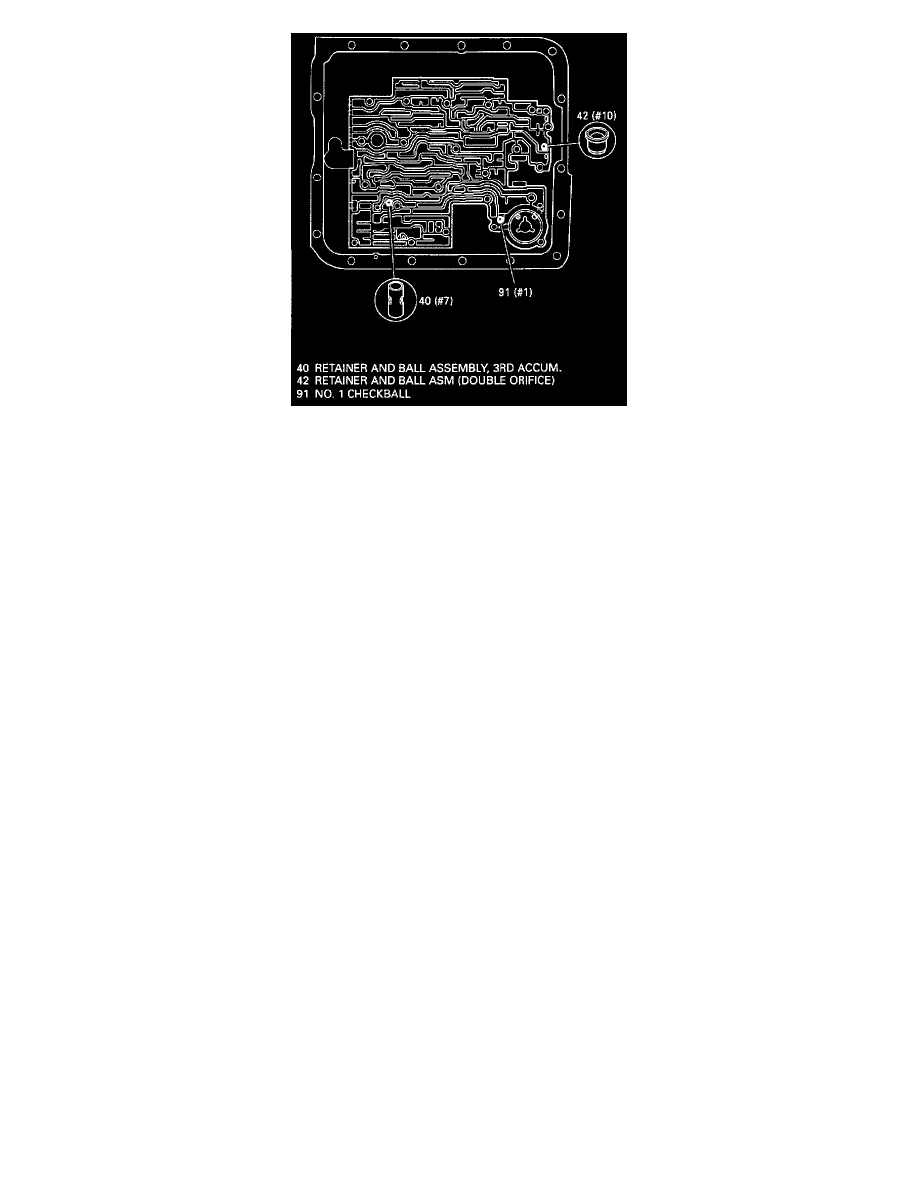
1. Checkball (91) into case as shown.
-
Retain with Transjel TM J 36850 or equivalent.
2. J 25025-5 into the case.
3. Screens onto spacer plate as shown.
4. Spacer plate to case gasket (47) and spacer plate to valve body gasket (52) onto the spacer plate (48).
-
Gasket (47) identified by a "C". Gasket (52) identified by a "V".
-
Retain with Transjel TM J 36850 or equivalent.
5. Spacer plate and gaskets onto the case.
IMPORTANT
-
Be careful not to damage screens when installing the spacer plate and gaskets.
6. Spacer plate support (53) and bolts (77).
TIGHTEN
-
Bolts to 11 Nm (8 lb. ft.)
Control Valve Body
CONTROL VALVE BODY