
C 2500 Suburban 2WD V8-6.5L DSL Turbo VIN F (1995)
B. Apply pressure on the tool until the stud breaks loose.
C. Remove J 23742.
D. Pull the stud away from the knuckle.
E. Support the knuckle assembly so that its weight will not damage the brake hose.
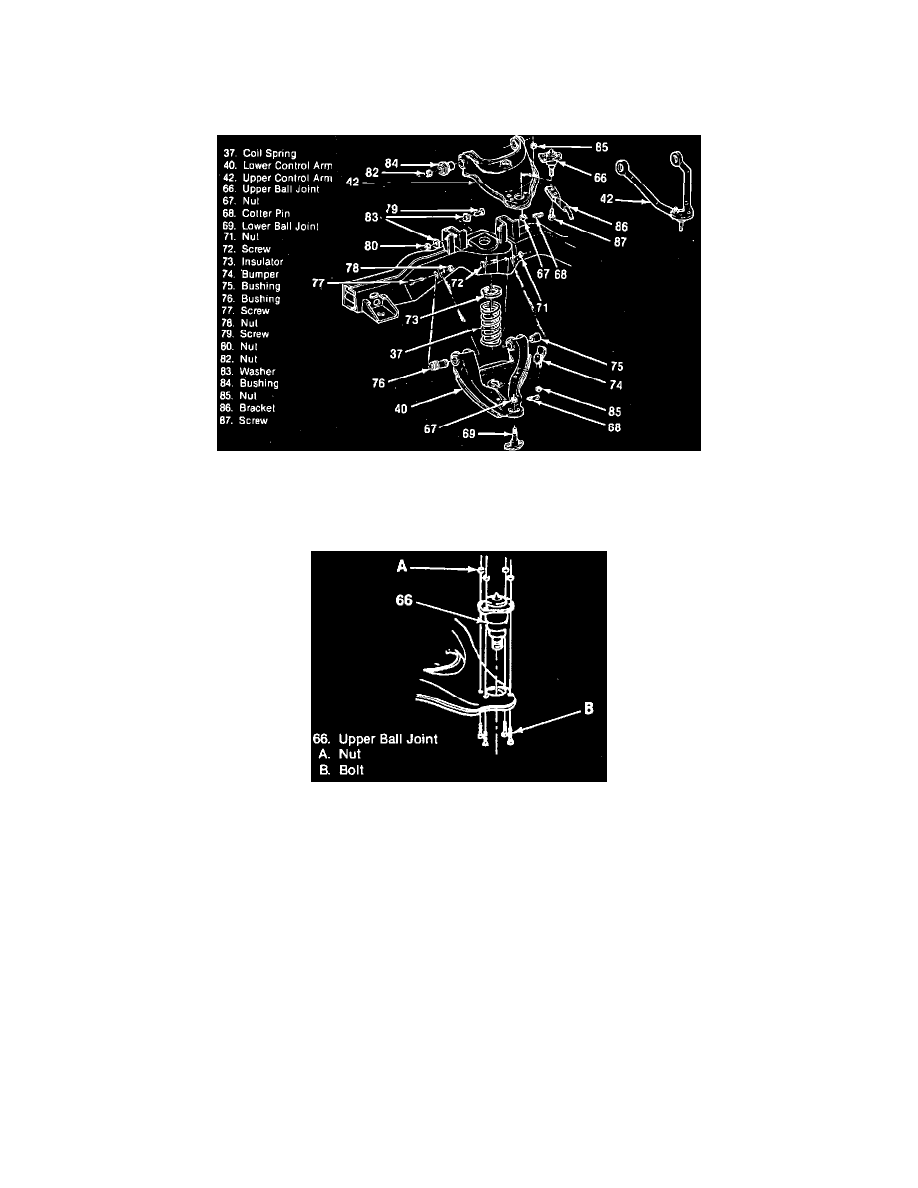
6. Upper ball joint (66).
Fig. 8 Control arms & components
INSTALL OR CONNECT
1. New upper ball joint (66) to the upper control arm (42).
Installing The Upper Ball Joint
^
Position four attaching bolts and nuts. Tighten nuts (A) to 24 Nm (18 lbs. ft.).
^
Take the support away from the knuckle assembly.
2. Upper ball joint (66) to the steering knuckle.
3. Stud nut (67). Tighten nut (67) to 115 Nm (84 lbs. ft.).
^
Align the slot in the stud nut with the hole in the stud by tightening the stud nut.
4. New cotter pin (68).
5. Brake caliper.
6. Tire and wheel assembly.
^
Lower the vehicle.
IMPORTANT
^ Check the running clearance at all suspension components.
^ Check the front end alignment.