
C 2500 Suburban 2WD V8-6.5L DSL Turbo VIN F (1995)
-
Control valve assembly.
A. Position as shown on a clean surface.
B. Remove blind hole retainer pins with a drill bit.
CAUTION: Some valves are under pressure - cover the bores while removing the retaining pins or personal injury could result.
C. Remove valve trains, shift solenoids (311 and 313), PCS (320), PWM solenoid (323), PCS screen (302) and shift solenoid filter (317).
D. Valves, springs, bushings and pistons must be laid out on a clean surface.
CLEAN
-
All valves, springs, bushings, pistons, control valve body and accumulator housing in clean solvent.
-
Dry using compressed air.
INSPECT
1. All valves, pistons and bushings for:
-
Porosity.
-
Scoring.
-
Nicks.
-
Scratches.
2. Pistons for:
-
Seal damage.
3. Springs for:
-
Damaged or distorted coils.
4. Valve body casting and accumulator housing for:
-
Porosity.
-
Cracks.
-
Interconnected passages.
-
Damaged machined surfaces.
5. Solenoid connectors and filter (317).
6. PCS (Pressure Control Solenoid) screen (302).
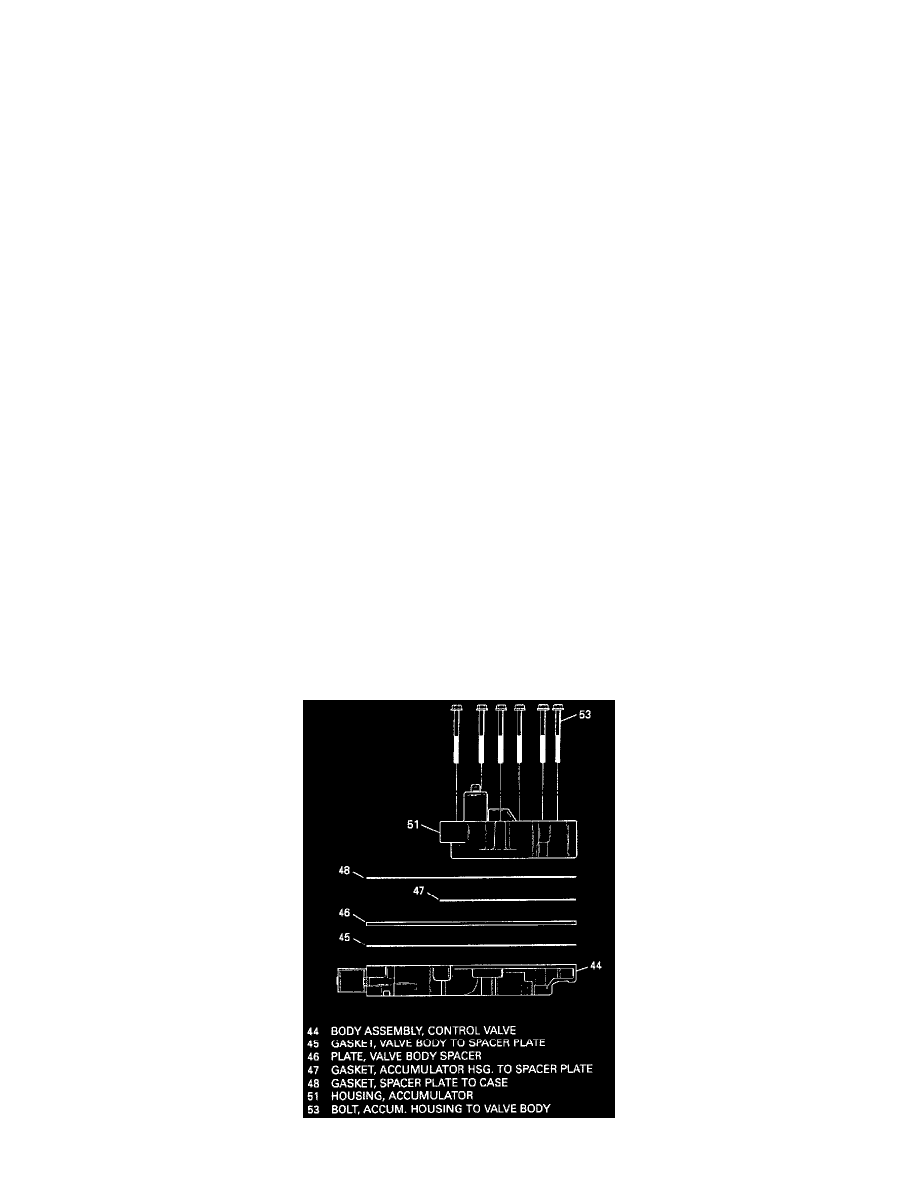
Control Valve Assembly/Accumulator Housing
CONTROL VALVE ASSEMBLY/ACCUMULATOR HOUSING