
C 2500 Suburban 2WD V8-6.5L DSL Turbo VIN F (1995)
IMPORTANT:
-
Install J 5824-01 or a used clutch drive gear to support the clutch.
-
Align the marks made during removal or, if new, align the lightest part of the clutch cover, identified by a yellow dot, to the heaviest part of the
flywheel, identified by an "X".
3. New spring washers and bolts.
IMPORTANT: Tighten each bolt one turn at a time to avoid warping the clutch cover.
TIGHTEN
-
Clutch cover bolts to 41 Nm (30 lbs. ft.).
-
Clutch cover bolts (dual mass flywheel) to 34 Nm (25 lbs. ft.).
-
Remove the clutch alignment tool.
NOTICE: Be careful not to use too much lubricant. Excessive lubricant may get on the clutch disc and cause slippage, or damage may result to the
clutch.
4. Ball stud.
-
Coat the rounded end of the ball stud with high temperature grease.
-
Pack the ball stud from the lubrication fitting on the clutch housing.
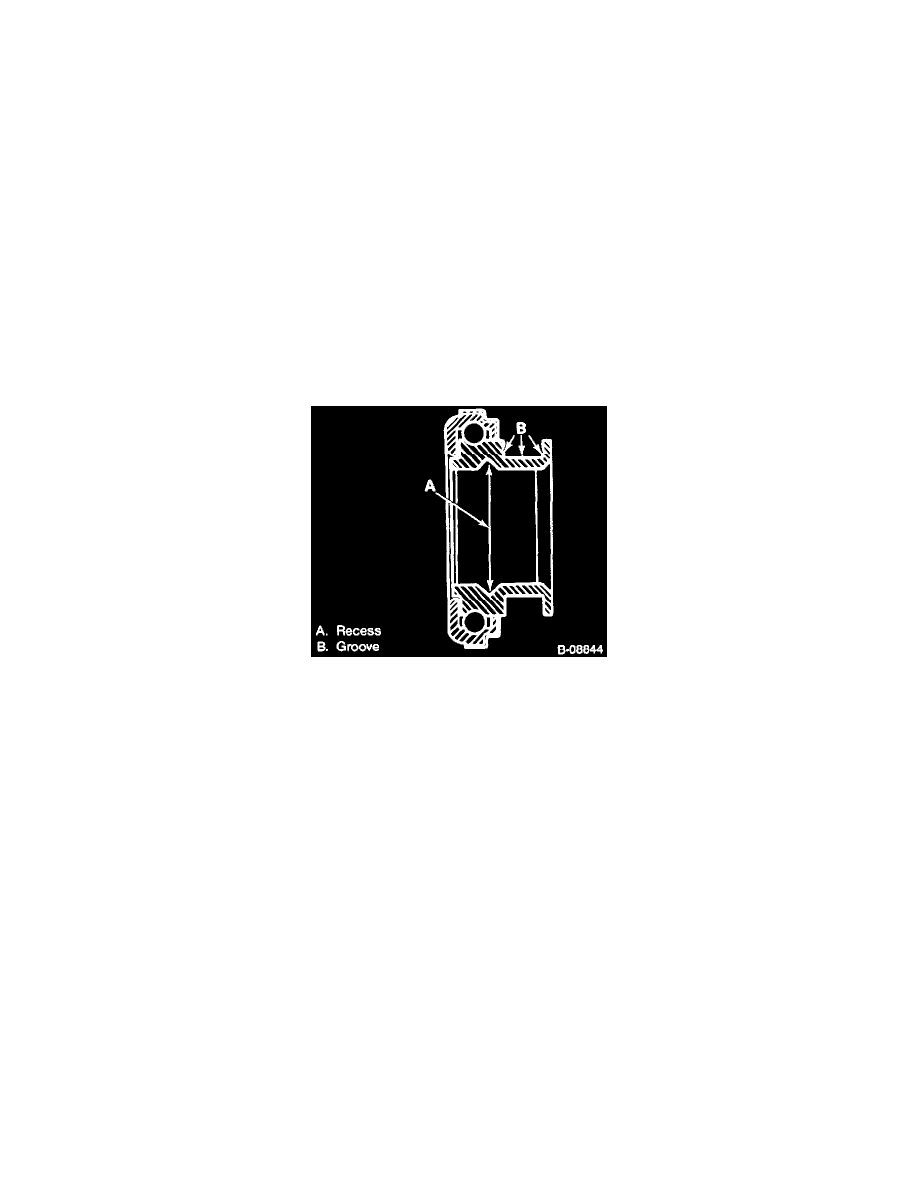
(Figure 4.) Release Bearing
5. Release bearing and clutch fork.
-
Pack the inside recess (A) and outside groove (B) of the release bearing with high temperature grease as shown.
-
Release bearing to the clutch fork.
IMPORTANT: Bearing retainer spring should be depressed and rest within groove (B) of the release bearing.
6. Seat and retainer.
7. Clutch housing and studs.
TIGHTEN
-
Clutch housing studs to 31 Nm (23 lbs. ft.).
8. Transmission to the clutch housing.
9. Inspection cover and bolts.
TIGHTEN
-
Inspection cover bolts to 12 Nm (106 lbs. in.).
10. Actuator cylinder.
-
Hydraulic tube and clips.
-
Remove clutch fork inspection plug to make sure push rod is properly seated in the fork.
11. Clutch fork inspection plug.
TIGHTEN
-
Inspection plug to 7.5 Nm (66 lbs. in.).