
C 2500 Suburban 2WD V8-6.5L DSL Turbo VIN F (1995)
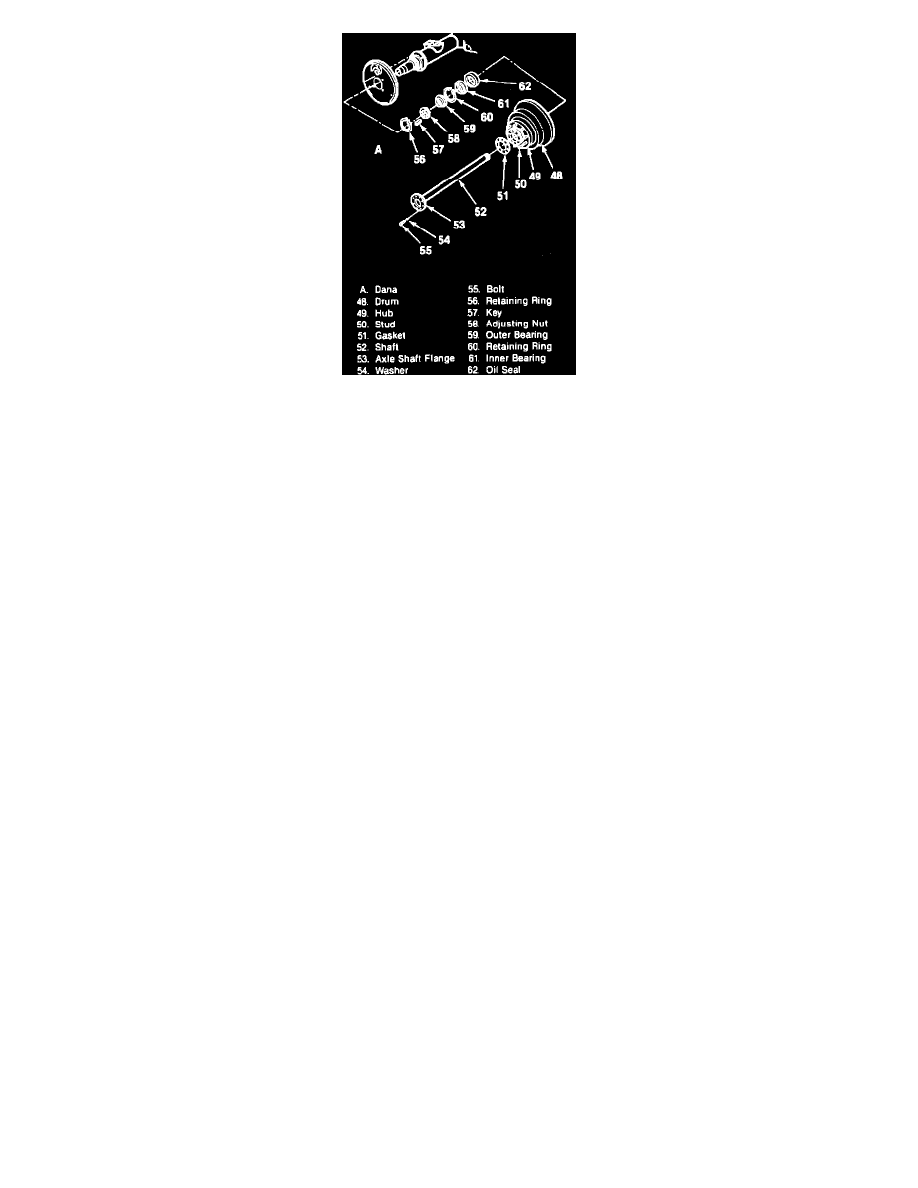
Fig. 3 Axle, Hub & Drum Components.
Remove or Disconnect
1. Bolts (55).
-
Rap the axle shaft (53) flange lightly with a soft faced hammer to loosen the shaft.
-
Grip the rib on the axle shaft (53) flange with a locking plier and twist, to start shaft removal.
2. Axle shaft (52) from the tube.
Clean
-
Axle shaft (53) flange. Remove old RTV or gasket (51).
-
Outside face of the hub assembly.
Inspect
-
All parts and replace as necessary.
Install or Connect
1. Axle shaft (53) with a gasket or RTV applied.
-
Be sure the shaft splines mesh into the differential side gear.
-
Align the axle shaft holes with the hub holes.
2. Bolts (55). Tighten bolts (55) to 156 Nm (115 ft. lbs.).
Wheel Bearing, Adjust
REAR WHEEL BEARING
Ensure the brakes are completely released and do not drag. Check wheel bearing play by grasping the tire at the top and pulling and pushing back and
forth, or by using a pry bar under the tire. If the wheel bearings are properly adjusted, movement of the brake drum in relation to the brake flange plate
will be barely noticeable and the wheel will turn freely. If the movement is excessive, adjust the bearings as follows:
1. Back off attaching nut until just loose, but not more than one slot of the lock or the axle spindle using wheel bearing nut wrench tool No. J-2222-C,
or equivalent.
2. Align adjusting nut slot with keyway in the axle spindle.
Hub & Bearing
REAR WHEEL BEARING
1.
Raise and support vehicle.
2.
Remove axle shaft.
3.
Remove hub and drum.
4.
Remove oil seal, inner bearing and retaining ring.
5.
Remove outer bearing.
6.
Reverse procedure to install.