
C 2500 Truck 2WD V6-4.3L VIN W (1996)
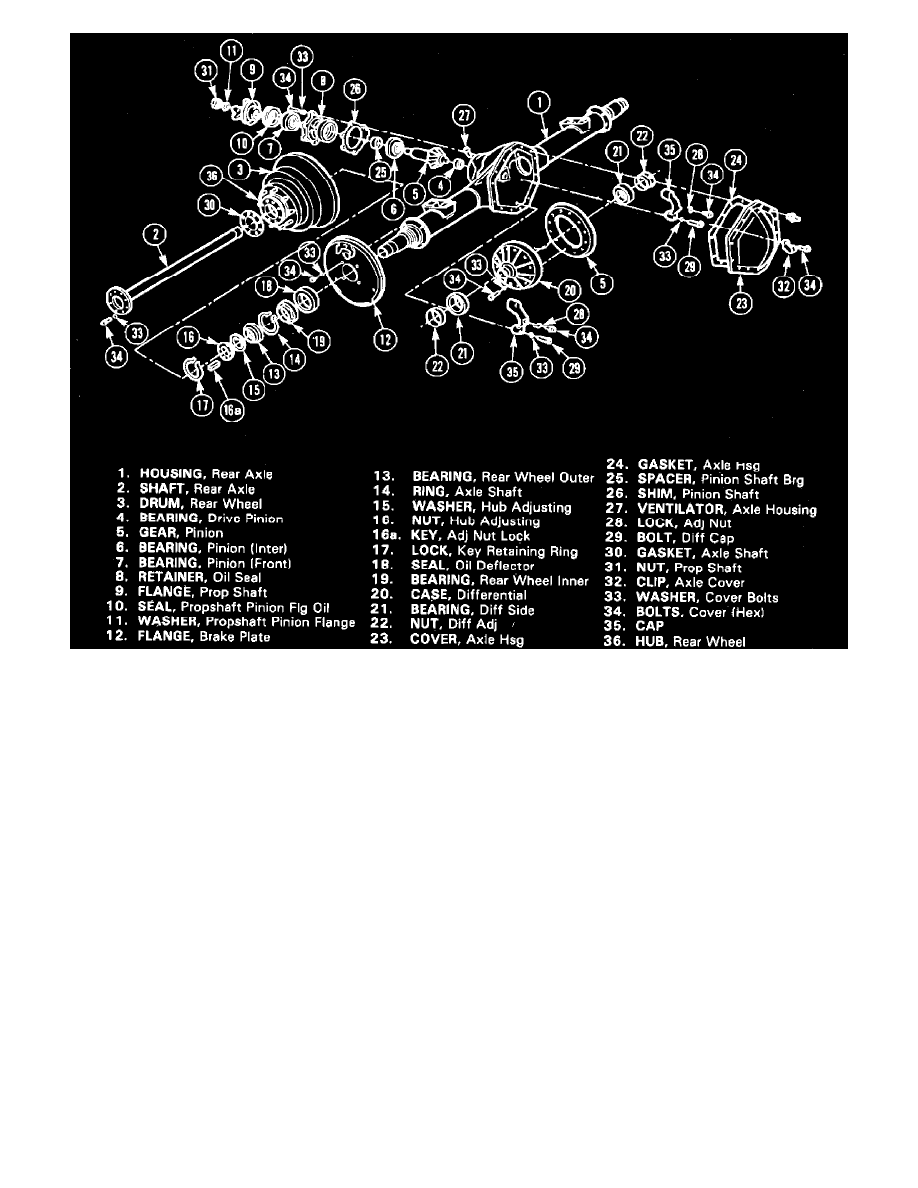
Fig. 1 Chevrolet 10-1/2 inch drive axle exploded view
1.
Mount axle assembly in suitable holding fixture, remove rear cover and gasket,
Fig. 1, and drain lubricant.
2.
Remove axle shafts.
3.
Measure ring gear and pinion backlash using suitable dial indicator and record reading to aid assembly.
4.
Remove adjusting nut lock retainers, then mark installation position of side bearing caps.
Keep all components in order during disassembly so
that any component to be reused can be installed in original position.
5.
Remove side bearing caps, then loosen bearing adjusters using J-24429 or equivalent and lift differential assembly from housing.
6.
Remove side bearing outer races and place with respective bearing caps.
7.
Measure pinion rotating torque using suitable torque wrench. If no bearing preload is present, or if endplay is evident, pinion bearings may require
replacement.
8.
Remove pinion bearing retainer bolts, then the pinion assembly, tapping on pilot end of pinion to free assembly from housing.
9.
Measure and record thickness of shim installed between pinion bearing retainer and housing and retain shims for assembly.
10.
Inspect components. Refer to
Cleaning and Inspection, and replace as needed. See: 10 1/2 Inch Ring Gear/Cleaning & Inspection
Assembly