
C 2500 Truck 2WD V6-4.3L VIN W (1996)
Differential Carrier: Service and Repair
Timken/Rockwell - 12 Inch Ring Gear
Disassembly
1.
Drain lubricant from axle housing and remove axle shaft retaining nuts and lockwashers.
2.
Rap each axle shaft sharply in center of flange, remove tapered dowels, then withdraw axle shafts.
Do not pry axle shaft from hub. Rapping
flange sharply should release tapered dowels locating flange and allow axle to be removed.
3.
Disconnect propeller shaft from companion flange and secure shaft aside.
4.
Remove all nuts securing carrier to housing except top two, loosen top two nuts and break carrier free from housing by tapping with soft faced
hammer.
5.
Support carrier with suitable jack, remove top two retaining nuts and withdraw carrier assembly from housing.
Small pry bar may be used to aid
carrier removal, but end of bar must be suitably rounded to prevent damage to mounting flange.
6.
Mount carrier assembly in suitable holding fixture and check ring gear and pinion backlash to aid assembly.
If original ring gear and pinion are
to be reused, backlash should be set to clearance measured in step 6 to maintain tooth contact pattern.
7.
Loosen jam nut and back-off ring gear thrust adjusting screw.
8.
Center punch one carrier leg, bearing cap and side bearing race to identify component location for assembly.
Keep all components in order
during disassembly. Components that are to be reused must be installed in original position.
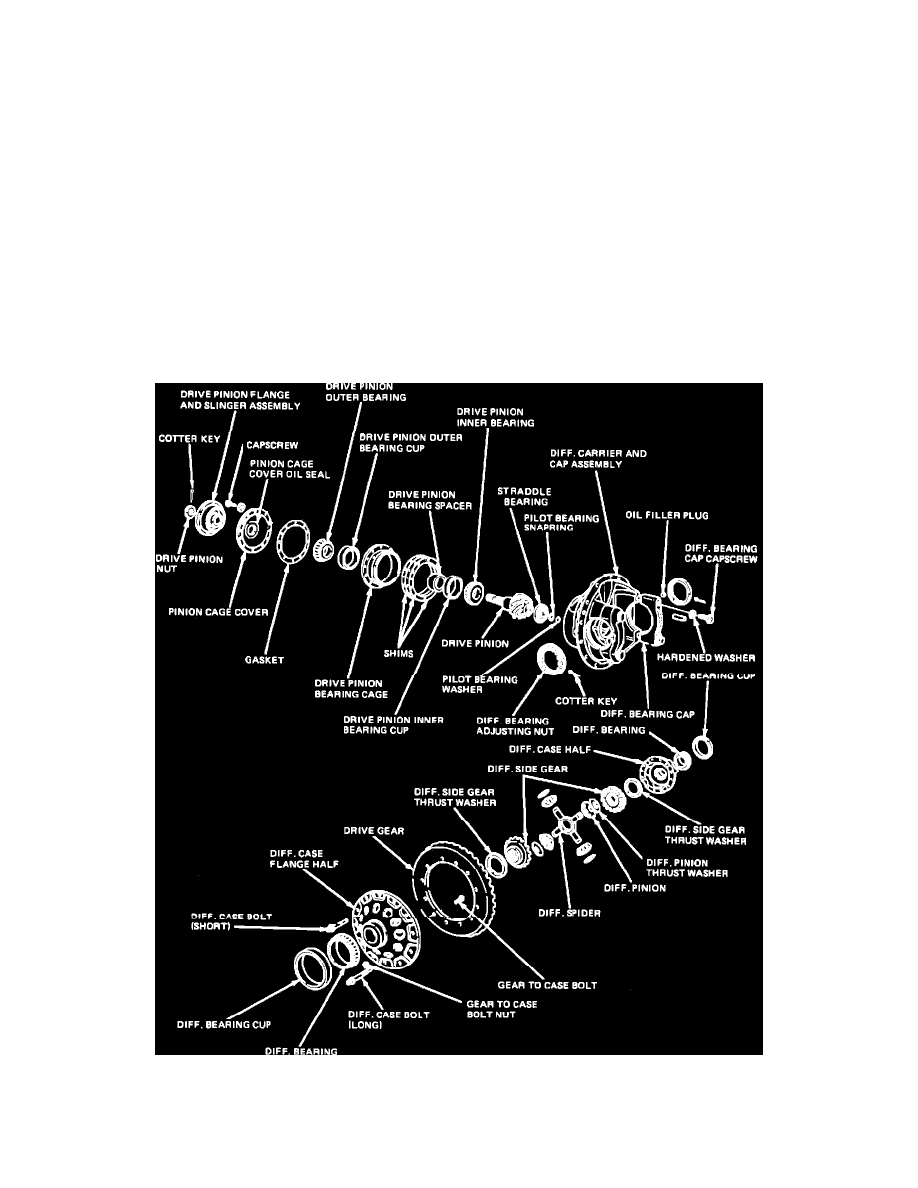
Fig. 1 Exploded View Of Timken/Rockwell Drive Axle With 12 inch Ring Gear
9.
Remove differential bearing adjusting nut locks, bearing caps and adjusting nuts,
Fig. 1.
10.
Lift differential case assembly from carrier.