
C 2500 Truck 2WD V8-305 5.0L VIN M SFI (1997)
Camshaft Bearing: Service and Repair
REMOVAL
^
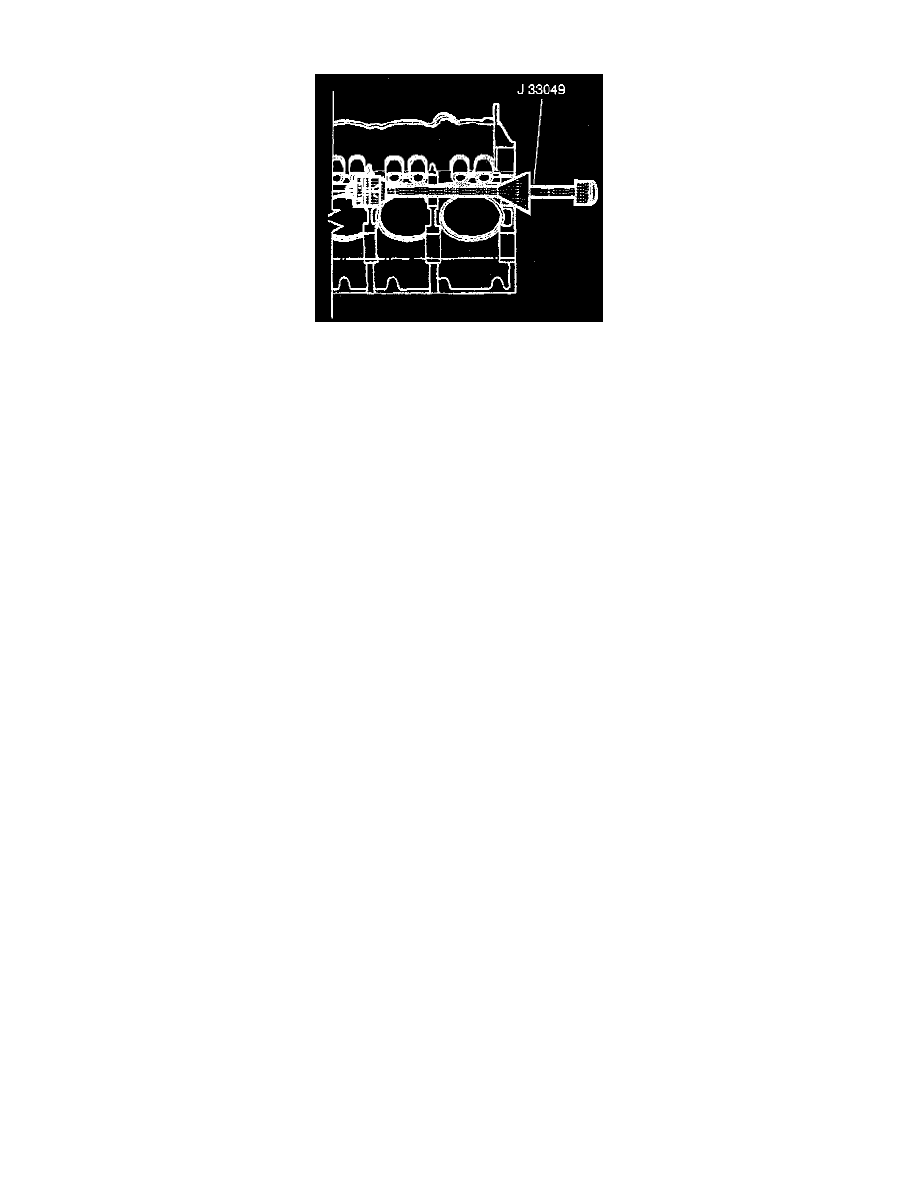
Tools Required
-
J 33049 Camshaft Bearing Removal and Installation Set, or equivalent
1. Remove the rear camshaft plug.
2. Remove all of the camshaft bearings using the J 33049 as follows:
a. Insert the tool with the correct collet into the camshaft bearing to be removed.
b. Turn the tool until the collet has tightened in the bearing.
c. Push the center cone against the block and into the first bearing bore in order to center the tool.
d. Drive the bearing from the block.
In order to remove the rear bearing, insert the tool through the front of the block. In order to remove the front bearing, insert the tool through
the rear of the block, this enables the tool to remain centered.
INSTALLATION
NOTE:
^
The outer camshaft bearings must be installed first. These bearings serve as guides for the tool and help center the inner bearings during the
Installation process.
^
Ensure the correct cam bearing fits into the bore. The cam bearing bores may vary in size.
^
Ensure that the camshaft bearing lubrication hole or holes align with the oil gallery hole or holes in the block. On some engines, the oil holes may
be difficult to see. Verify that the holes are aligned.
1. Install the front camshaft bearing using the J 33049.
NOTE: Ensure that the camshaft bearing lubrication hole or holes align with the oil hole or holes in the block.
2. Install the rear camshaft bearings using the J 33049.
3. Install the inner camshaft bearings.
4. Install the camshaft rear plug as follows:
a. Coat a new camshaft plug with sealer GM P/N 12345493 or the equivalent.
b. Install the camshaft plug into the block.