
C 2500 Truck 2WD V8-350 5.7L (1988)
14.
Remove the upper and lower ball studs from the knuckle. Use tool J36607.
FLOOR JACK MUST REMAIN UNDER THE LOWER CONTROL ARM DURING REMOVAL AND INSTALLATION OF THE
KNUCKLE.
15.
Position a floor jack under the lower control arm. Raise the jack until it just supports the lower control arm.
16.
Remove the knuckle.
17.
Install new knuckle. Torque upper ball joint nut to 90 N-m (66 lb.ft) and the lower ball joint nut to 128 N-m (94 lb.ft). Tighten the nuts to align the
cotter pins. Do not tighten more than 1/6 turn. Install new cotter pins.
18.
Reinstall axle shaft bolts to the differential. Torque bolts to 80 N-m (59 lb.ft).
19.
Reinstall knuckle seal.
20.
Reinstall splash shield. Torque bolts to 16 N-m (12 lb.ft).
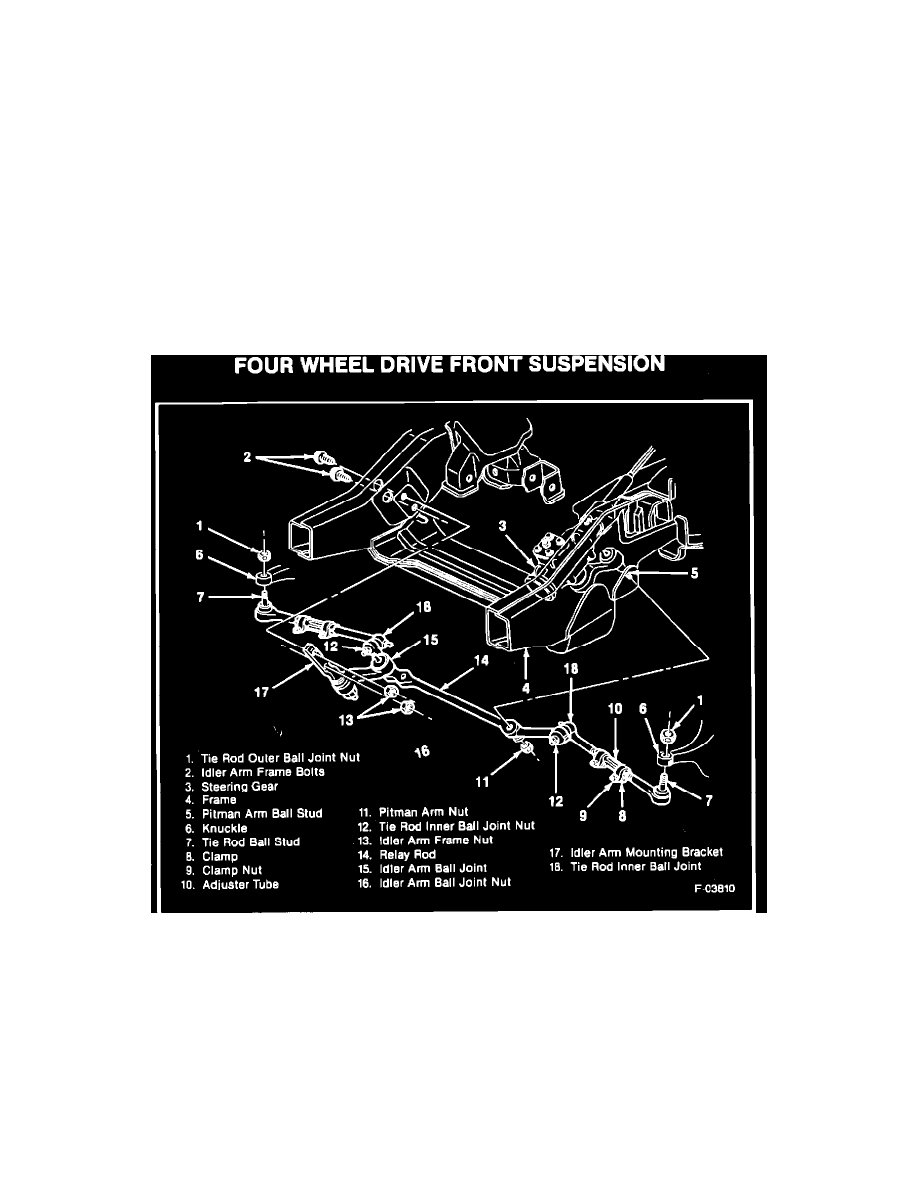
FIGURE NO. 3 - STEERING LINKAGE - K MODEL
21.
Install new outer tie rod to the adjuster tube. The number of threads on both the inner and outer rod ends must be within three threads. The clamp
and bolt should be positioned as shown in Figure No. 3.
22.
Seat the tie rod ball stud in the knuckle using tool J29193. Torque nut to 54 N-m (40 lb.ft).
23.
Reinstall hub and bearing assembly. Tighten bolts to 90 N-m (66 lb.ft).
SERVICE PROCEDURE (CONT'D)
4-WHEEL DRIVE (CONT'D)
24.
Install washer and nut on axle shaft. Tighten nut to 235 N-m (173 ft.lbs.).