
C 2500 Truck 2WD V8-6.5L DSL Turbo VIN S (1997)
Water Pump: Service and Repair
Replacement
REMOVE OR DISCONNECT
1. Negative battery cable.
2. Coolant from the radiator.
3. Fan shroud.
4. Fan.
5. Drive belt.
6. Raise vehicle. Support with safety stands.
7. Vacuum pump mounting bracket nuts.
8. Bolt holding vacuum pump bracket and generator.
9. Vacuum pump with bracket.
10. Power steering pump (icy aside).
11. Power steering pump mounting bracket.
12. Lower radiator hose from pump.
13. Bypass hose from pump.
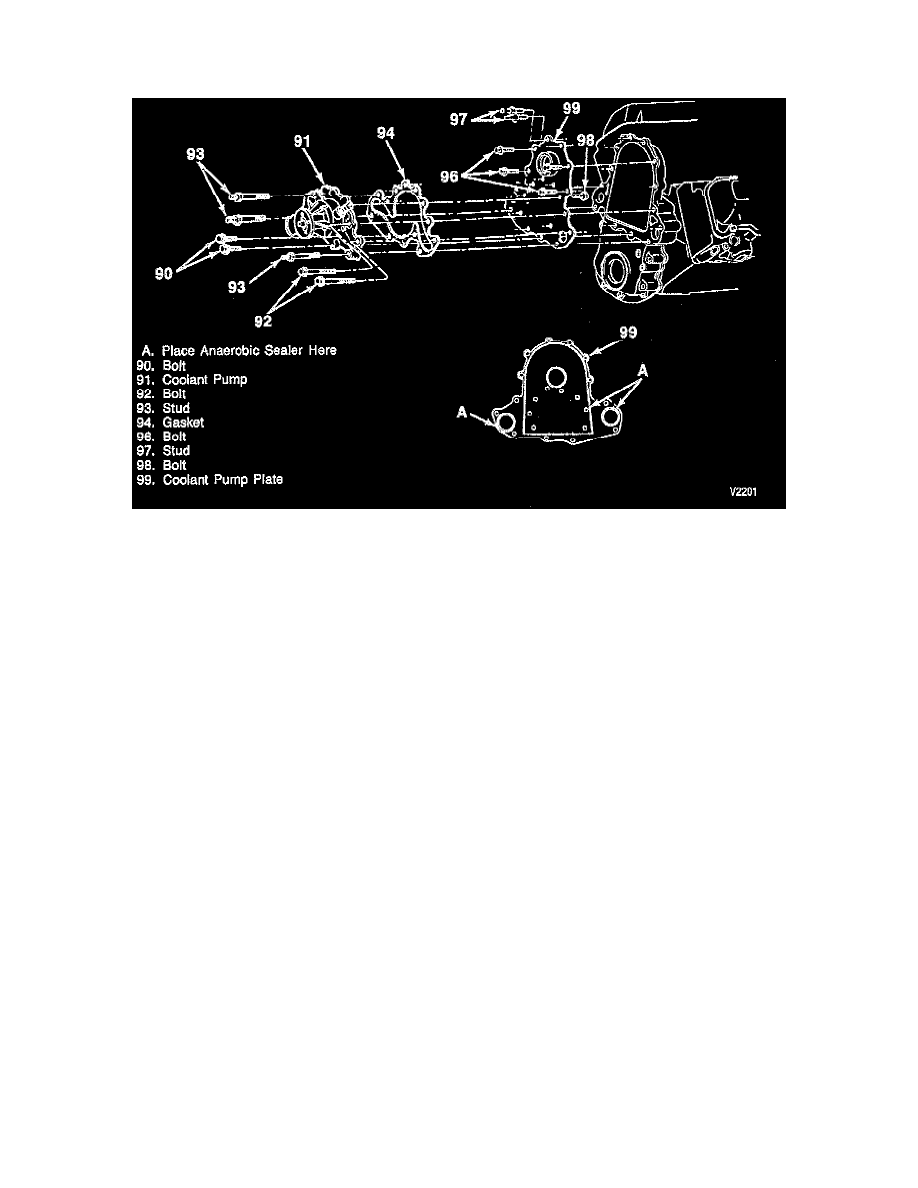
14. Bolts (90, 92, and 96), studs (93 and 97), water pump plate (99), and the water pump (91).
15. Bolt (98) from the-rear of the water pump plate.
16. Water pump (91) and gasket (94) from the plate (99).
^
Clean all flanges must be free of oil. Clean the mating surfaces on the coolant pump, both sides of the water pump plate, and the engine block.
INSTALL OR CONNECT
1. Gasket (94).
2. Water pump (91) to the water pump plate (99).
3. Bolt (98).
^
Tighten bolt (98) to 23 Nm (17 ft. lbs.).
4. Water pump (91) and water pump plate (99) to the engine.
^
Apply anaerobic sealer GM P/N 1052357 or equivalent.
^
The sealer must be wet to the touch when the bolts are tightened.
^
Bolts (90, 92, and 96) and studs (93 and 97).
^
Tighten
-
Bolts (90 and 96) and studs (97) to 42 Nm (31 ft. lbs.).
-
Bolts (92) and studs (93) to 42 Nm (31 ft. lbs.).
6. Bypass hose and lower radiator hose.
7. Power steering bracket and pump.
8. Vacuum pump and bracket.
9. Bolt holding vacuum pump and generator.
10. Fan and pulley.