
C 2500 Truck 2WD V8-6.6L DSL Turbo VIN 1 (2001)
Rear Door Hinge: Service and Repair
Hinge Replacement - Rear Side Access Door
REMOVAL PROCEDURE
1. Remove the door from the body.
2. Remove any excess sealer surrounding the hinge and scribe the location of the hinge on the body.
3. Lightly hand-sand existing body hinge with 100 grit or finer sandpaper to locate each weld attaching hinge to door.
IMPORTANT: Original punch marks may not necessarily indicate the center of the welds.
4. Center punch each of the 4 weld marks on the original hinge base. It is critical to punch the center of the weld so that as much of the weld is
removed during drilling as possible.
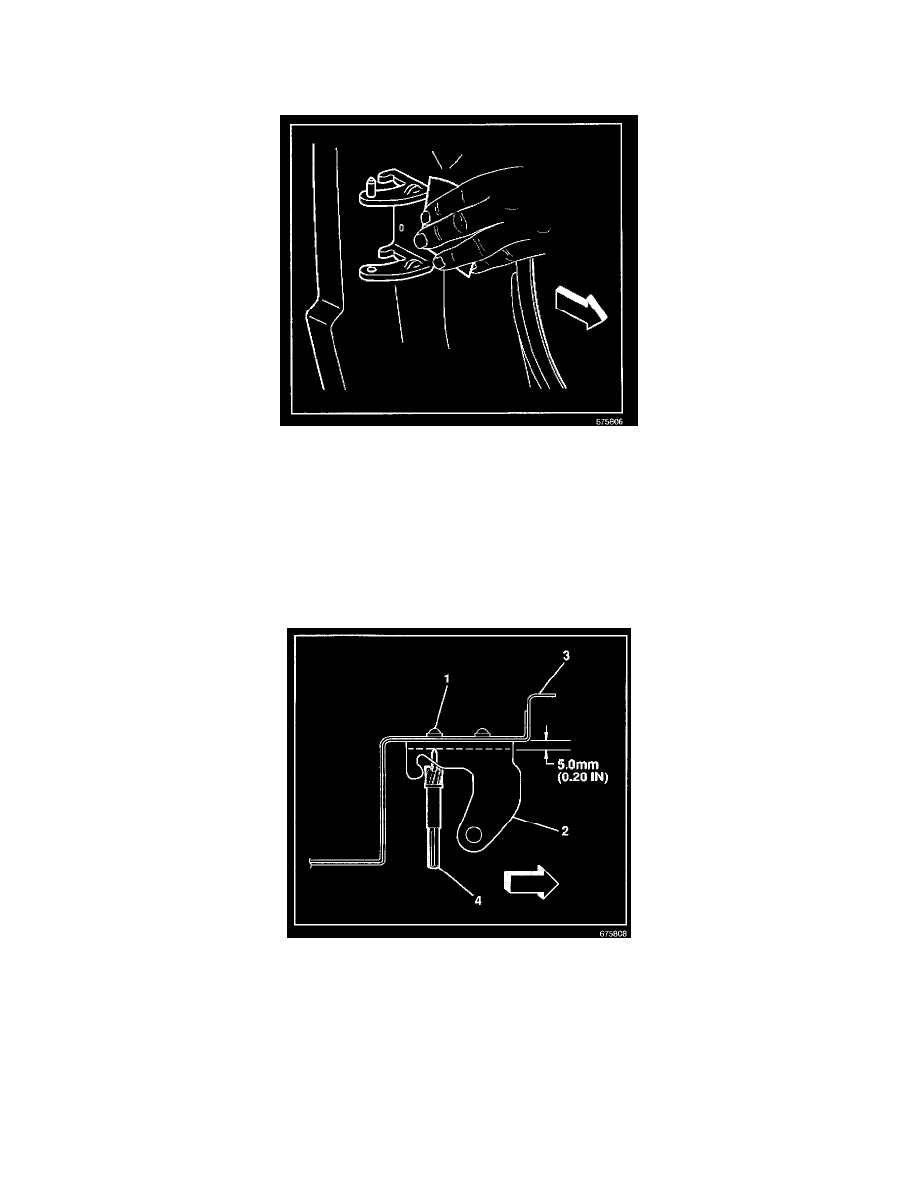
IMPORTANT: Do not drill into the door frame (3). Drill through hinge only. If necessary, use a chisel to separate the hinge from door.
5. At each punch location, drill through hinge base only using a 13 mm (1/2 in) rotabroach (4) saw, or equivalent.
6. Remove the hinge from pillar.
7. Remove all remaining weld from door surface to ensure a flush fit of service hinge.
INSTALLATION PROCEDURE