
C 30 1 Ton Pickup 2WD V8-454 7.4L VIN W 4-bbl (1983)
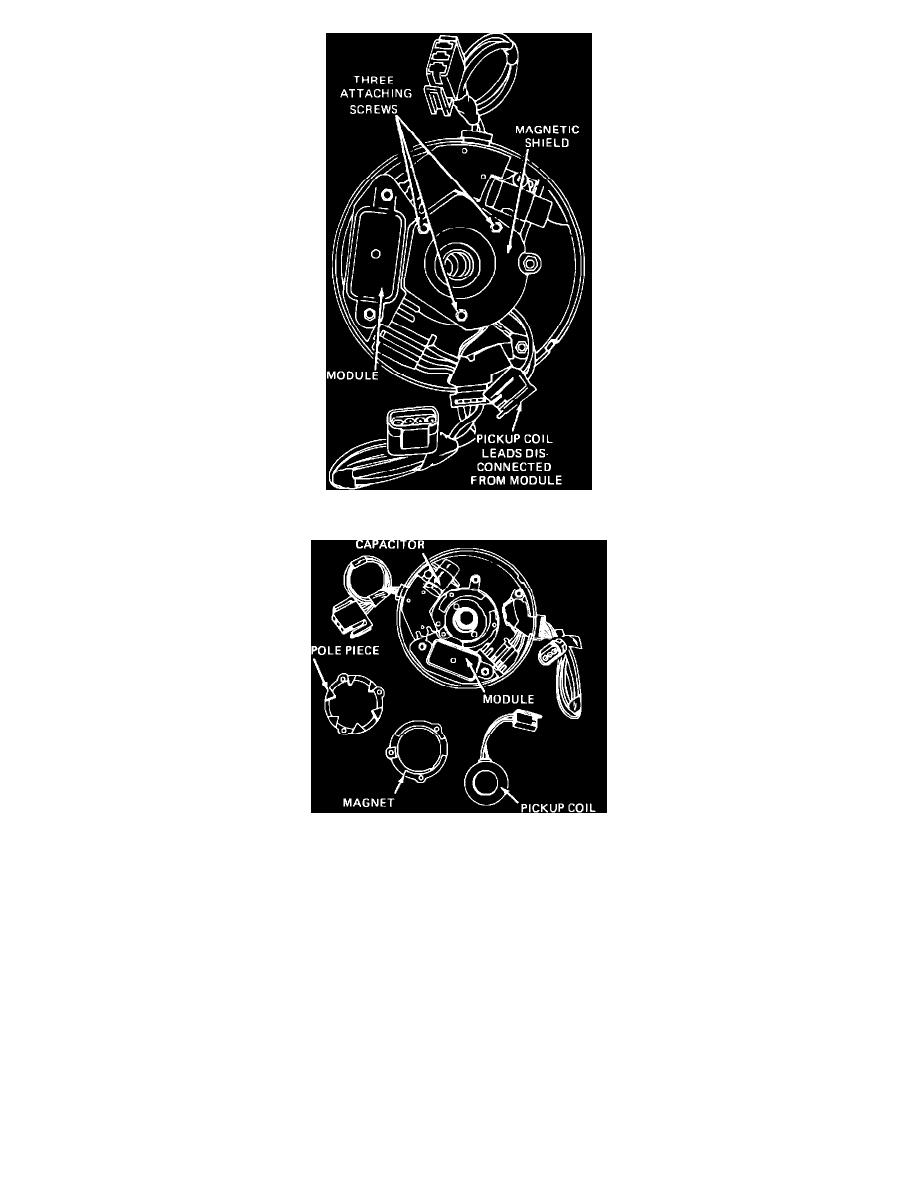
Fig. 14 Distributor shield installation
Fig. 15 Typical pickup coil assembly
PICKUP COIL REPLACE
Removal
1.
With distributor removed, disconnect pickup coil leads from module terminals.
2.
Remove roll pin from drive gear by driving out with 1/8 inch diameter drift punch.
3.
Remove gear, shim and the tanged washer from distributor shaft, as equipped. Remove any burrs that may have been caused by removal of pin.
4.
Remove distributor shaft from housing.
5.
Remove washer from upper end of distributor housing. Bushings in the housing are not serviceable.
6.
Remove pickup coil shield, if equipped, then remove retaining screws and the pile piece, magnet and pick-up coil, Figs. 14 and 15.
Installation
1.
Install pick-up coil, magnet and pole piece and loosely install three screws holding pole piece.
2.
With washer installed at top of housing, temporarily install distributor shaft and rotate to check for proper clearance between pole piece teeth and
timer core teeth.