
C 30 P/U 2WD V8-379 6.2L DSL (1985)
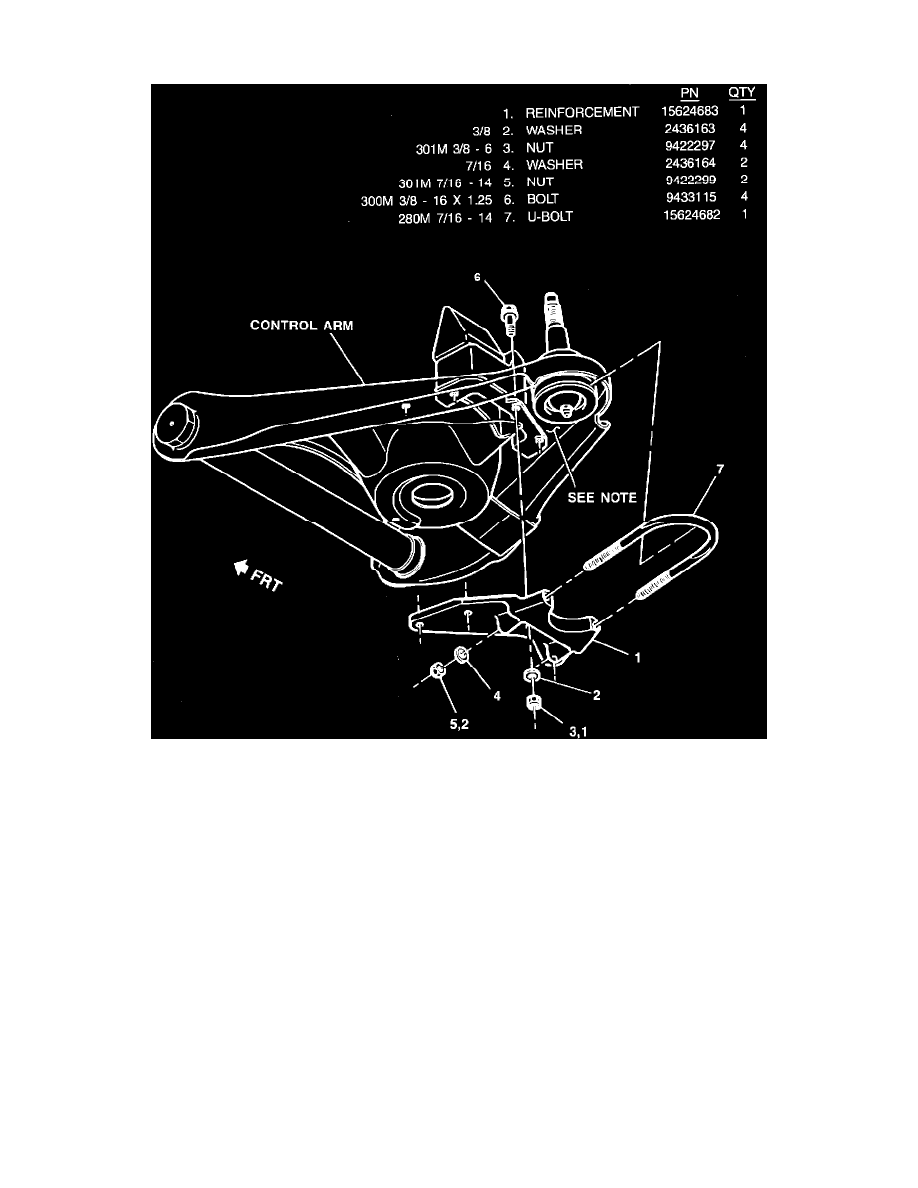
INSTALLATION OF REINFORCEMENT
# 1. Reinstall reinforcement (Figure 4, "1") and U-bolt (Figure 4, "7"). Hand start all bolts. Tighten U-bolt nuts (Figure 4, "5") to approximately 22
N-m (16 lb.ft.). Make sure U-bolt is ALIGNED with bottom edge of ball joint and is NOT COCKED while continuing to torque.
NOTICE:
If rear most bolt head flange interferes with bump stop bracket, install bolt from bottom of control arm.
# 2. Torque 3/8-16 bolts (Figure 4, "6") to 37-43 N-m (27-32 lb.ft.). Tighten center bolt first and remainder in any sequence.
# 3.
Torque U-bolt nuts (Figure 4, "5") to 40-46 N-m (30-34 lb.ft.).
# 4.
Lower vehicle.
5. Install Campaign Identification Label.
ID Label and Claim Information
CAMPAIGN IDENTIFICATION LABEL