
C 3500 HD Truck 2WD V8-8.1L VIN G (2002)
Installation Procedure
1. Install the connecting rod in the adjuster sleeve.
2. Install the connecting rod to the pitman arm. Make sure the seal is on the stud.
Notice: Refer to Fastener Notice in Service Precautions.
3. Use the J29193 in order to seat the tapers.
-
Tighten the J29193 to 62 Nm (48 ft. lbs.).
4. Install the nut (8) retaining the connecting rod to the pitman arm.
-
Tighten the connecting rod retaining nut to 50 Nm (37 ft. lbs.).
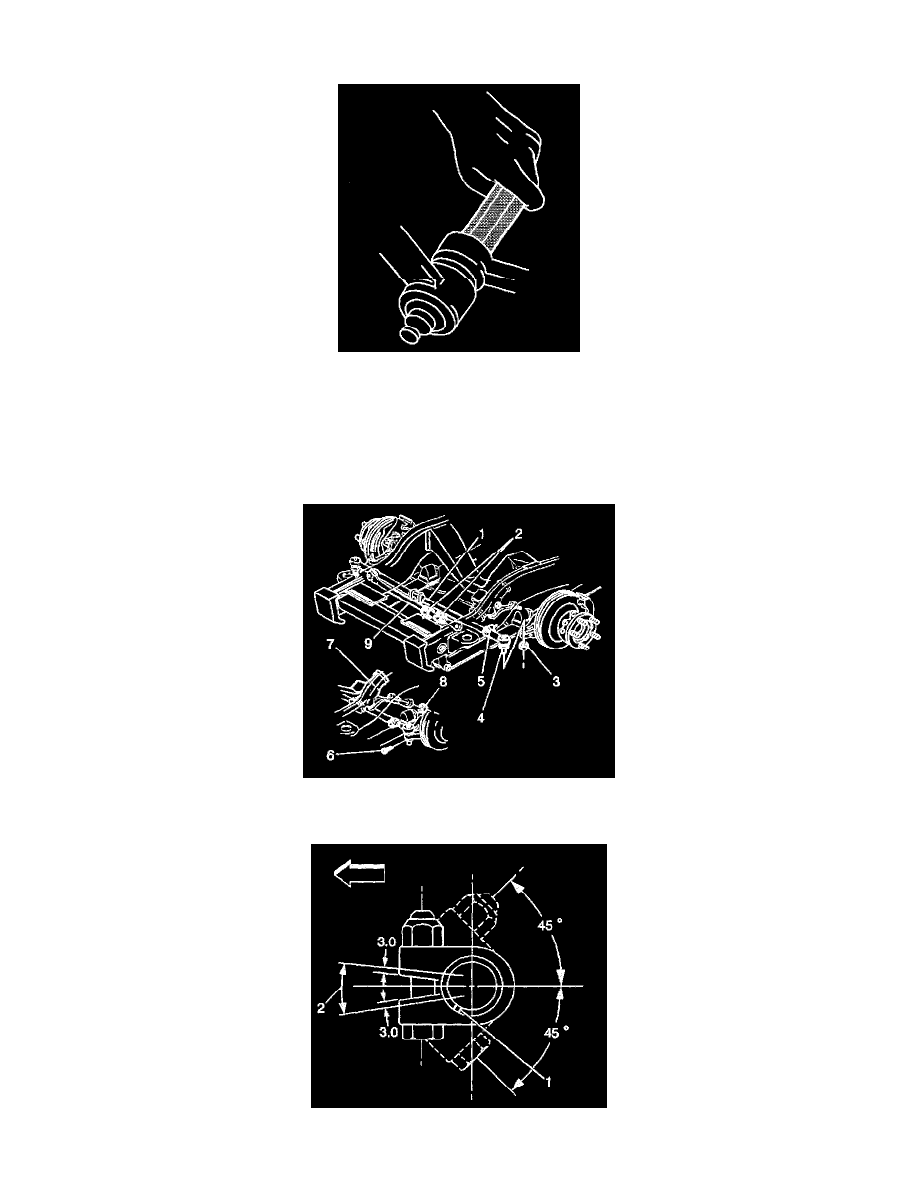
5. Tighten the adjuster sleeve retaining bolts. Make sure the slot in the sleeve (1) is not positioned within the clamp opening.