C 3500 Truck 2WD V8-305 5.0L (1988)

^
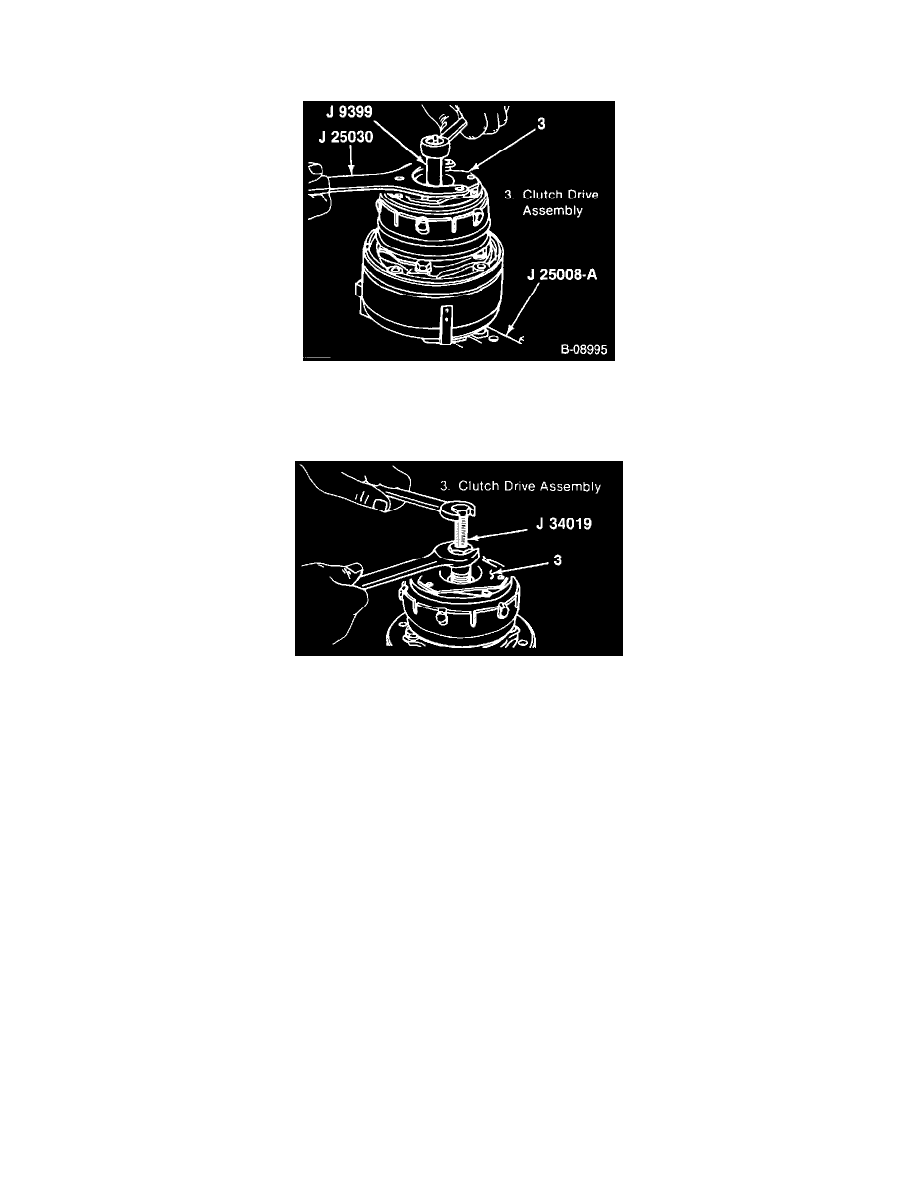
Clamp J 25008-A to the compressor.
^
Mount J 25008-A and the compressor in a vise.
Removing The Shaft Nut
1. Shaft nut (1) with J 9399.
^
Hold the clutch plate and hub assembly (3) with J 25030.
Clutch Plate And Hub Removal
2. Clutch drive hub (3).
^
Thread J 34019 into the clutch plate and hub assembly (2).
Important
^
Do not drive or pound on the clutch hub or the shaft. This may cause internal damage.
^
Make sure the contact surfaces of the clutch plate and the pulley are clean.
^
Align the shaft key with the shaft key way and place the clutch plate and hub assembly onto the compressor shaft.
^
Hold the body of J 34019 with a wrench and turn the center screw into the remover body.
3. Shaft key (2).
^
Retain the shaft key (2) if usable.
Inspect
^
All parts and replace if necessary.
Install or Connect
Tools Required:
J 9399 Thin Wall Socket
J 9408-B Clutch Plate and Hub Installer
J 25030 Clutch Hub Holding Tool
