C 3500 Truck 2WD V8-305 5.0L (1988)

Control Arm Bushing: Service and Repair
Upper Control Arm Bushing
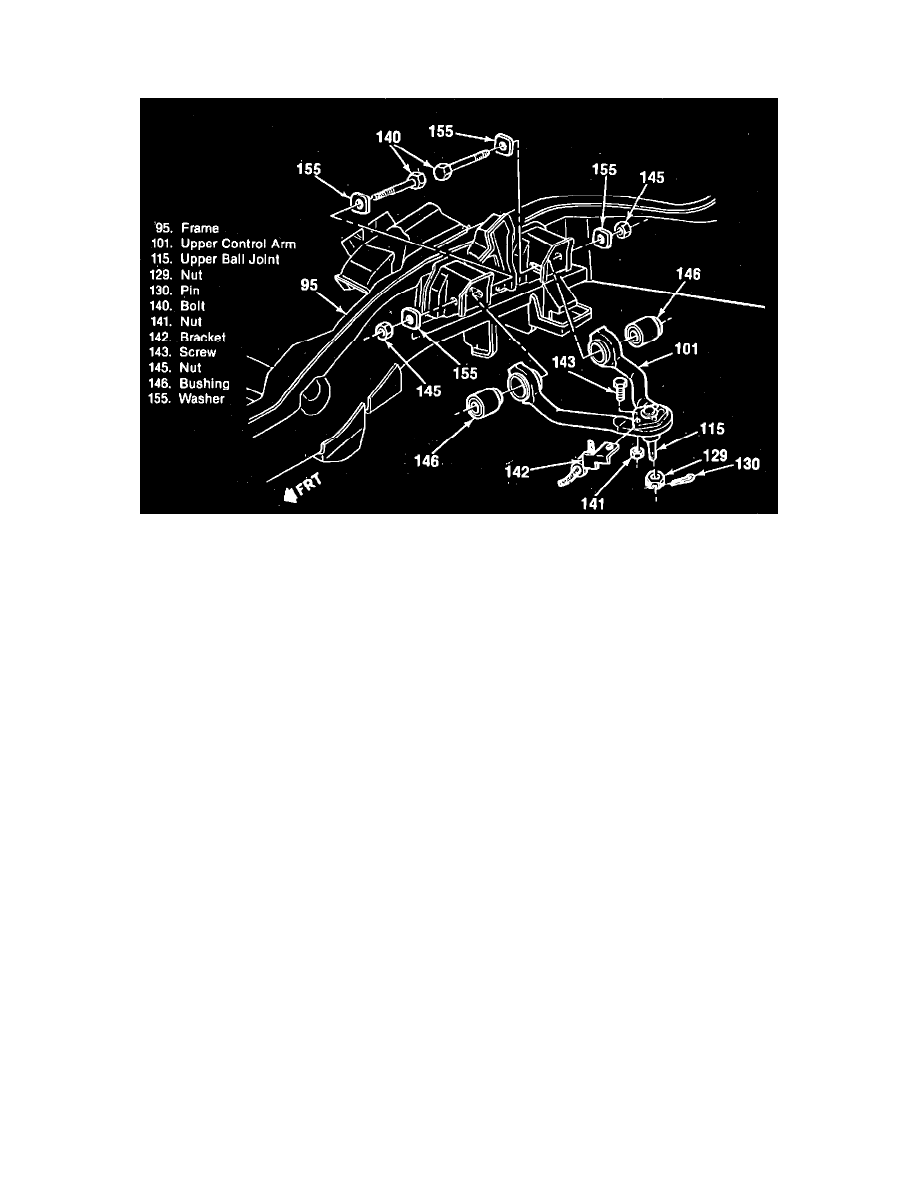
Fig. 4 Upper control arm components
1.
Raise and support vehicle..
2.
Remove wheel and tire assembly.
3.
Disconnect battery ground cable.
4.
Remove air cleaner extension, if necessary.
5.
Remove brake hose.
6.
Remove pin, nut and upper control arm from knuckle, Fig. 4.
7.
Remove nuts, bolts and upper control arm.
8.
Remove bushings.
9.
Reverse procedure to install. Torque nuts (145) to 88 ft. lbs. Torque nut (129) to 94 ft. lbs.
