
C 3500 Truck 2WD V8-6.6L DSL Turbo VIN 1 (2002)
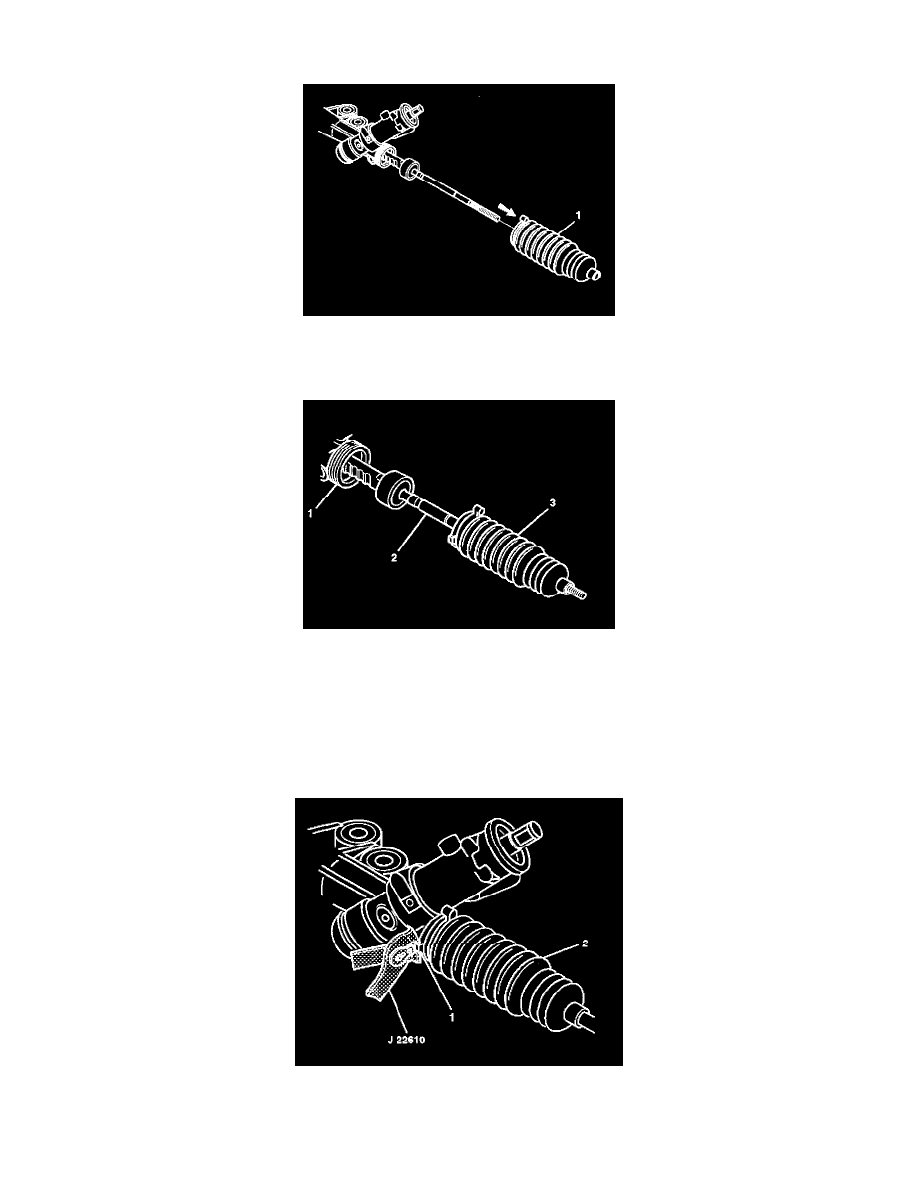
Important: Prior to removing the breather tube or the rack and pinion boot, mark the location of the breather tube on the gear assembly.
7. Remove the rack and pinion boot (1) and the breather tube from the rack and pinion gear assembly.
Installation Procedure
1. Prior to the rack and pinion boot installation, apply grease to the inner tie rod assembly (2) and the rack and pinion gear assembly (1).
2. Install the rack and pinion boot (3) onto the inner tie rod assembly (2).
3. Install the breather tube while aligning the breather tube with the mark made during removal and the molded nipple of the rack and pinion boot.
Important: The rack and pinion boot (3) must not be twisted, puckered or out of shape in any way. If the rack and pinion boot (3) is not shaped
properly, adjust the rack and pinion boot (3) by hand before installing the boot clamp.
4. Install the rack and pinion boot onto the gear assembly (1) until the rack and pinion boot (3) is seated in the gear assembly groove.
5. Install the boot clamp (1) on the rack and pinion boot (2).
6. Crimp the boot clamp (1) using the J 22610.
7. Pinch the pliers together on the rack and pinion boot (2) in order to install the tie rod end clamp.