
C Tahoe 2WD V8-5.7L VIN R (1996)
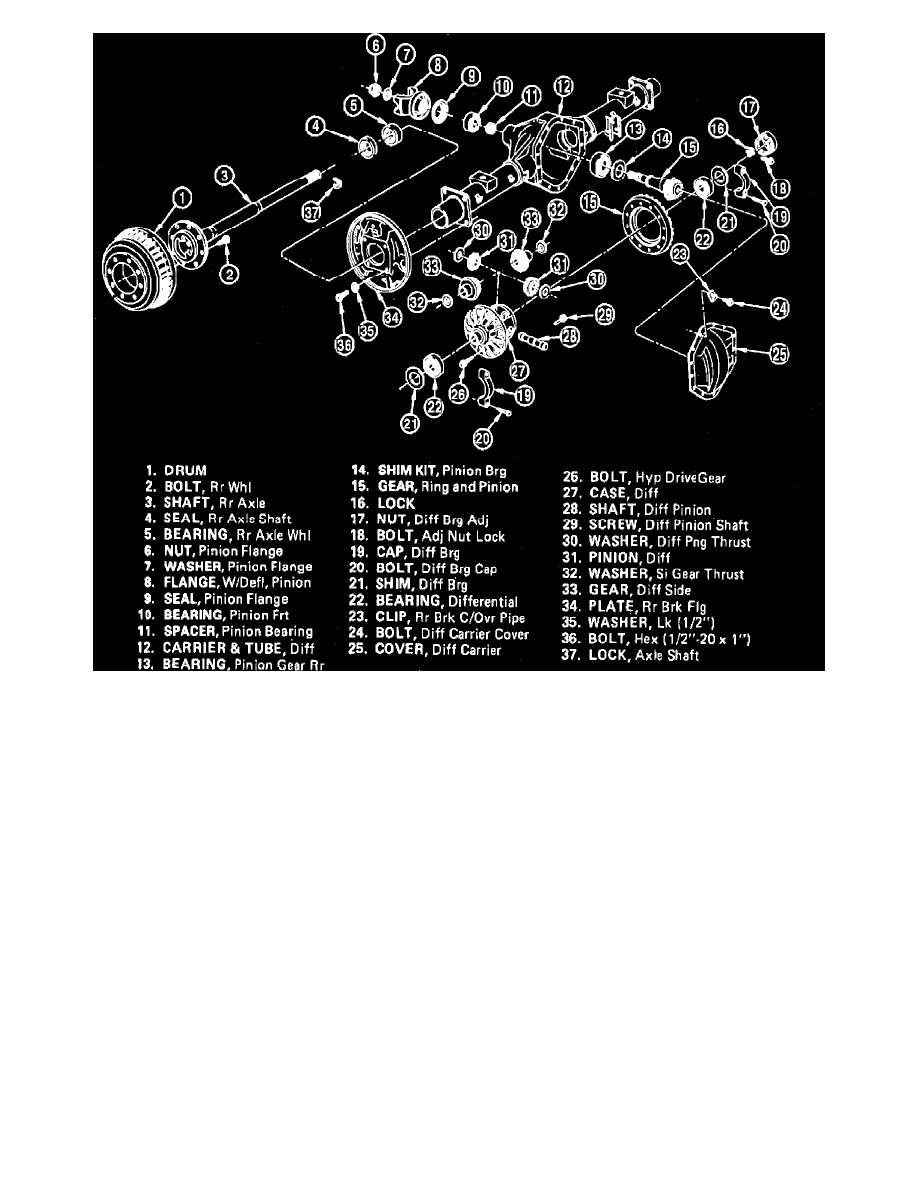
Fig. 1 Chevrolet 9-1/2 inch semi-floating drive axle w/standard differential exploded view. Full floating models similar
Axle can be disassembled either in or out of vehicle. If axle is disassembled in vehicle it may be necessary to disconnect shock absorbers and
lower housing to provide clearance for differential case removal. If housing is lowered care must be taken not to damage flexible brake hose
between housing and frame.
1.
Loosen rear cover bolts, break gasket seal and drain lubricant, then remove rear cover,
Fig. 1.
2.
Remove axle shafts. Refer to
Drive Axles, Bearings and Joints / Axle Shaft, Conventional Fixed/Floating / Service and Repair. See: Drive
Axles, Bearings and Joints/Axle Shaft Assembly/Service and Repair
3.
On models with standard differential, rotate case and remove differential pinions and thrust washers, noting position for assembly.
Keep all
components in order so that any component reused can be installed in original position.
4.
On all models, measure and record ring gear and pinion backlash to aid assembly.
5.
Remove bolt securing threaded preload adjuster lock, lock, side bearing cap bolts and the side bearing caps.
6.
Pry differential case assembly from housing taking care not to mar machined surfaces, then remove case, bearing races and shims. Place bearing
races and shim packs with respective bearing caps.
7.
Measure pinion rotating torque with suitable torque wrench. If no preload is present and play can be felt, pinion bearings may be defective.
8.
Hold driveshaft companion flange with suitable tool and remove pinion nut and washer.
9.
Remove companion flange with suitable puller.
10.
Thread pinion nut half-way onto pinion, temporarily install rear cover, then tap pinion from front bearing using soft drift and hammer.
11.
Pry pinion seal from housing, then remove front pinion bearing, cover, and pinion and rear bearing assembly.
12.
Discard collapsible spacer, press rear bearing from pinion, remove depth adjusting shim and retain shim for assembly.
13.
Drive pinion bearing races from housing, positioning suitable drift in recesses in case to prevent damage.
Keep races with respective bearings
and keep components in order for assembly.
14.
Inspect components. Refer to
Cleaning and Inspection and replace as needed. See: 9 1/2 Inch Ring Gear/Cleaning & Inspection
Assembly
1.
Lubricate side bearings, place outer races over bearings, then install differential assembly into housing.