
Camaro V6-3.8L VIN K (1995)
Front Side Door Water Deflector
NOTE: Whenever work is performed where the deflector (86) is disturbed, the deflector (86) must be properly sealed and taped to the door inner
panel to prevent waterleaks. For service sealing, strip caulking is recommended if additional sealing material is required.
When access to the door inner panel is required to perform service operations, the deflector (86) may be completely or partially detached from the
door inner panel. If the existing deflector (86) is damaged so that it will not properly seal the door assembly, replace the deflector (86).
If only partial removal of the deflector (86) is required, perform only the steps that are necessary to expose the required area of the door inner panel.
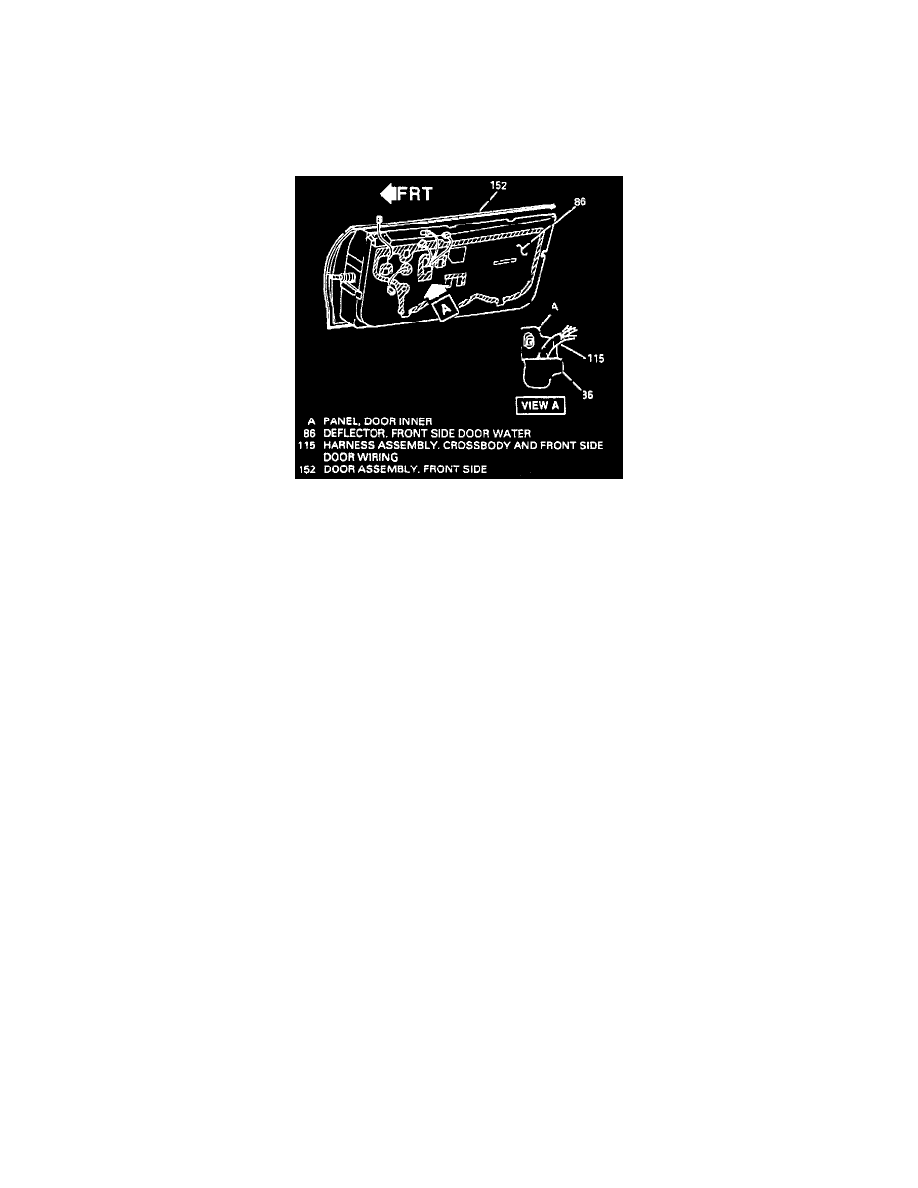
Front Side Door Water Deflector (Typical)
REMOVE OR DISCONNECT
1. Front side door trim assembly.
2. Deflector (86).
^
Break the sealer bond with a flat-bladed tool.
^
Peel tape from door inner panel.
^
Disconnect tabs on lower edge of deflector (86) from slots in door inner panel.
INSPECT
^
Deflector (86) for tears or holes. Repair using waterproof body tape on both sides of deflector (86) or replace deflector (86).
INSTALL OR CONNECT
1. Deflector(86).
^
Apply continuous bead of string sealer to guide water to drain slots.
^
Align arrows on deflector (86) at upper outer comers to front and rear of door inner panel.
^
Slick down top of deflector (86).
^
Pull electrical connectors through appropriate holes or slots in deflector (86).
^
Slick outer edge of deflector (86) to door inner panel working downward to bottom edge.
^
Insert tabs into retaining slots and slick.
2. Front side door trim assembly.
Radio Front Side Door (Tweeter) Speaker Assembly