
Camaro V8-305 5.0L VIN E TBI (1989)
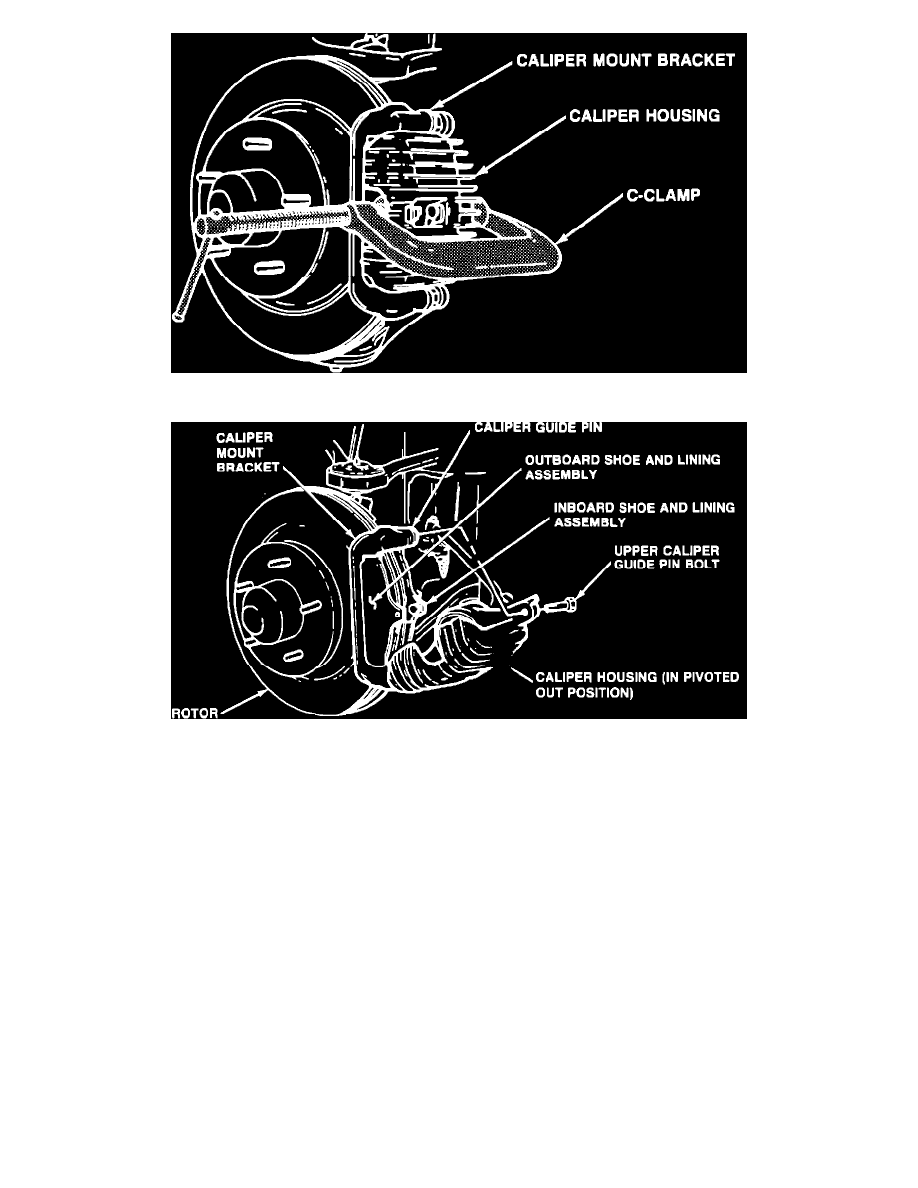
Figure 2 - Compressing Piston
Figure 3 - Shoe and Lining Replacement
Procedure:
1.
Remove 2/3 of the brake fluid from the master cylinder.
2.
Raise vehicle and remove the rear wheels and tires.
3.
Remove the rear brake calipers and rotors.
4.
Remove the eight bolts retaining the axle shafts and the backing plates. Discard the old lock nuts.
5.
Remove the axle shafts using tool # J-21579.
6.
Install the new backing plates and axle shafts (See Figure # 1). Use new lock nuts. Torque bolts to 41-54 N.-m. (30-40 ft. lbs.).
IMPORTANT:
Plates are right and left hand and must be installed with the flange facing inward towards the differential.
7.
Install the rotors and brake calipers. Torque caliper bolts to 90-110 N.-m. (66-81 ft. lbs.).
8.
Bottom the caliper pistons (See Figure # 2). Then, remove the upper guide pin bolts and pivot the calipers out (See Figure # 3).
9.
Remove the old pads, clean all surfaces, and inspect the guide pins for free movement in the mounting brackets.
10.
Install the new pads, rotate the calipers back into operating position, and install new caliper guide pin bolts - torque to 35 N.-m (26 ft. lbs.).
11.
Lower the vehicle and refill the master cylinder with brake fluid.
12.
With the engine running, pump the brake pedal three (3) times to fully seat the pads. Also apply the park brake lever three (3) times and check for
full release position.
13.
Raise the vehicle and disconnect the prop shaft at the axle and support as required. (Mark position of prop shaft to axle).