
Campaign for Replacement of Faulty Convertible Top Latch Handles
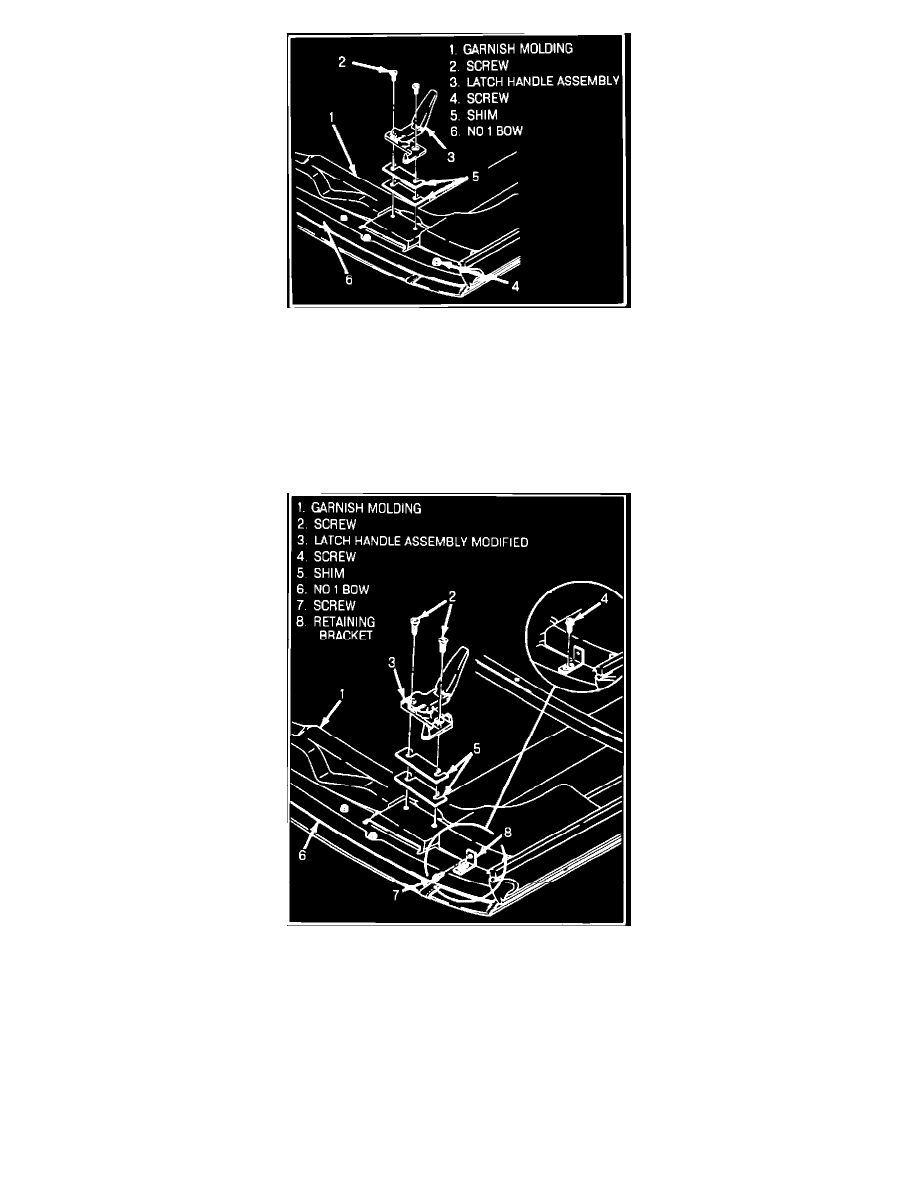
Figure 2 - Latch Handle Assembly Removal
14.
Remove screws (2, Fig. 2) retaining latch handle assemblies (3, Fig. 2) to top of No. 1 bow assembly, (6, Fig. 2) and discard old latch handles
(retain 2 shims per side to be installed in step 20).
NOTICE:
Screws retaining latch handles have Locktite applied to them when installed and may be difficult to remove. Be careful
not to strip screw heads when removing (an impact wrench may help in breaking loose Locktite on screws).
15.
Remove second most inner screw on both sides (4, Fig. 2) retaining the No. 1 bow retaining strip to the No. 1 bow (6, Fig. 2).
Figure 3 - Latch Handle Assembly and Retaining Bracket
16.
Position No. 1 bow garnish molding retaining brackets (8, Fig. 3) onto No. 1 bow retaining strip at second most inner screw hole and install
screws (4, Fig. 3).
17.
Position No. 1 bow garnish molding (1, Fig. 3) onto No. 1 bow (6, Fig. 3.).
NOTICE:
Be sure No. 1 bow garnish molding (1, Fig. 3) covers No. 1 bow garnish molding retaining brackets (8, Fig. 3).
18.
Using a 9/64 in. drill bit, firmly press No. 1 bow garnish molding (1, Fig. 3) against No. 1 bow garnish retaining bracket (8, Fig. 3), and drill
a hole through No. 1 bow garnish molding (1, Fig. 3) and through center of No. 1 bow garnish molding retaining bracket (8, Fig. 3).