
Camaro V8-350 5.7L (1989)
8.
Pull each top latching handle down and rotate to release top from windshield header.
9.
Slowly bring top rearward until all the way down.
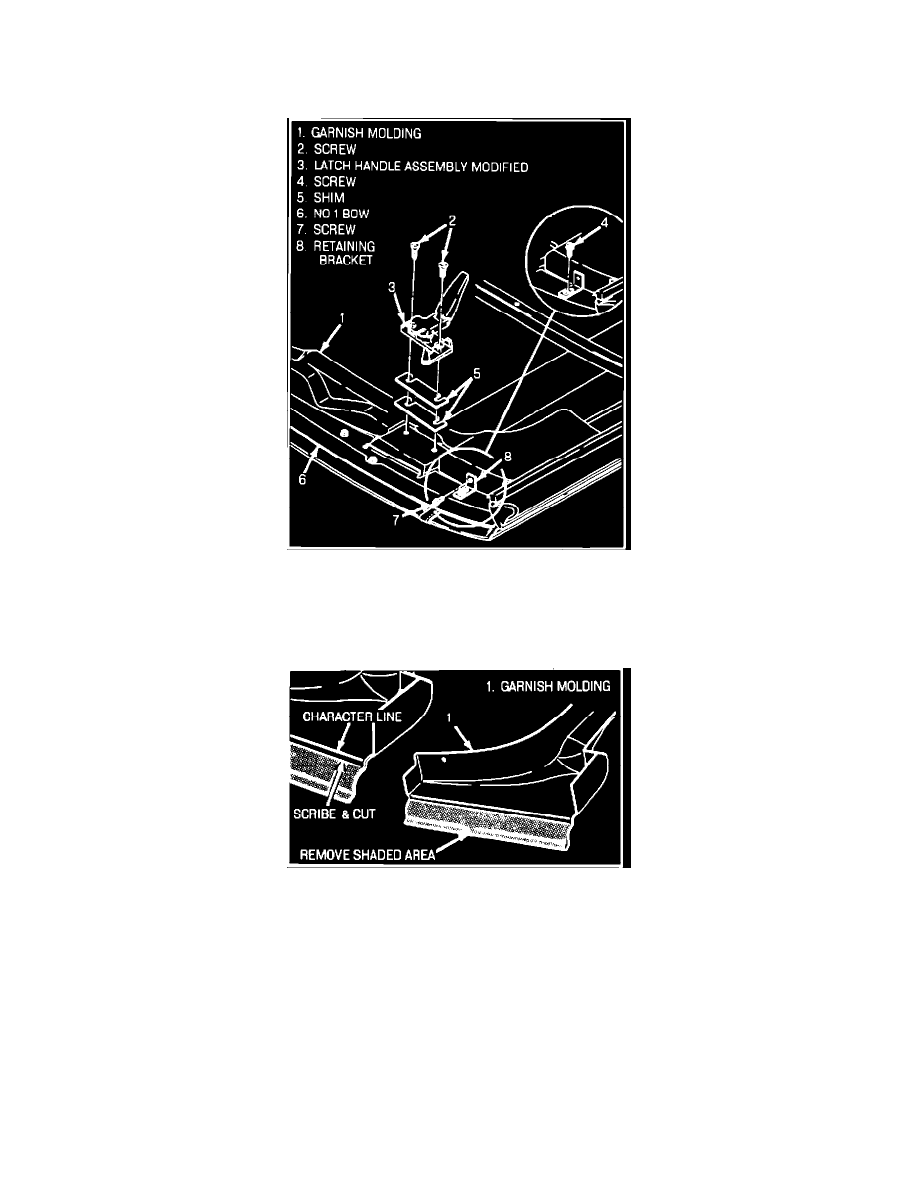
Figure 3 - Latch Handle Assembly and Retaining Bracket
NOTICE:
No. 1 bow garnish moldings on some vehicles may have been previously modified with a retaining bracket (see 8, Fig. 3). If
molding has already been modified perform step 14 and then steps 20 through 25, otherwise proceed with steps 10 through
25.
Figure 1 - No. 1 Bow Garnish
10.
Remove No. 1 bow garnish molding (1, Fig. 1).
11.
Scribe a line across underside of No. 1 bow garnish molding (1, Fig.1) at character line.
12.
Cut No. 1 bow garnish molding (1, Fig. 1) along scribe line using tin snips or other appropriate tool.
13.
Remove all burrs from No. 1 bow garnish molding (1, Fig. 1) using a file.