
Camaro V8-350 5.7L (1989)
6.
Apply lubricant provided in repair kit to clamp rod (28), then slide rod through holes in boot (25) and actuating collar (24). Ensure boot is firmly
positioned against reaction plate on clamp rod.
7.
Lubricate new compliance bushing (27), then install bushing onto clamp rod (28).
8.
Lubricate grooved bead of inner boot (20), boot groove in caliper housing and actuating collar with lubricant provided in repair kit.
9.
Push clamp rod to bottom of piston mating hole, then pull actuating collar (24) and seat inner boot (20) into boot groove in caliper housing.
10.
Ensure pushrod (22) is positioned in hole in caliper housing, then install bleeder cap and valve.
11.
If removed, install pivot pin (3) and new nut (12) onto caliper, torque nut to 16 ft. lbs., then lubricate parking brake lever (5) and pivot pin.
12.
Install pivot pin seal (1), parking brake lever and new sprag clip (2), ensuring teeth of sprag clip face away from lever, then snap seal cap over
pivot pin.
13.
Install the two collar return springs (26) onto retainer (31). Ensure retainer enters springs at end of second coil.
14.
Install adjustment screw (11) into caliper housing until actuating collar is parallel to piston bore face of housing.
15.
Lubricate guide pins with suitable grease, then slide boots onto pins.
16.
Fill boots with grease, then install into mounting bracket. Ensure boots are properly positioned in grooves in pins and mounting bracket.
17.
Install caliper and bleed brake system, then adjust parking brake free travel as outlined under CALIPER INSTALLATION.
Caliper Installation
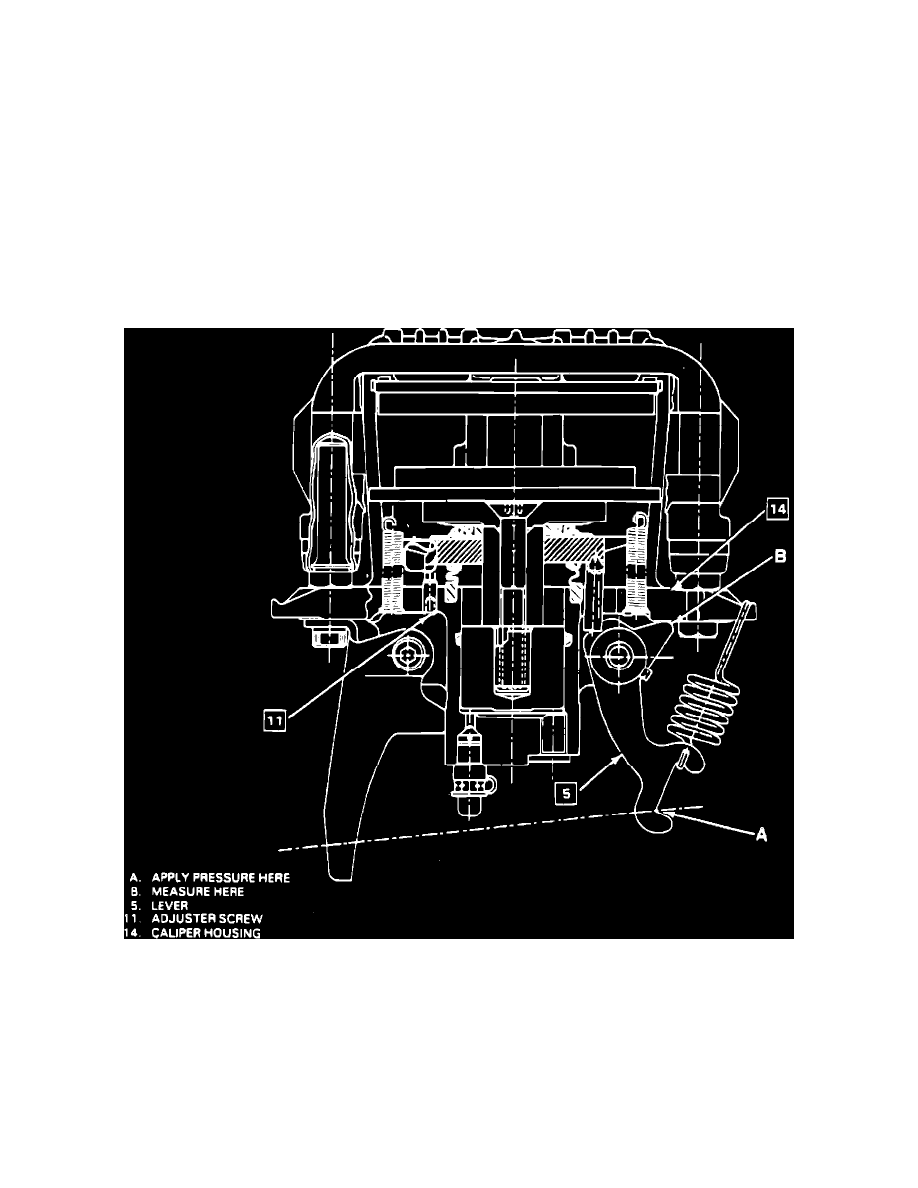
Fig. 4 Parking Brake Free Travel Adjustment
1.
Install shoe and lining assemblies, if removed, as outlined previously.
2.
Position caliper over rotor and onto mounting bracket, then install upper and lower guide pin bolts. Torque upper bolt to 26 ft. lbs. and lower bolt
to 16 ft. lbs.
3.
Attach parking brake cable to caliper bracket and lever, then install lever return spring.
4.
If removed, install inlet fitting using new gaskets, then bleed brake system.
5.
If caliper was overhauled, adjust parking brake free travel as follows:
a. Have an assistant apply a light load to brake pedal until rotor can no longer be turned by hand.
b. Apply pressure to caliper lever in direction shown in Fig. 4.
c. Measure free travel between caliper lever and housing. Free travel should be .024-.028 inch. If free travel is not as specified, proceed to next