
Camaro V8-5.7L VIN G (1998)
1.
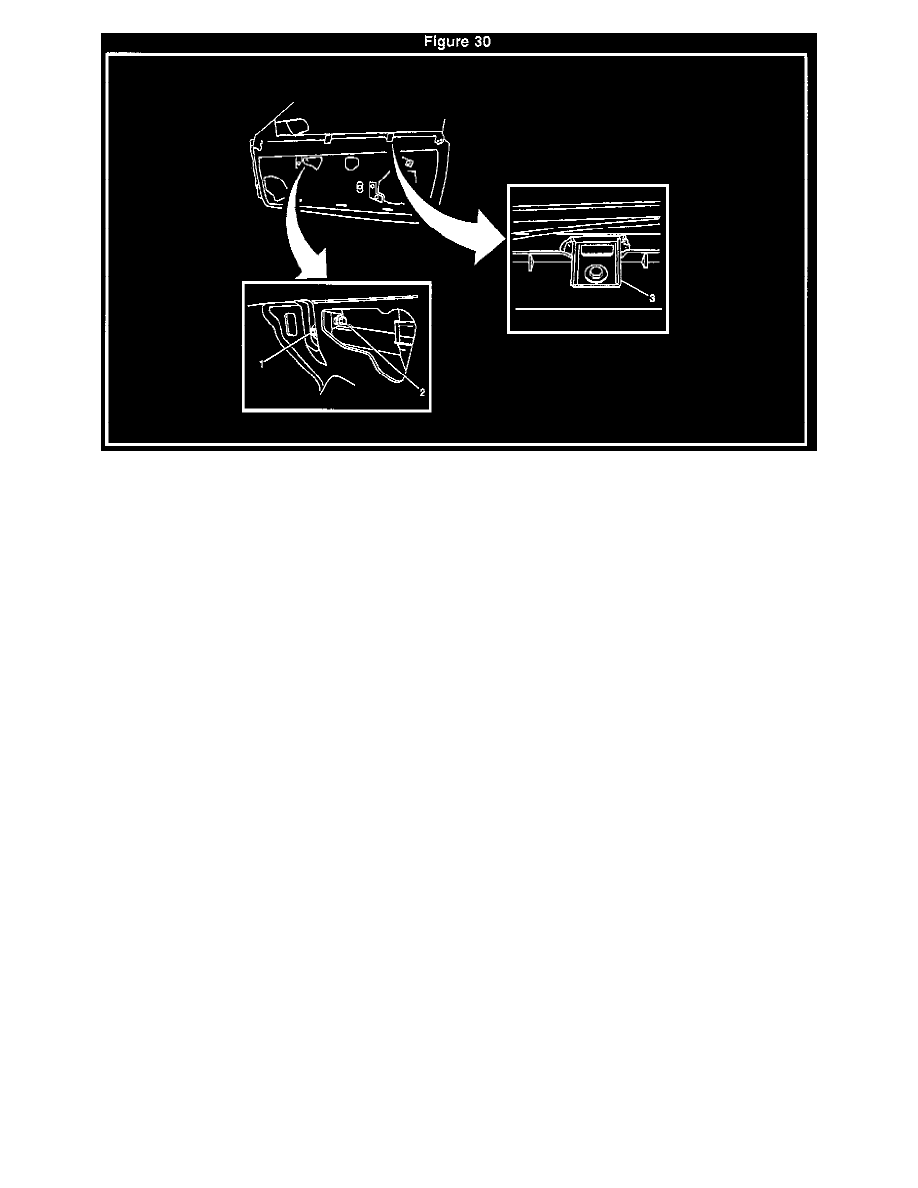
Loosen the front up stop attachment. Refer to item 1 in Figure 30.
2.
Position the glass to the desired location and tighten the attachments.
Tighten
Tighten the attachments to 10 Nm (89 lb in). The glass is up or down at the rear.
1.
Loosen the rear up stop attachment in the rear guide channel.
2.
Position the glass to the desired location and tighten the attachments.
Tighten
Tighten the attachments to 10 Nm (89 lb in).
The upper edge of the glass is inboard or outboard.
1.
Loosen the rear guide channel attachments
2.
Loosen the front up stop in/out attachment (access through the hole in inner panel rearward of the front up stop). Refer to item 2 in Figure 30.
Important:
The front up stop will "float" in or out as the jack screws are adjusted in or out.
3.
Adjust the rear guide channel jack screws in or out as desired.
Tighten
^
Tighten the rear guide channel attachments to 27 Nm (20 lb in).
^
Tighten the front up stop in/out attachment to 10 Nm (89 lb in).
Belt stabilizers will reduce noise during glass travel or improve glass stability. Refer to item 3 in Figure 30.
1.
With the glass in the full up position, loosen the stabilizer attaching screw.
2.
Apply slight outboard pressure on the glass.
3.
Tighten the stabilizer attaching screw.
Important: