
Camaro V8-5.7L VIN G (1998)
Vacuum Brake Booster: Service and Repair
Vacuum Brake Booster Replacement
REMOVAL PROCEDURE
1. Remove the hood rear seal.
2. Remove the air inlet screen.
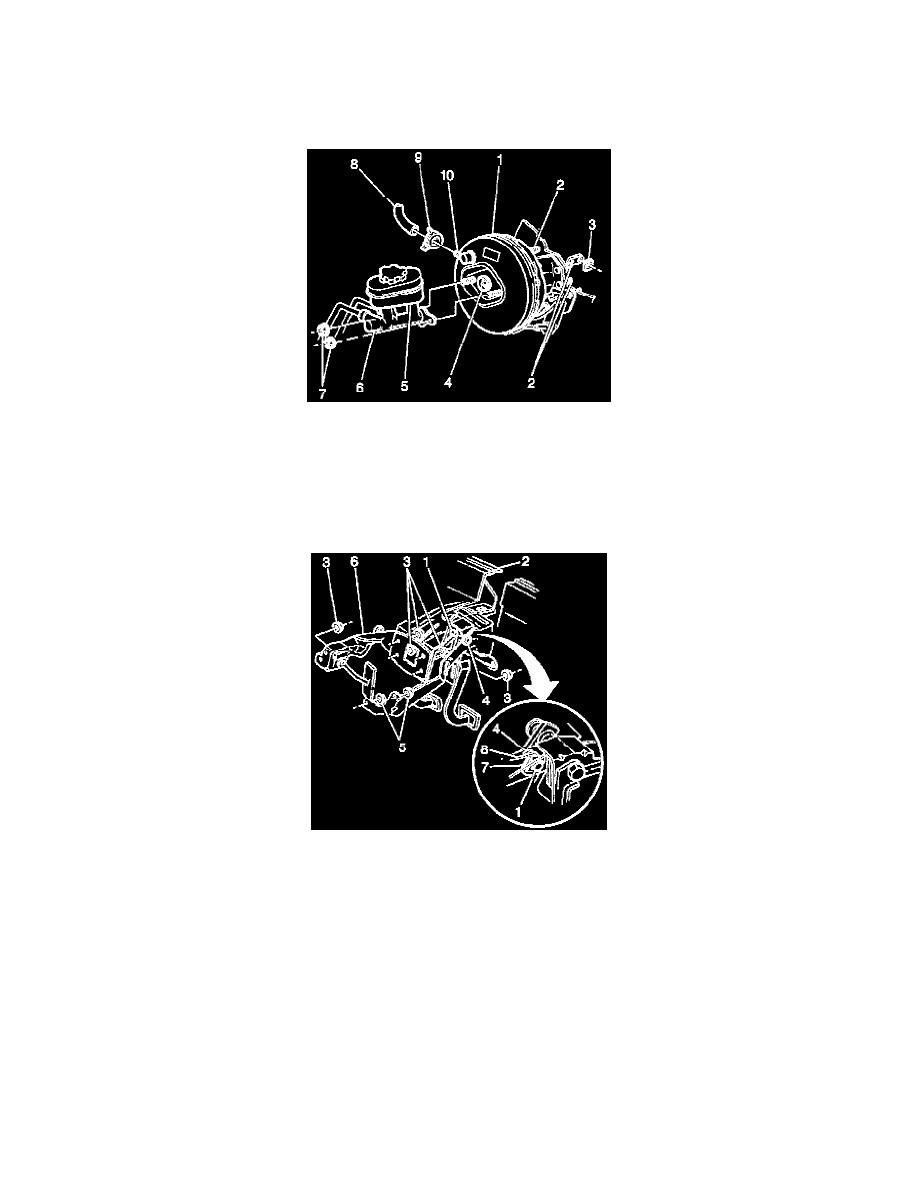
3. Remove the brake booster vacuum hose clamp (9) and the vacuum hose (8) from the check valve (4).
4. Remove the master cylinder nuts (7) attaching the master cylinder (6) to the brake booster (1).
5. Remove the master cylinder from the brake booster.
^
Move the master cylinder forward and toward the driver's side in order to provide clearance for the booster. Moving the master cylinder will
flex the brake pipes slightly.
^
Do not bend or distort the brake pipes.
6. Remove the left side instrument panel insulator. Refer to Instrument Panel Insulator in Instrument Panel, Gauges and Warning Indicators.
7. Remove the brake pedal nuts (3) attaching the brake booster to the brake pedal with bracket (6).
8. On vehicles equipped with manual transmissions, loosen the clutch master cylinder nuts (5).
9. Remove the brake booster pushrod (8) from the brake pedal lever pin.
^
From inside the vehicle, remove the brake pedal pushrod retainer (7) and the pushrod washer (4).
^
Tilt the entire brake booster slightly in order to work the brake booster pushrod (8) off the brake pedal pin. Do no put undue side pressure on
the pushrod.