Camaro V8-6.2L (2010)

1. Turn the ignition switch to the OFF position.
2. Remove the ignition key.
3. Put on safety glasses.
4. Remove the seat belt pretensioner from the vehicle.
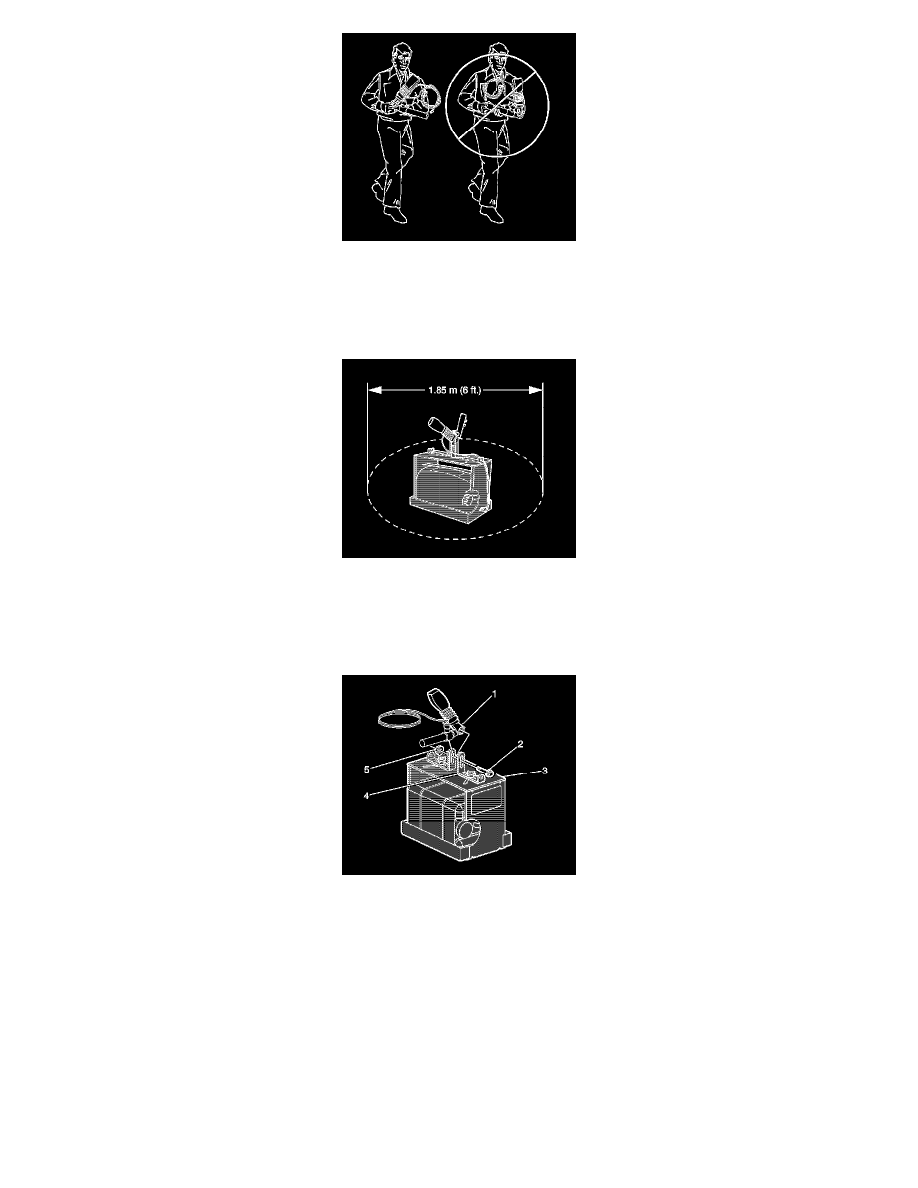
5. When carrying a pretensioner to the deployment area keep the open end of pretensioner pointed away from the body.
6. Clear a space on the ground about 1.85 M (6 ft) in diameter for deployment of the pretensioner. If possible, use a paved, outdoor location free of
activity. Otherwise, use a space free of activity on the shop floor. Make sure you have sufficient ventilation.
7. Make sure no loose or flammable objects are in the area.
8. Place the J 39401-B SIR Deployment Fixture in the center of the cleared area.
9. Fill the fixture plastic reservoir with water or sand.
10. Mount the pretensioner (1) in the SIR deployment fixture (3) with the open end facing up using the following mounting method.
1. Adjust and secure the J 39401-B arms (4) to the deployment fixture (3).
2. To mount, use the proper size bolt (2) and nut (5) with washers in order to secure the pretensioner (1) to the deployment fixture brackets (4).
3. Securely tighten all fasteners prior to deployment.
