
Caprice V6-262 4.3L (1987)
Control Arm Bushing: Service and Repair
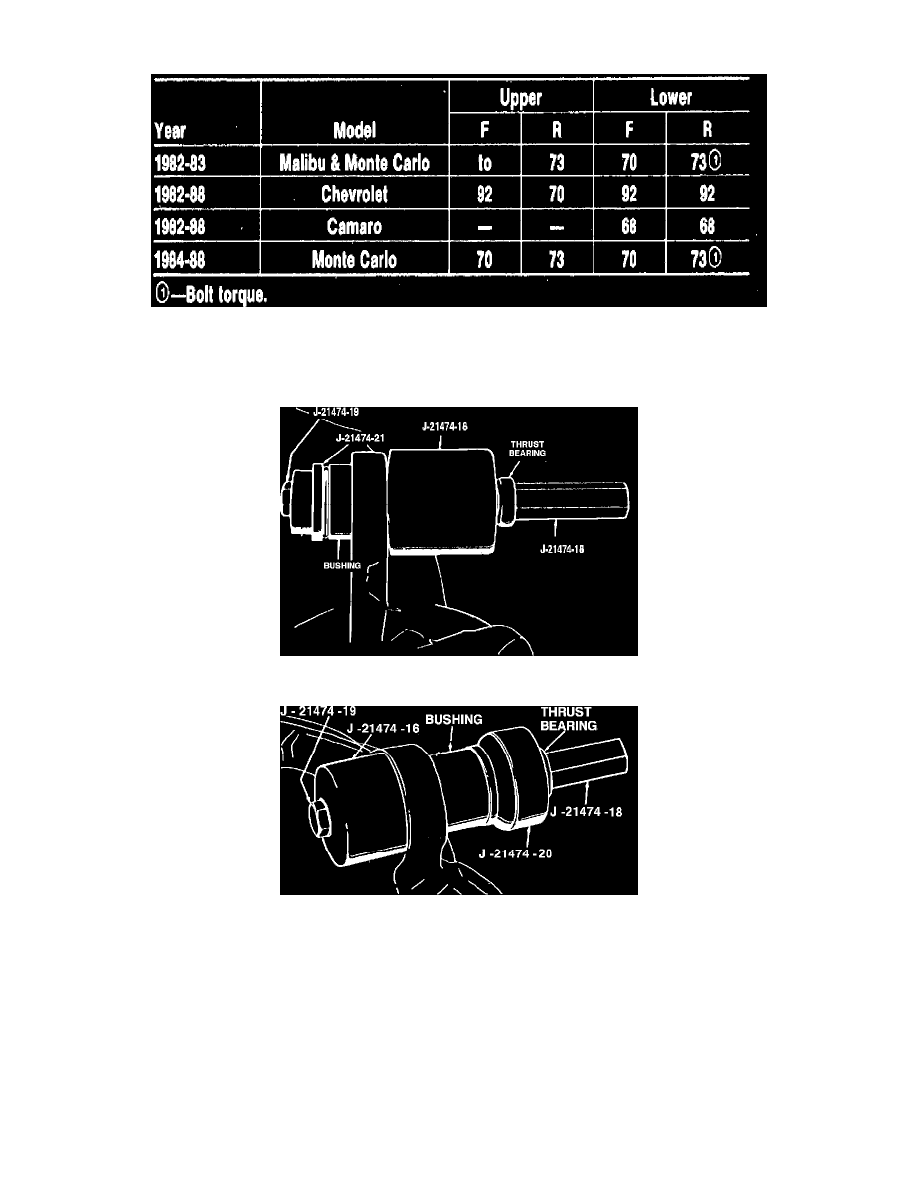
Fig. 10 Control arm retaining nut torque specifications
EXC. CORVETTE
If more than one control arm is being replaced, remove and install one arm at a time to prevent axle assembly from slipping or twisting out of position.
Fig. 11 Upper control arm rear bushing (differential carrier bushing) removal
Fig. 12 Upper control arm rear bushing (differential carrier bushing) installation
BUSHING REPLACEMENT
Differential Carrier Bushings (Upper Control Arm Rear Bushing)
The upper control arm rear bushing, which is pressed into the differential carrier, can be replaced using the following procedure:
1.
Raise vehicle and support at frame pads, and support nose of axle housing to prevent assembly from twisting.
2.
Lower rear axle to obtain clearance, disconnect upper control arm from axle and position aside.
3.
Install suitable bushing removal tool as shown in Fig. 11, tighten puller screw and press bushing out of housing.
4.
To install replacement bushing, reverse position of removal tool and pull bushing into position by tightening screw, Fig. 12.