
Caprice V8-265 4.3L VIN W MFI (1995)
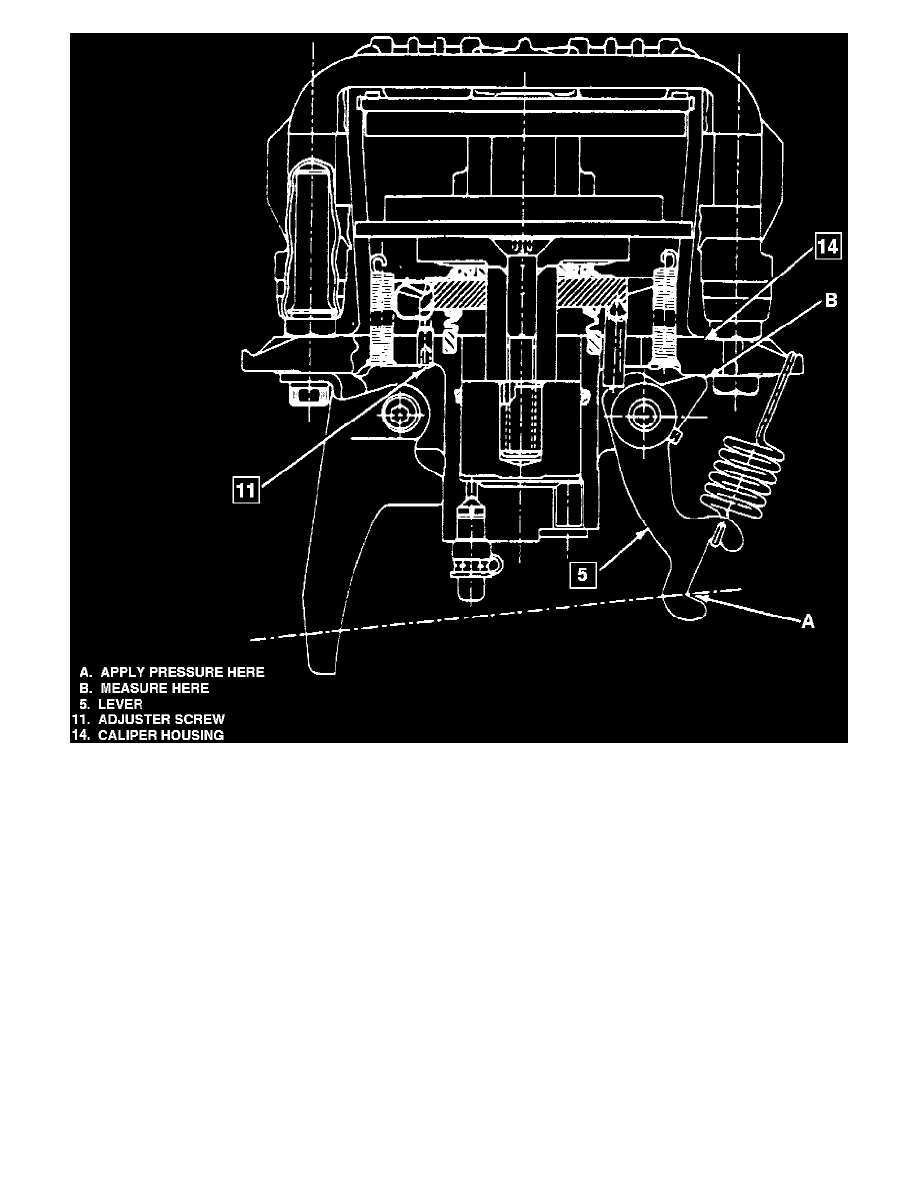
Fig. 4 Parking Brake Free Travel Adjustment
REMOVAL
1. Disable parking brake automatic adjuster as follows:
a. Working from inside vehicle, remove driver seat cushion, then the parking brake lever cover screws and cover.
b. Using 0.080 inch gauge wire, fabricate a tool to disengage drive pawl from sector, Fig. 3.
c. Using tool mentioned above, disengage drive pawl from sector, then insert a nail through anchor plate to keep drive pawl in disengaged
position.
d. Pull up on lever until it aligns with pawl, then depress button until lever is fully downward.
e. Visually inspect that anchor plate is fully against stud. If not, repeat procedure as needed.
f.
Pull front parking brake cable rearward to slacken cable at caliper assembly.
2. Raise and support vehicle, then remove tire and wheel assembly.
3. Install two wheel retaining nuts to retain rotor in position.
4. If caliper requires overhaul, remove inlet fitting attaching bolt, then disconnect inlet fitting from caliper housing. Discard the two gaskets, then
plug openings in inlet fitting and caliper to prevent loss or contamination of fluid.
5. Remove caliper lever return spring. Discard spring if coils are open.
6. Disconnect parking brake cable from lever (5) and caliper bracket (8), Fig. 1.
7. Remove upper and lower guide pin bolts, then remove caliper from rotor and mounting bracket. If caliper does not require overhaul, suspend it
from suspension to prevent damage to brake line.
INSTALLATION
1. Install shoe and lining assemblies, if removed, as outlined previously.
2. Position caliper over rotor and onto mounting bracket, then install upper and lower guide pin bolts. Torque upper bolt to 26 ft. lbs. and lower bolt