
Caprice V8-265 4.3L VIN W MFI (1995)
1. Connect one lead of a test light to a known good ground. When using a Digital Voltmeter (DVM), be sure the voltmeter's negative lead is
connected to ground.
2. Connect the other lead of the test light or voltmeter to a selected test point (connector or terminal).
3. If the test light illuminates, there is voltage present. When using a DVM, note the voltage reading.
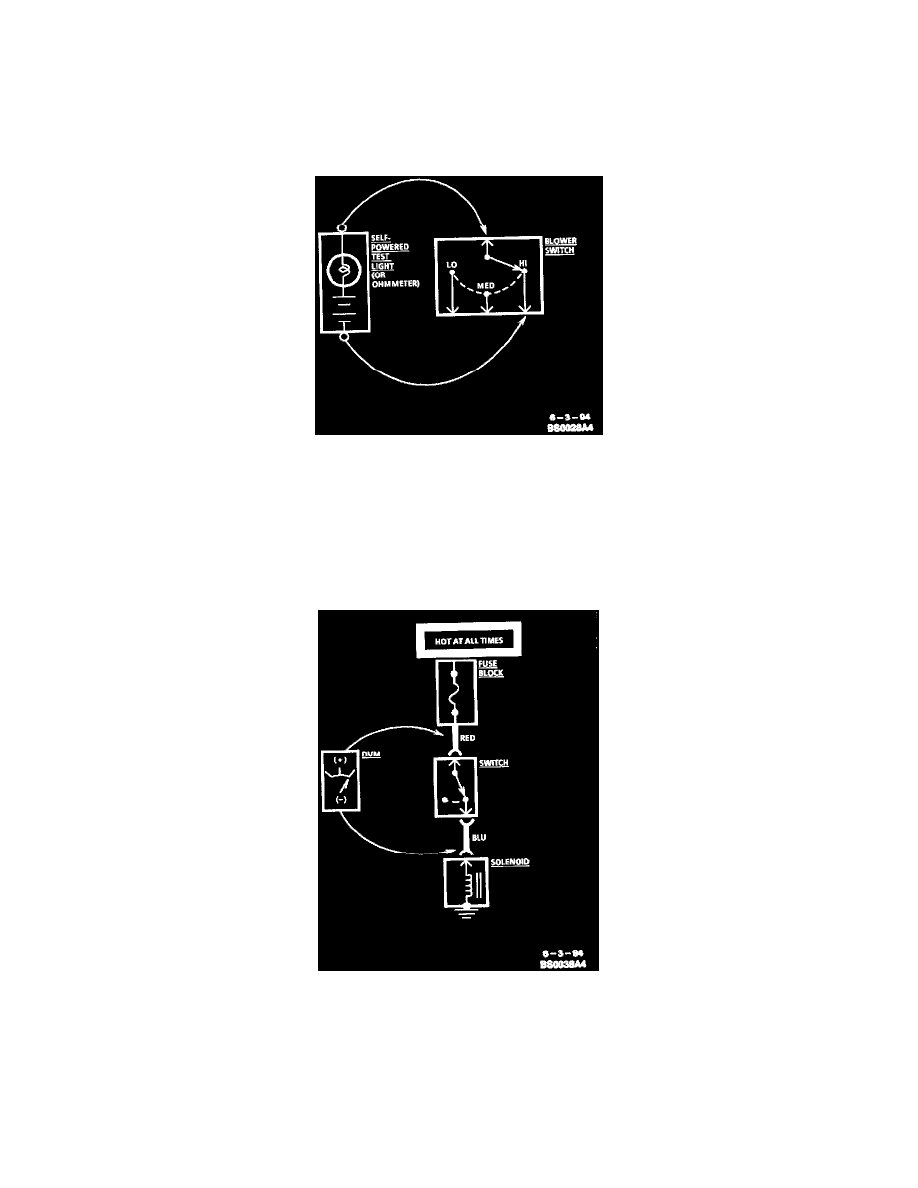
Testing For Continuity
Continuity Check Through A Switch
1. Remove the fuse to the circuit involved.
2. Connect one lead of a self-powered test light or ohmmeter to one end of the part of the circuit you wish to test.
3. Connect the other lead to the other end of the circuit.
4. If the self-powered test light glows, there is continuity. When using an ohmmeter, LO or no resistance means good continuity.
Testing For Voltage Drop
Voltage Drop Test
This test checks for voltage being lost along a wire, or through a connection or switch.
1. Connect the positive lead of a Digital Voltmeter (DVM) to the end of the wire (or to one side of the connection or switch) which is closer to the
Battery.
2. Connect the negative lead to the other end of the wire (or the other side of the connection or switch).
3. Operate the circuit.
4. The DVM will show the difference in voltage between the two points.