
Caprice V8-265 4.3L VIN W MFI (1995)
Suspension Strut / Shock Absorber: Service and Repair
Rear Suspension
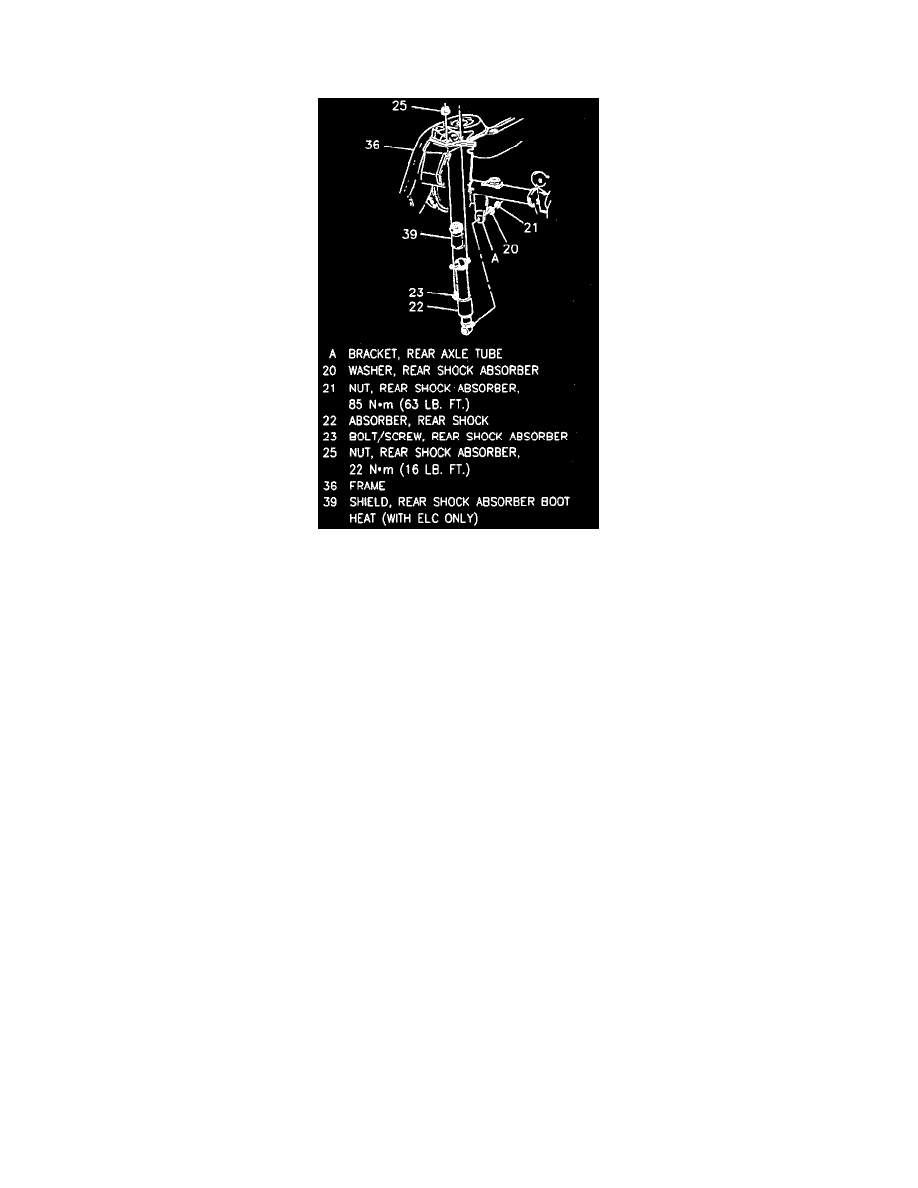
(Figure 1) Rear Shock Absorber
REMOVE OR DISCONNECT
1. Raise and suitably support vehicle.
2. Support rear axle.
3. Air line from air adjustable shock absorber, if equipped, by turning spring clip 90° and pulling gently on air line housing.
4. Nuts and bolts/screws from shock absorber at frame.
CAUTION: When removing the lower attaching nut, the stud must not turn. A hex is located on the stud between the bracket and the shock
absorber so that a wrench can be used to keep the stud from turning. Failure to hold the stud may cause damage to the mechanical bond between
the shock absorber and the stud.
5. Nut and washer from shock absorber.
6. Shock absorber.
7. Shield from shock absorber, if equipped.
INSTALL OR CONNECT
1. Shield to shock absorber, if equipped. Position so that "V" notch near clamp is 180° from air tube fitting and rim of shield is seat against rubber
rim of shock absorber boot.
2. Shock absorber.
3. Bolts/screws and nuts loosely at frame.
CAUTION: When tightening lower attaching nut, the stud must not turn. A hex is located on the stud between the bracket and the shock absorber
so a wrench can be used to keep the stud from turning. Failure to hold the stud may cause damage to the mechanical bond between the shock
absorber and the stud.
4. Washer and nut at rear axle housing and tighten nut to 85 Nm (63 lb ft).
5. Air line to air adjustable shock absorber, if equipped.
6. Remove support from rear axle.
7. Lower vehicle.