
Caprice V8-265 4.3L VIN W SFI (1996)
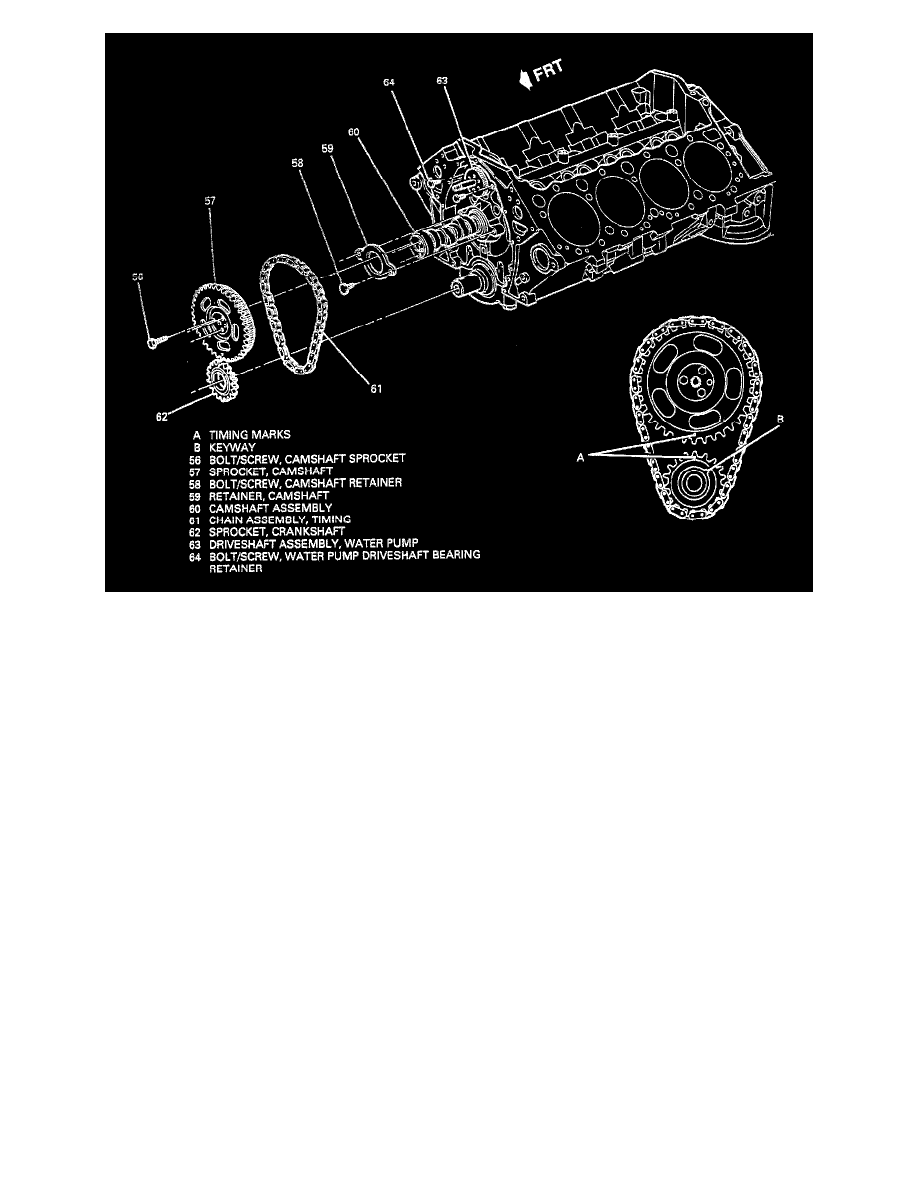
Figure 14
Tool Required- J39046 Crankshaft Hub Remover and Installer
Remove or Disconnect
1. Raise and suitably support the vehicle.
2. Serpentine drive belt.
3. Crankshaft pulley bolt/screws (246) and pulley (194), if equipped with mechanical fan.
4. Balancer bolts/screws (46) and balancer assembly (42).
5. Match mark crankshaft hub (45) to engine front cover assembly.
-
Do not crank engine over after match marking crankshaft hub and engine front cover assembly. Rotating crankshaft assembly will misalign
installation of crankshaft hub and balancer assembly to crankshaft assembly possibly resulting in engine imbalance.
6. Crankshaft hub bolt/screw (43) and washer (44).
7. Crankshaft hub (45) using J39046.
Install or Connect
Notice: See fastener notice in service precautions.
1. Crankshaft hub (45) using J39046.
Important: The crankshaft hub (45) can be installed by a different procedure if the engine should accidentally be cranked over after match marking
the hub and engine front cover assembly.
A. Set number 1 piston assembly to top dead center. When number 1 piston assembly is at top dead center, crankshaft keyway should be in
position shown in Figure 14.
B. Install crankshaft hub (45) with cast arrow on hub in the 12 o'clock position.
2. Crankshaft hub washer (44) and bolt/screw (43).
3. Crankshaft balancer assembly (42) and bolt/screws (46).
Important: If balancer assembly is replaced, new balance weights of the same size must be installed on the new balancer assembly in the same hole
locations used on the old balancer assembly.