
Caprice V8-305 5.0L (1986)
BRAKE COMBINATION VALVES
2.
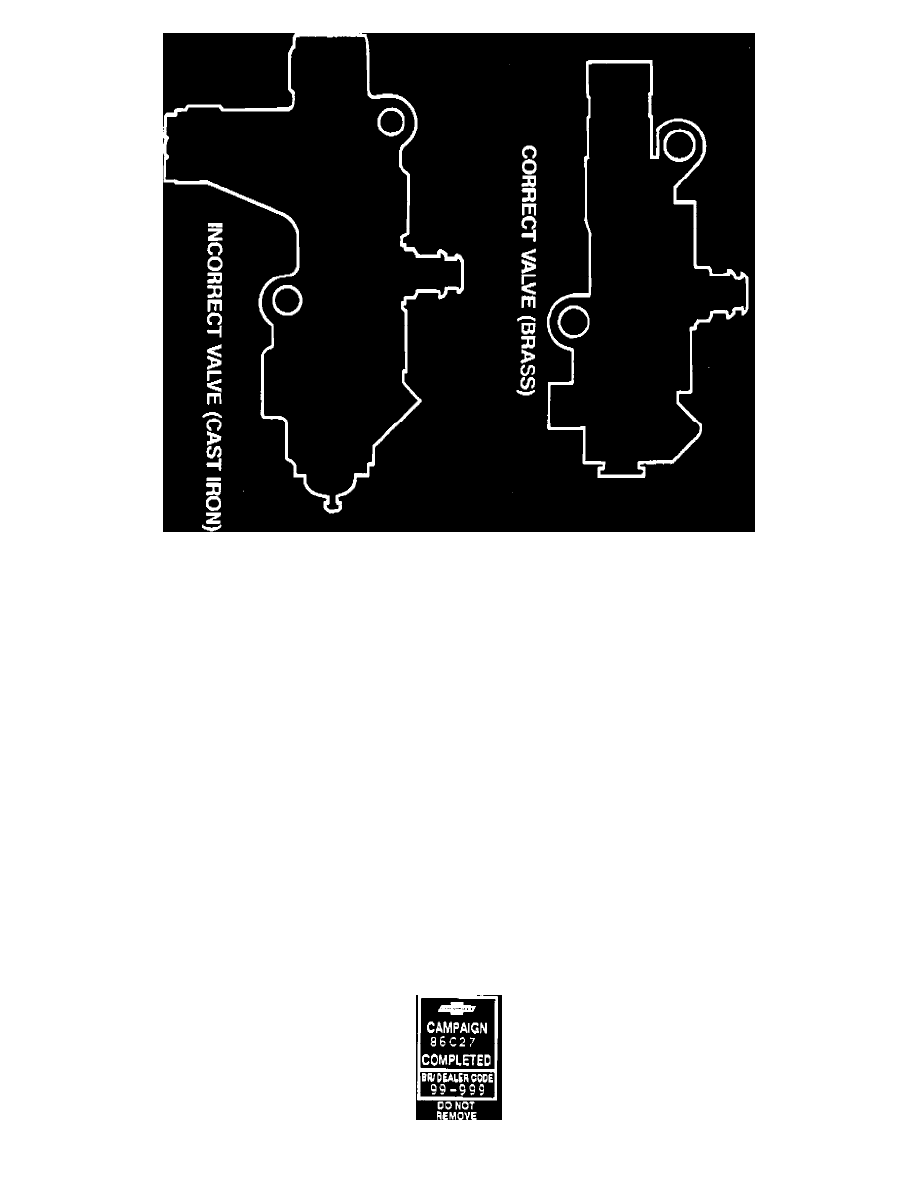
Locate combination valve (on frame rail below master cylinder% If the current combination valve is a Cast Iron valve, the valve must be
replaced with a Brass valve by following the procedure on page 5. If the vehicle already has the Brass valve, the combination valve does not
need to be replaced. Proceed to step 3 on page 5. Figure 2 on the next page illustrates the differences in the two valve types.
a.
Remove the electrical wiring harness connector from the pressure differential switch by squeezing the eliptical-shaped plastic lock ring and
pulling up. A pair of pliers may aid in removing the connector.
b.
Disconnect hydraulic lines at combination valve. Plug lines to prevent loss of fluid and entrance of dirt.
c.
Remove cast iron combination valve.
d.
Install brass combination valve. Torque mounting bolts to 20 N-m (14 lb.ft.).
e.
Remove plugs and connect hydraulic lines at combination valve. Torque lines to 24 N-m (18 lb.ft.).
f.
Connect electrical wiring harness connector to pressure control differential switch.
g.
Bleed entire brake system. Do not move vehicle until a firm brake pedal is obtained.
h.
Check brake lines for leaks and proper clearances.
3.
Install Campaign Identification Label.
Campaign Identification Label