
Caprice V8-307 5.0L (1987)
Assembly
1. Install Powermaster body (39) in vise.
2. Install new spring (38) and poppet (37) in Powermaster body (39).
3. Install new valve seat and seal (36) in Powermaster body (39).
4. Bottom out valve seat and seal (36) by threading nut of tube and nut assembly (12) into Powermaster body port.
5. Remove Powermaster body (39) from vise.
6. Install grommets (34 and 35) into Powermaster body (39).
CAUTION:Make sure grommets are properly seated.
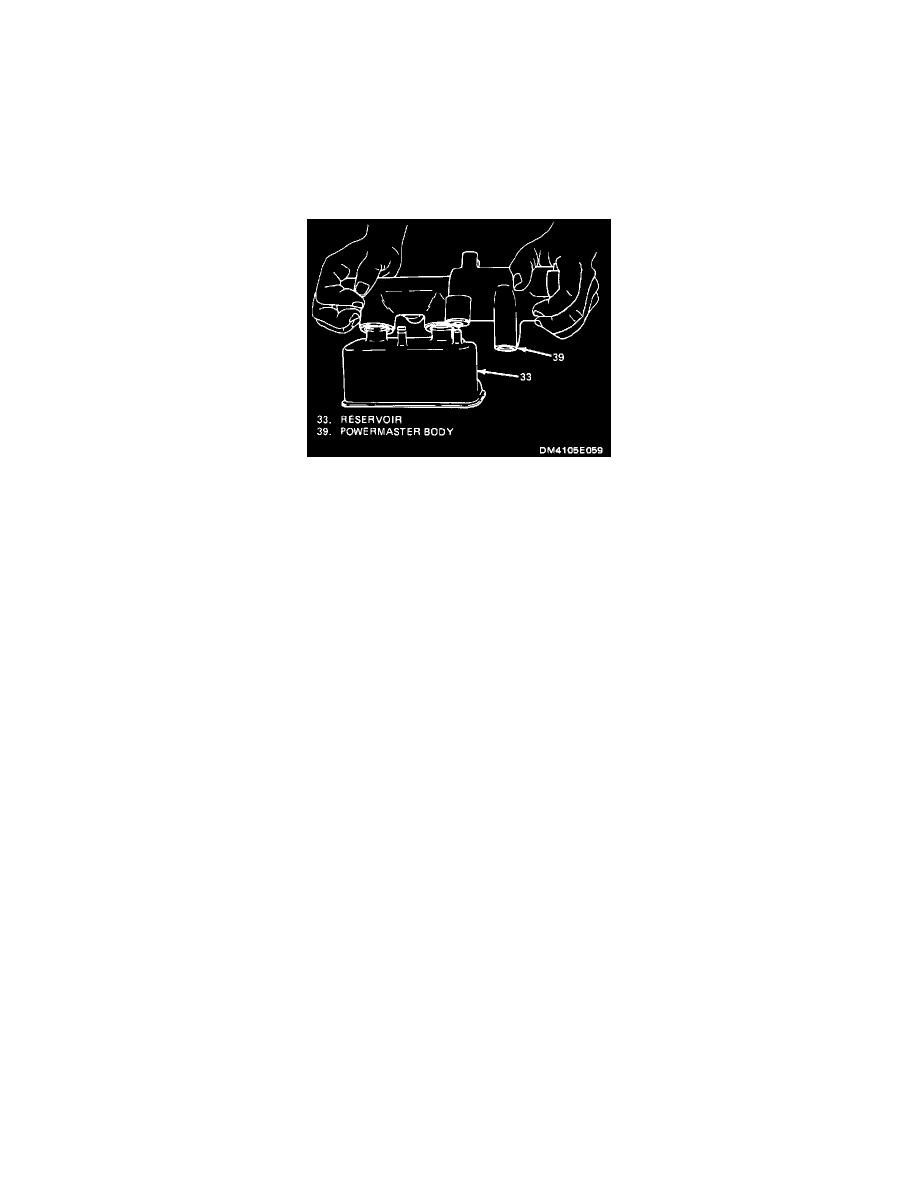
Figure 9 Installing Reservoir
7. Install reservoir (33) to Powermaster body (39).
8. Install spring (31) in Powermaster body (39).
9. Install secondary seal (27), primary seal (29) and spring retainer (28) on secondary piston (30).
10. Install secondary piston assembly (27 thru 30) in Powermaster body (39).
11. Install primary piston assembly (26) in Powermaster body (39).
12. Install reaction piston (23) and new reaction disc (23) in reaction body group (22).
13. Install two O-rings (21) on power piston assembly (25).
14. Install reaction body group (22) in power piston assembly (25).
15. Install power piston assembly (25) in Powermaster body (42).
16. Install one O-ring (21) on piston guide (19); O-ring (20) in piston guide.
17. Install piston guide (19) in Powermaster body (39), over power piston (23).
18. Install retainer (18) while depressing piston guide (19) and power piston (25).
19. Install boot, pushrod, socket group (17), socket into end of power piston assembly (25) and retained with retainer (16).
20. Assemble external components: