
Caprice RWD V8-305 5.0L (1992)
5. Raise and suitably support vehicle.
-
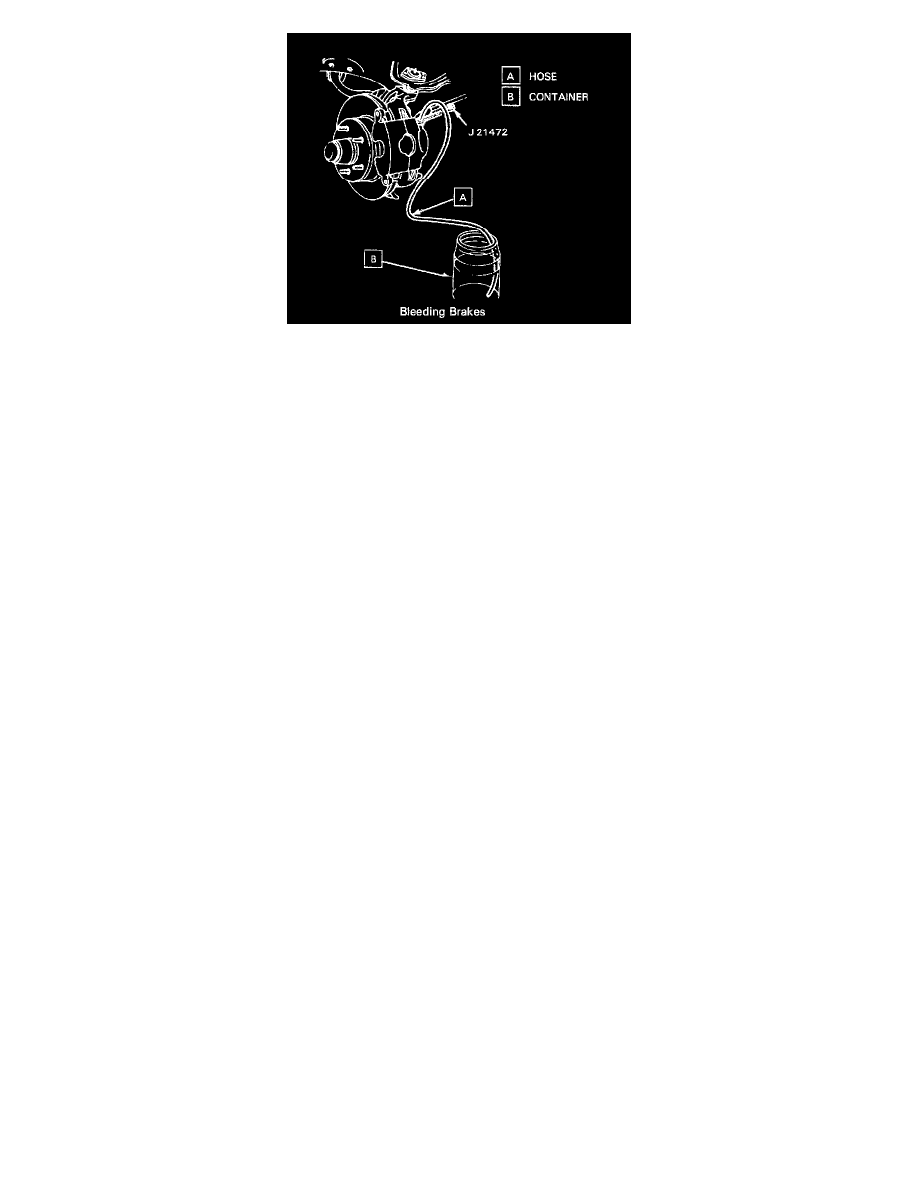
Place a proper size box end wrench or J 21472 over the bleeder valve.
-
Attach a clear tube over bleeder valve and allow tube to hang submerged in a clear container partially filled with brake fluid.
-
Have a helper depress the brake pedal slowly one time and hold. Loosen the bleeder valve to purge the air from the cylinder. Tighten bleeder
valve and slowly release pedal, wait 15 seconds. Repeat the sequence, including the 15 second wait until all air is removed.
Tighten
-
Caliper bleeder valve to 13 Nm ( 115 lb. in. ).
-
Wheel cylinder bleeder valve to 7 Nm ( 62 lb. in. ).
-
It may be necessary to repeat the sequence ten or more times to remove all the air.
-
Rapid pumping of the brake pedal pushes the master cylinder secondary piston down the bore in a way that makes it difficult to bleed the rear
side of the system.
-
Lower vehicle.
-
Fill master cylinder to proper level. Refer to "Filling Master Cylinder Reservoirs" in this section.
6. Check the brake pedal for "sponginess" and the red "BRAKE" warning lamp for indication of unbalanced pressure.
-
Repeat entire bleeding procedure to correct either of these two conditions.