
Caprice RWD V8-305 5.0L (1992)
Oil Pan: Service and Repair
Oil Pan
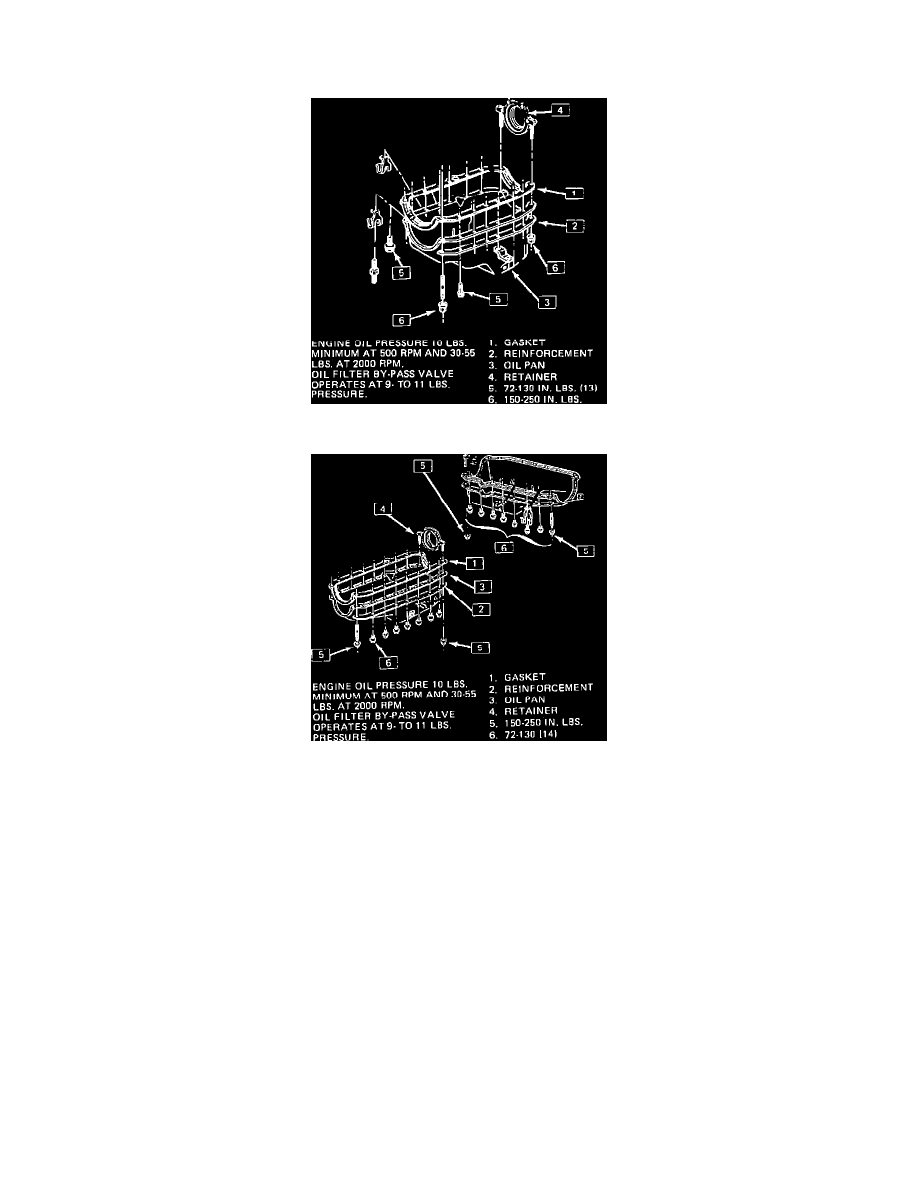
Fig. 17 Oil Pan & Gasket Assembly. 4.3L
Fig. 18 Oil Pan & Gasket Assembly. 5.0L & 5.7L
1.
On models equipped with airbag, disable airbag system as described under MAINTENANCE PROCEDURES/AIRBAG SYSTEM
DISARMING.
2.
On all models, disconnect battery ground cable, then remove air cleaner.
3.
On 1991-92 models with 5.0L/V8-305, 5.7L/V8-350 and 1992 4.3L/V6-262 engines, remove distributor cap and wires.
4.
On all models, remove upper fan shroud.
5.
Raise and support vehicle, then disconnect AIR pipe at exhaust manifold.
6.
Disconnect AIR hose at converter pipe.
7.
Drain crankcase.
8.
Disconnect exhaust pipe at exhaust manifold.
9.
Remove flywheel cover.
10.
On 1991-92 models, remove transmission dipstick tube assembly.
11.
On all models, detach transmission oil cooler lines from oil pan clips.
12.
Remove attaching bolts, then remove starter motor.
13.
On 1991-92 models with 5.0L/V8-305 and 5.7L/V8-350 engines, remove oil level sensor electrical connector, then remove oil level sensor.
14.
On all models, remove both left and righthand engine mount through bolts.
15.
Remove oil pan attaching nuts and bolts, then lower oil pan, Fig. 17 and 18.
16.
Position forward crankshaft counterbalance weight and throw to permit oil pan removal.
17.
Raise engine slightly to permit oil pan removal.
18.
Remove oil pan and gasket.
19.
Reverse procedure to install. Apply a small quantity of sealer 1052914 or equivalent to front cover and engine block junction and rear seal retainer