
Caprice RWD V8-305 5.0L (1992)
Compressor Clutch Bearing: Service and Repair
4 Pole Clutch
V-GROOVE TYPE - 4 POLE CLUTCH
Remove or Disconnect
1. Remove the Clutch Plate and Hub assembly.
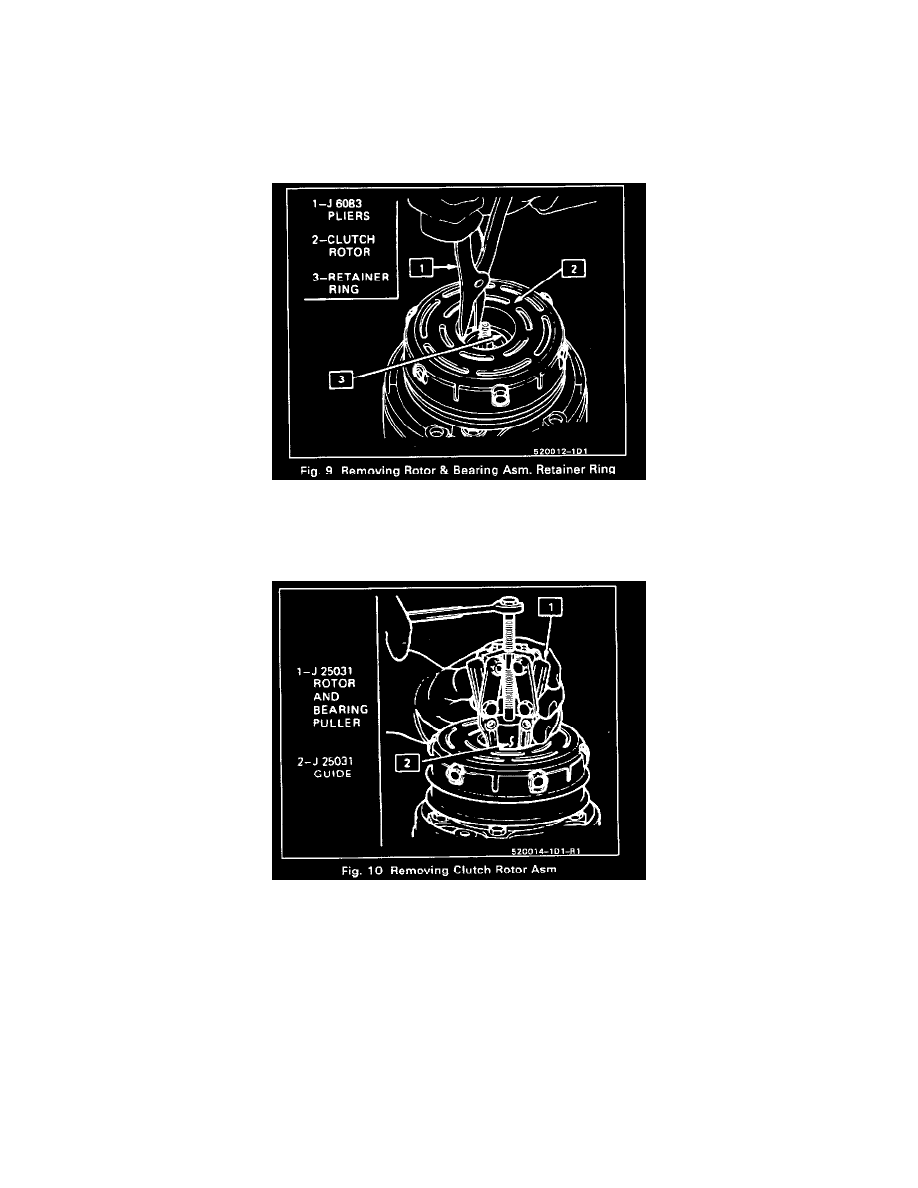
2. Remove Rotor and Bearing assembly retaining ring, using Snap Ring Pliers J 6083 (Fig. 9). Mark the location of the clutch coil terminals.
If only the Clutch Rotor and/or Rotor Bearing are to be replaced, bend the screw head washer away from the pulley rim and remove the six (6)
mounting screws before proceeding with Step 3. Discard the mounting screws.
3. Install Rotor and Bearing Puller J 25031 down into the rotor until the Puller arms engage the recessed edge of the rotor hub. Hold the Puller and
arms in place and tighten the Puller screw against the Puller Guide to remove the Clutch Rotor and Bearing assembly (Fig. 10), being careful not
to drop the Puller Guide.
4. If the pulley rim mounting screws were removed in Step 2, only the Clutch Rotor and Bearing assembly will be removed for replacement. The
Clutch Coil and Housing assembly is pressed onto the Front Head of the compressor with a press fit and will not be removed unless the pulley rim
mounting screws are left securely in place and the pulley rim pulls the Coil and Housing assembly off with the total Clutch Rotor and Pulley Rim
Assembly.